As not everyone is familiar with the process of entering RSGB contests using the online system and generating their logs from within Minos I thought I would do a basic run through of the process.
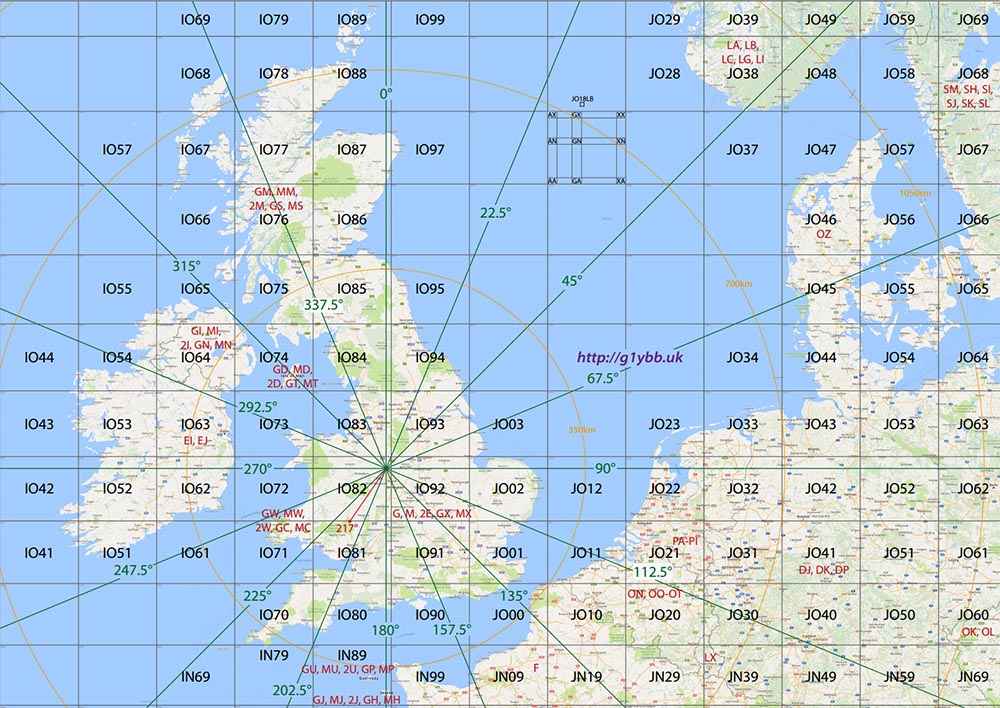
First up, I HIGHLY recommend logging the actual contest as you go with a computer, and Minos I think is one of the best for VHF contests. It does not do any HF contests. If you are search and pouncing you don’t even need to be able to type quickly as you can listen to the running station and pre-fill in their details ready before you call and only have to type in the report and serial. Added bonus is once you have entered their locator it gives you their beam heading from you too.
This page is quite long as I have gone through each step with a picture to hopefully make it dead easy for the first time user to get going.
Anyway, let’s get it downloaded and installed…
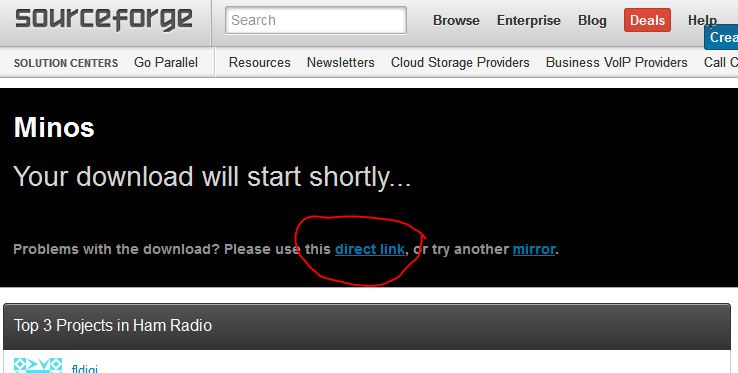
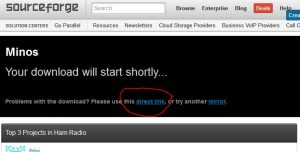
THIS LINK should download the latest version from the main Sourceforge page. If the download does not start automatically click the circled link below:
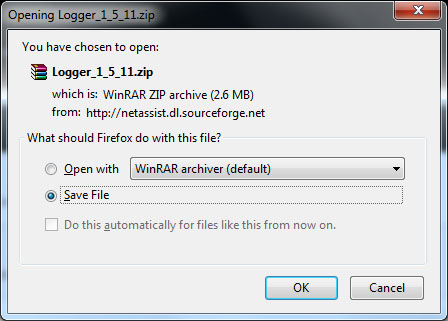
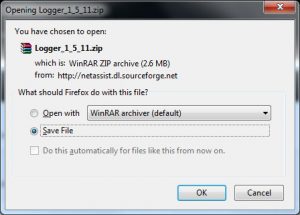
You should see the below (version number may change of course). Ensure you know where it is being saved!
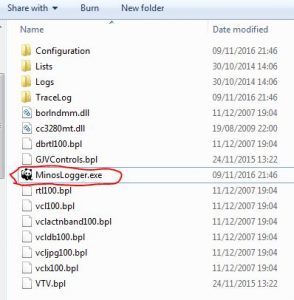
Once saved double click the ZIP file and extract the files, this time choosing a suitable folder as the program not not need an install sequence so you can run it directly from the folder it is extracted to. To run Minos you just need to double click the MinosLogger.exe:
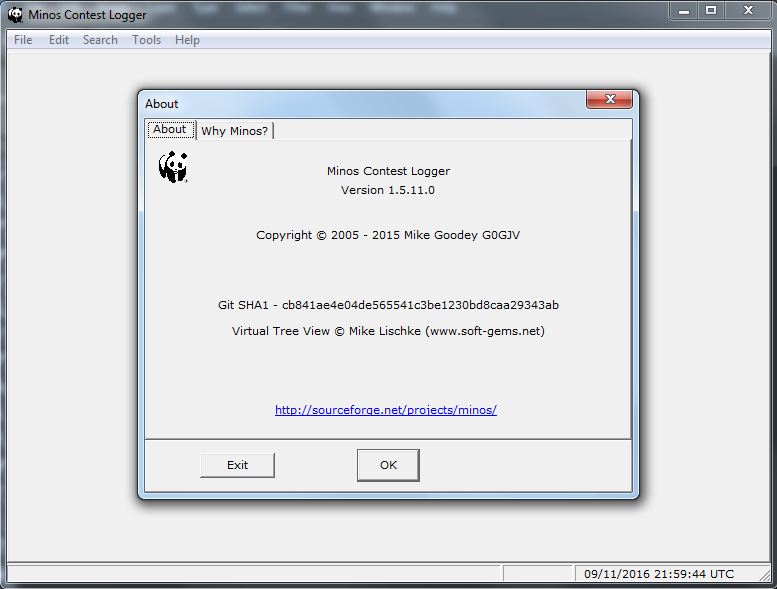
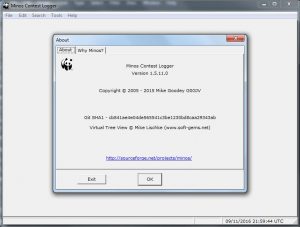
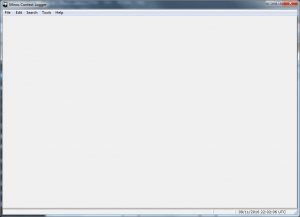
Once running you need to click OK on the opening screen:
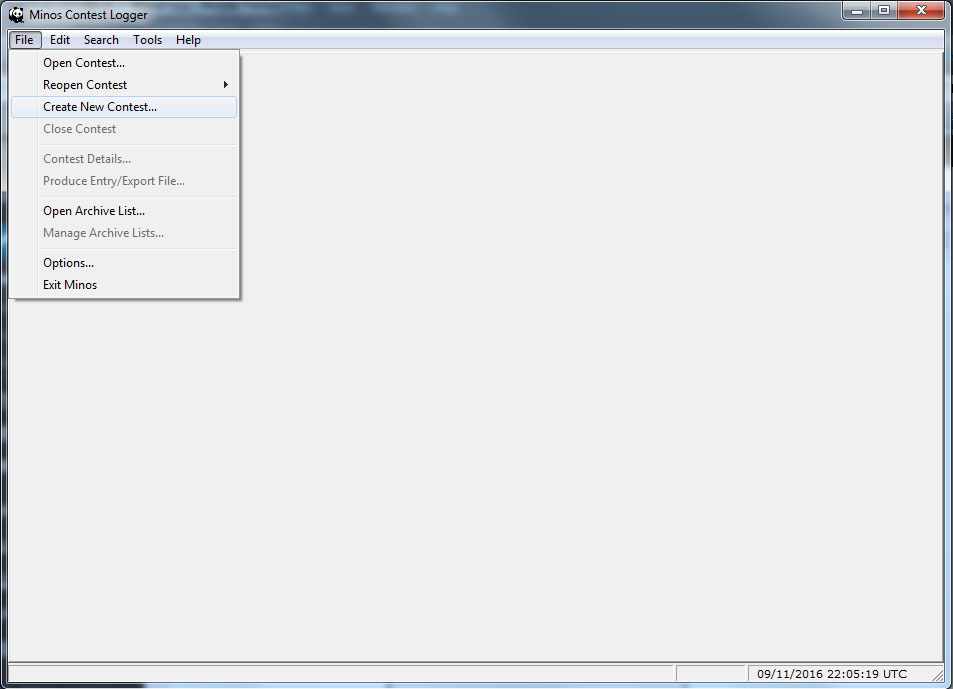
You’ll probably end up at a blank screen:
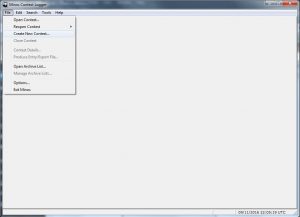
Go to File/Create new contest:
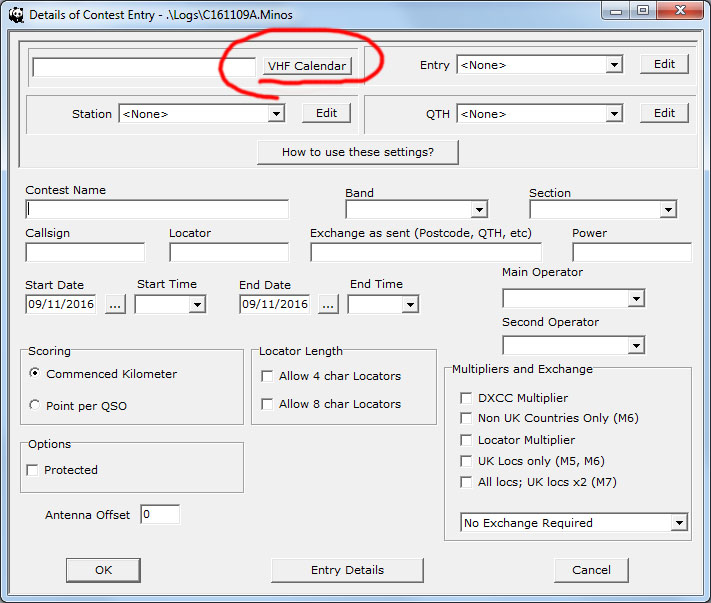
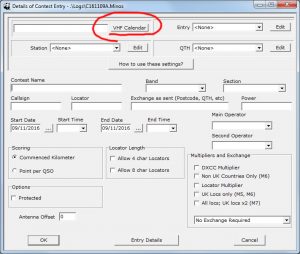
Ideally you want to be online now as Minos will download the current contest calendar making choosing the contest you want to enter a breeze and set up the scoring system ready for you. Click the VHF Calendar button:
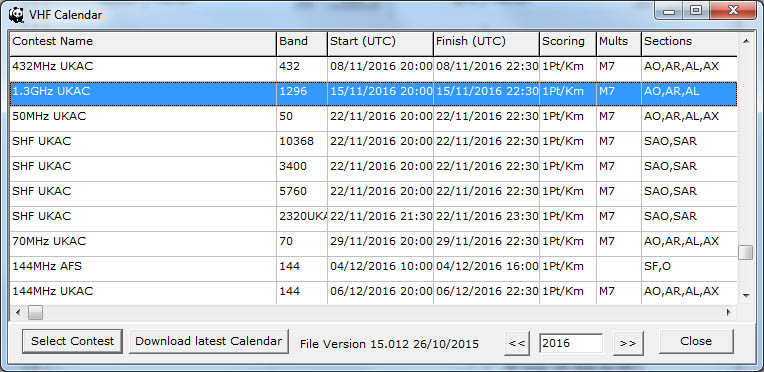
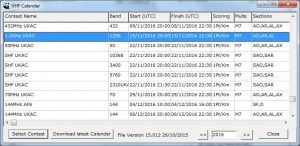
Once that is downloaded the calendar pops up with the next contest selected (in blue) but I am going to click on the 144MHz UKAC at the bottom and click Select Contest:
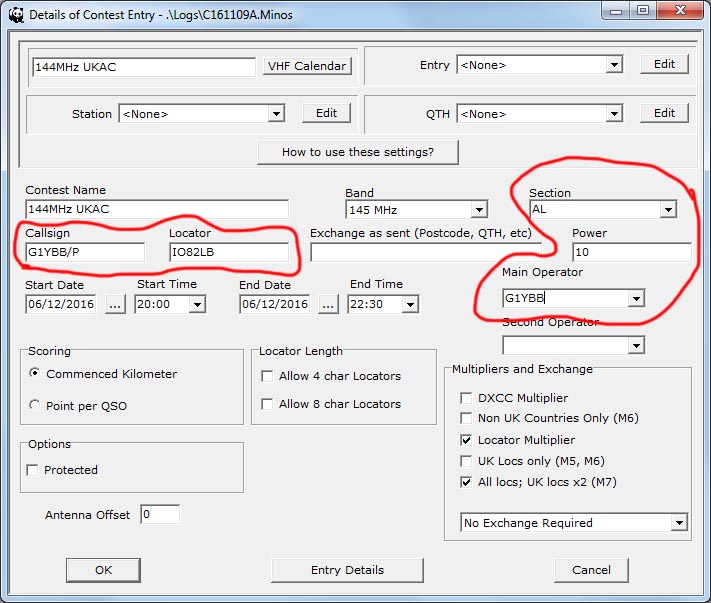
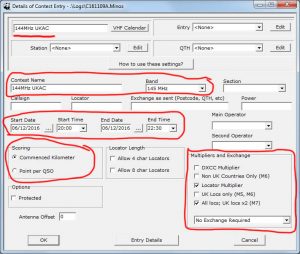
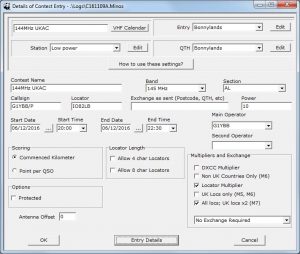
Once done all the relevant details are pre-filled in for you, date and start end times, and all scoring information:
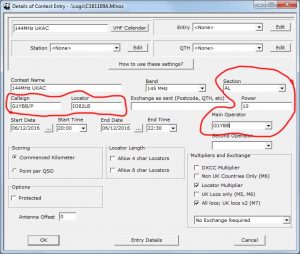
Next fill in the station details for this contest. Here I have filled in for operating portable. Note that if you are operating portable it will set the main operator to the portable callsign so you need to delete the /P. Not a problem if you are operating as a fixed station:
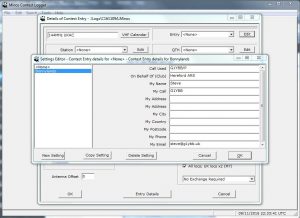
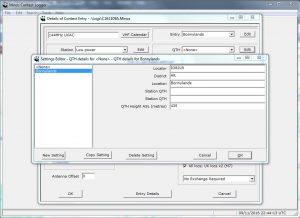
Next set up the Entry section. Click the edit button (top right) then click the New Setting button, give it a suitable name like “Home station” and fill in the relevant details and click OK:
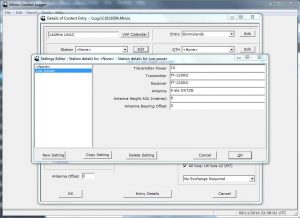
Next repeat for Station. Here you enter the equipment details so a suitable name might be Low Power:
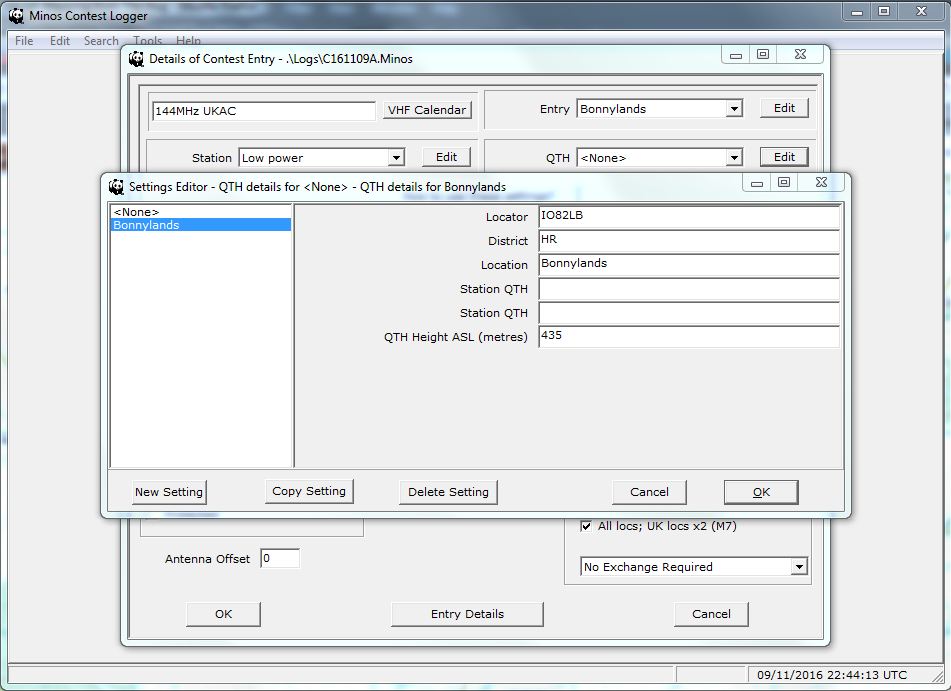
And finally the QTH details:
You should now look like the below. The Entry Details button is probably best used after the contest, it is where you can add comments about the contest itself. So now hit OK:
You will be asked to save the new contest. Choose the Logs folder chosen on extracting the ZIP file. I usually accept the default filename:
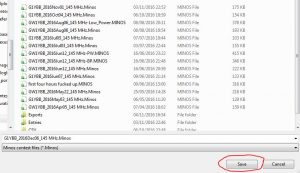
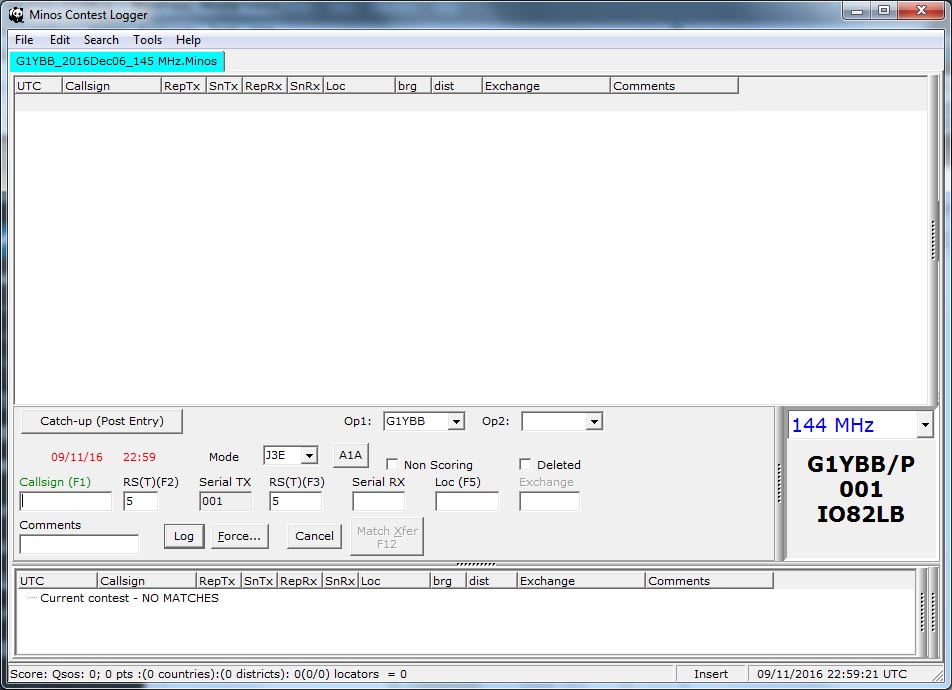
Once saved you will now be in the default layout contest entry window:
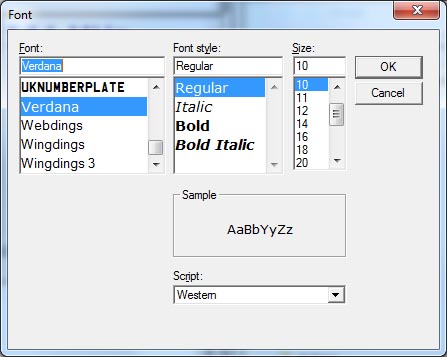
Now you want to arrange the screen to suit your tastes. If you are starting to need longer arms like me, or have a hi-res tablet like me, the writing may he hard to read. Minos is very good in that you can fix that! Go to Tools/Select Font… and you can change the default Verdana size 8 to a bigger font size:

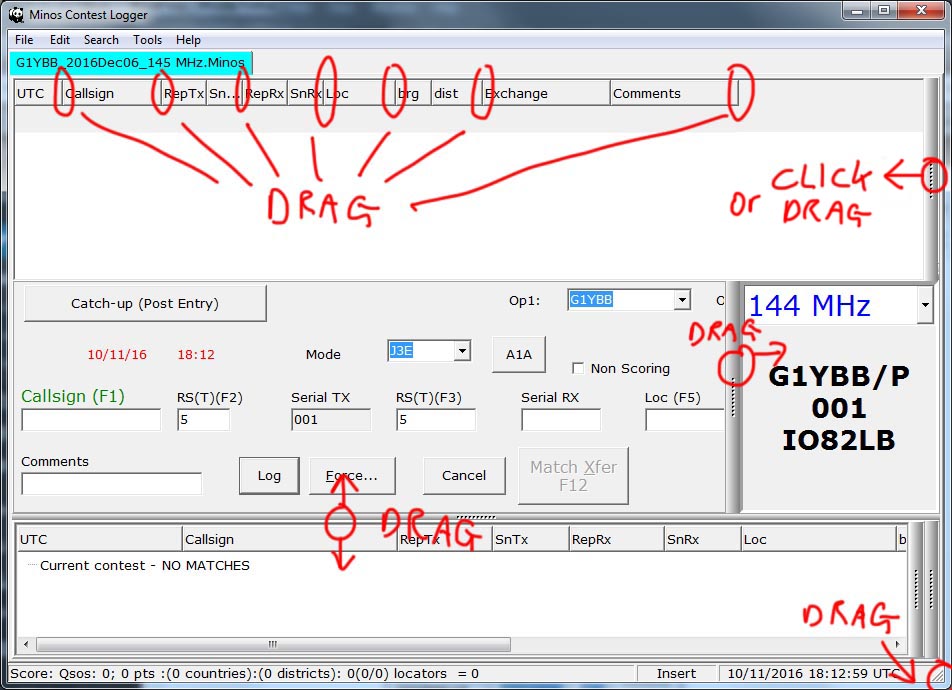
Now would be a good time to re-arrange the screen:
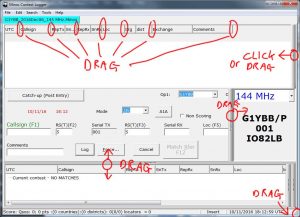
To this:
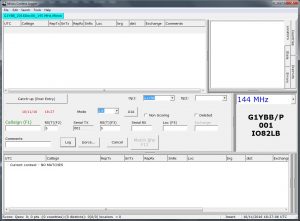
We’re now ready to roll.
NOTE: If the time is showing in red as above the contest has not yet started. If your PC time and date and time zone/daylight saving is all set correctly, the date and time will turn black when the contest starts, and back to red when it is over.
Contest use is easy. The cursor defaults to the callsign field. Type in the callsign there. ENTER moves you to the next empty field.
The fields are ordered in this order:
Callsign of station you are working
Signal report you give them
Your serial number you are giving them
The signal report they give you
Their serial number they gave you
Their locator square
Their district (if applicable)
If entering information out of sequence like when the other station shuffles the order up or when you are pre-filling callsign and locator when search and pouncing, ENTER moves through the unfilled fields in sequence, looping around at the end. Once all the fields are entered correctly ENTER will log the QSO and put cursor back in the callsign box. TAB will also move through the fields but I like to use ENTER.
If you lose the QSO for any reason or change your mind about calling in pressing ESCAPE will clear all fields and start over in the callsign field.
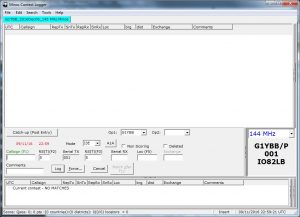
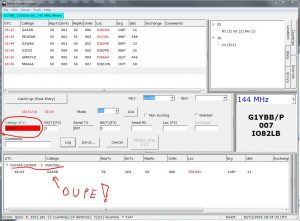
Here my first QSO will be Dave G4ASR. I have prefilled his info as I have heard him running, he is 59 with me so filled that in too, I just need to call in and get my report and serial from him. Circled in red is his distance from my site in km and the beam heading to his location:
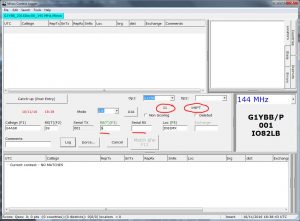 The middle right hand box is a visual aid to always know your current serial number to issue and your call (handy if you often work portable as G and GW !) and locator.
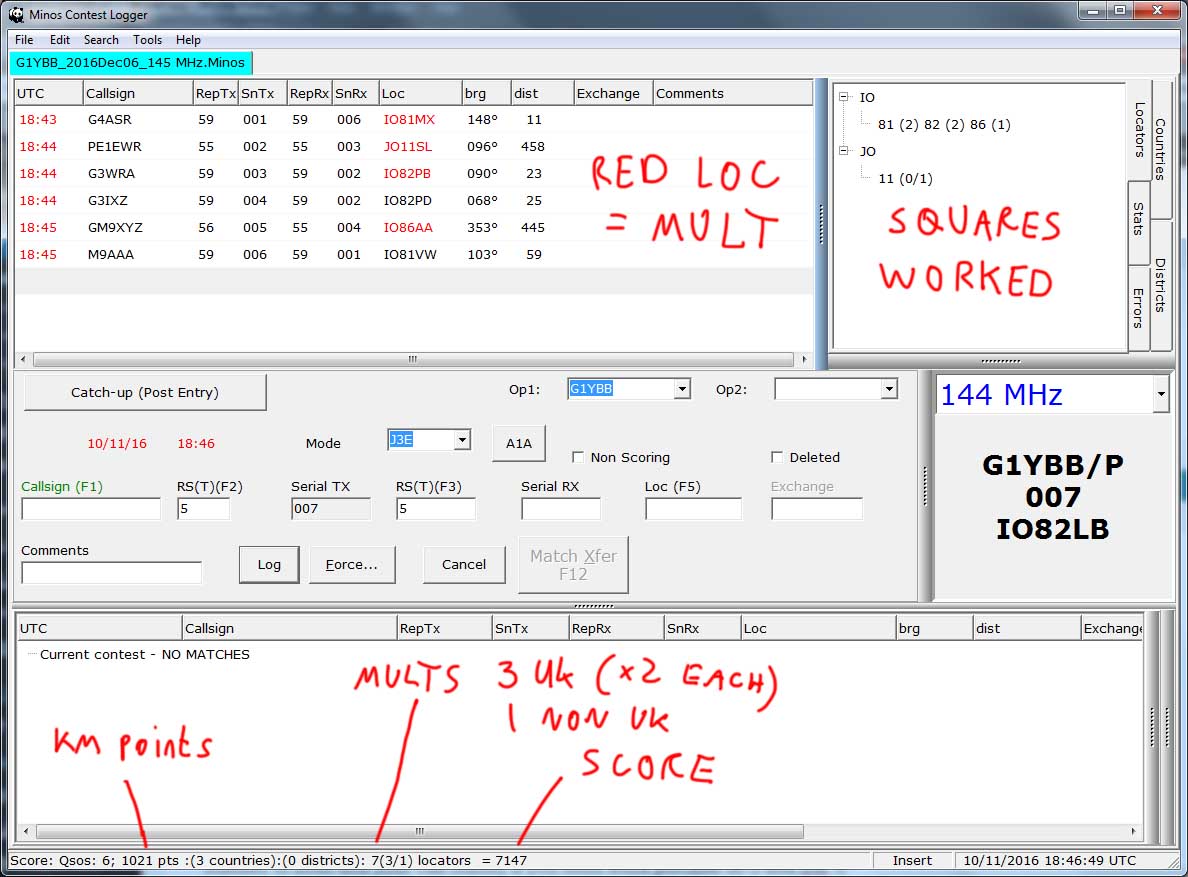
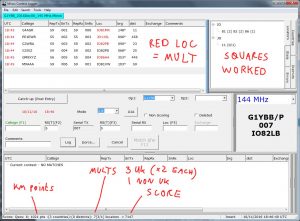
Here with a few more QSOs logged with useful information detailed:
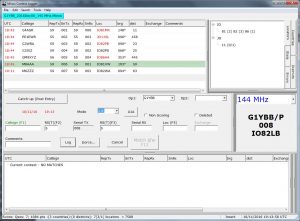
If you try and work someone or someone calls you and you have worked before you will get a red highlight in the callsign box and the matching QSO shown at the bottom. Time to press ESCAPE and move on or tell him we have worked before:
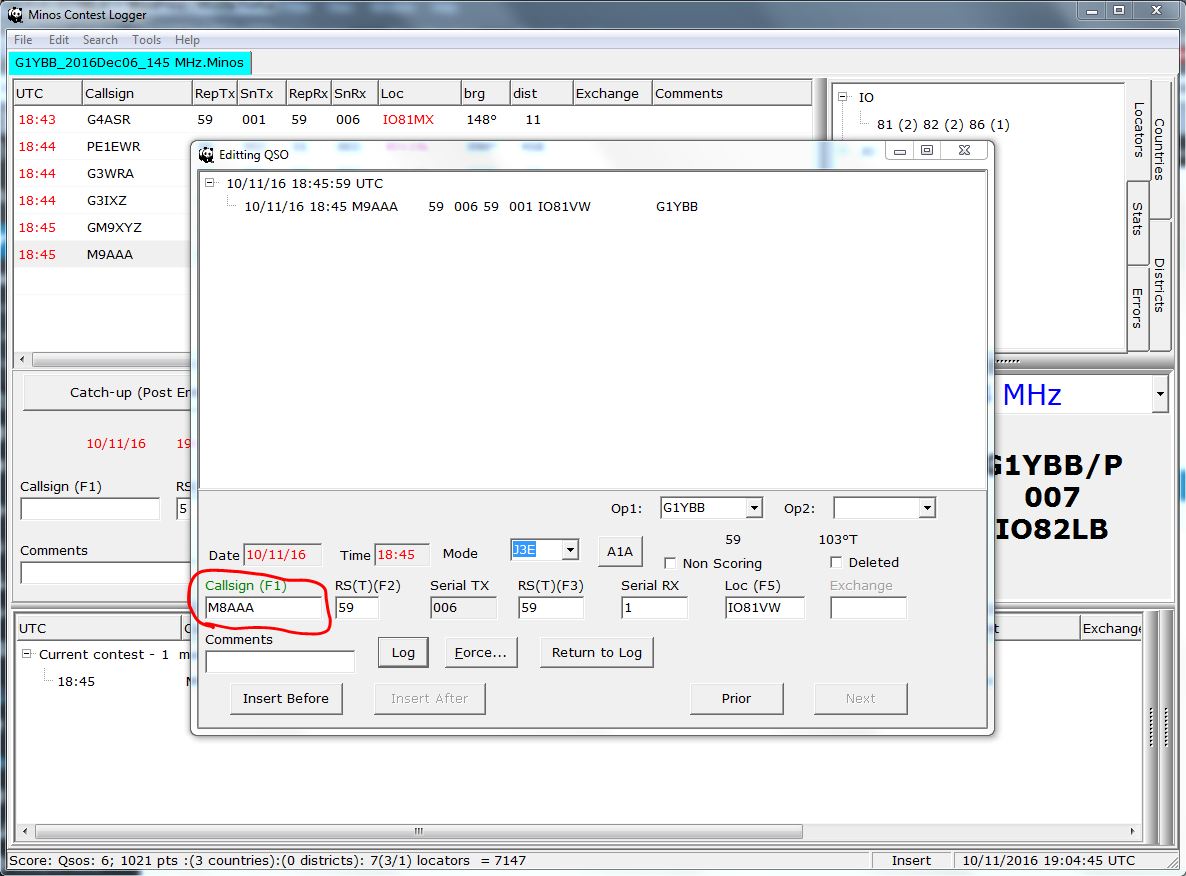
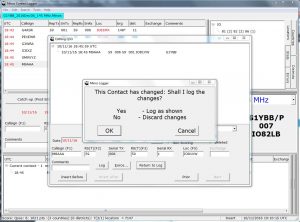
If you make a typo but you have logged the QSO you can correct it. Double click on the QSO line in the top window and you will see this window. When logging M8AAA I pressed 9 next to it by mistake, so I can edit it here:
Click the Return to Log button and click OK at this requester:
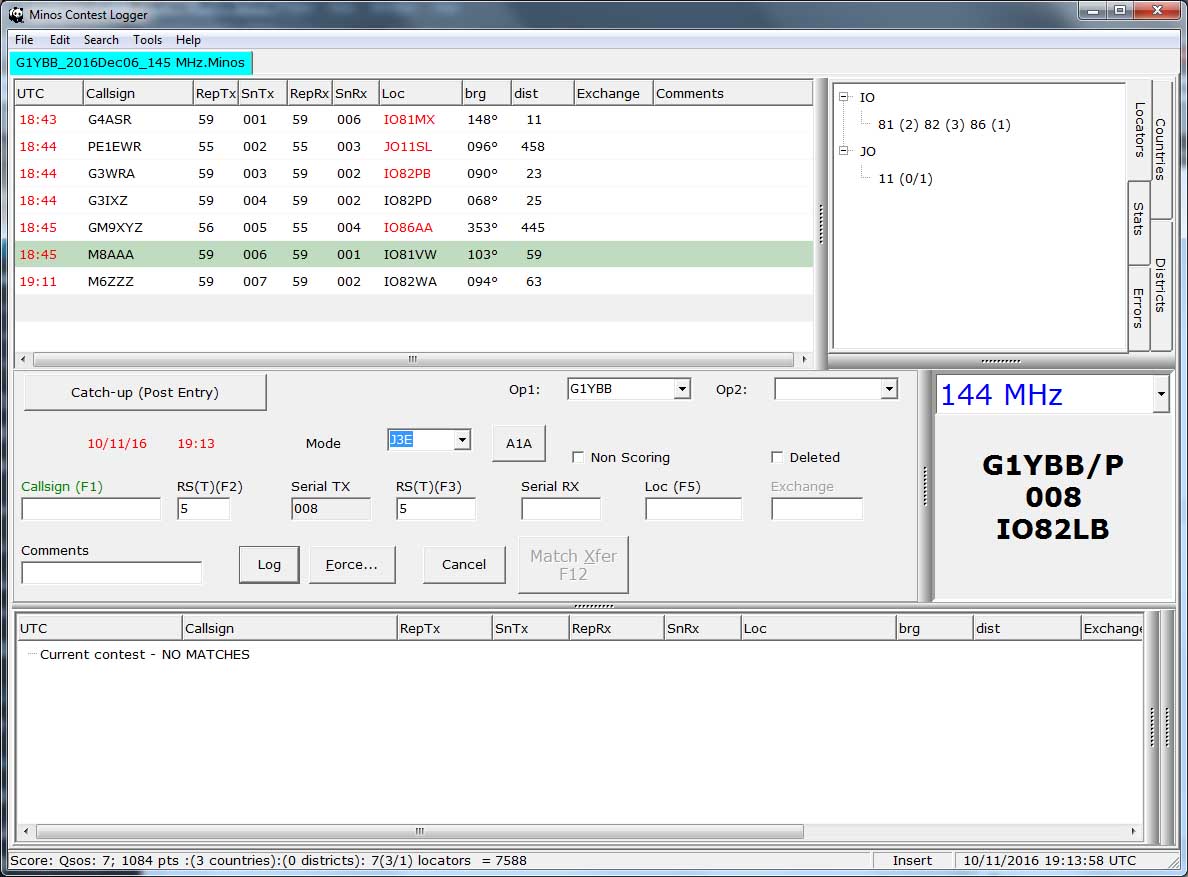
That QSO line will turn green which just means it has been edited. Here I have made the edit and now worked another station too:
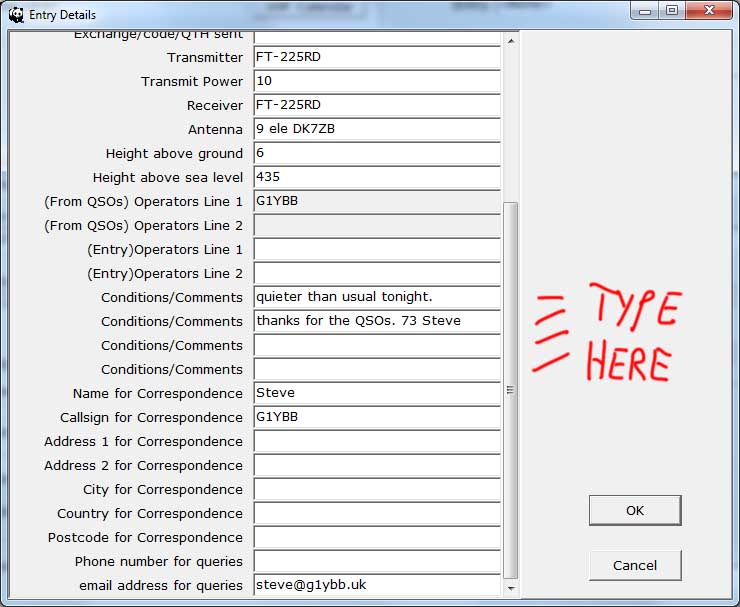
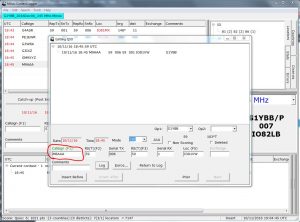
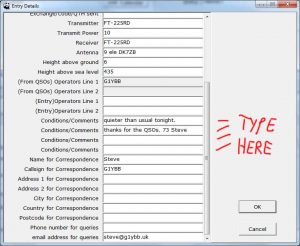
OK, now we have worked the contest and it’s time to generate the entry file. Start by entering some comments if you wish by going to File/Contest details, and then clicking the Entry Details button at bottom of the screen that pops up:
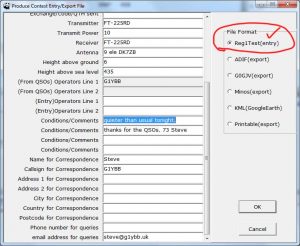
Click OK twice to get back to the main screen and choose File/Produce Entry_Export file. You’ll get another chance to edit the contest entry details here but can click OK as it should default to the correct Regedit format:
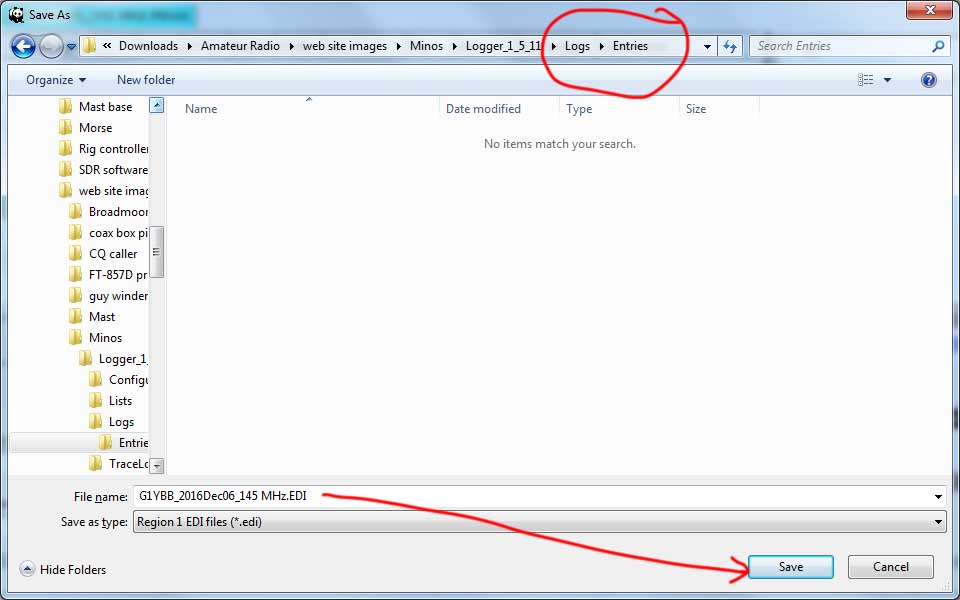
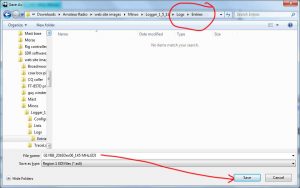
Next you are asked where to save the entry file. I have a subfolder below Logs called Entries so I know which is what. I use the default filename:
That’s it done. Now to upload it to the RSGB site.
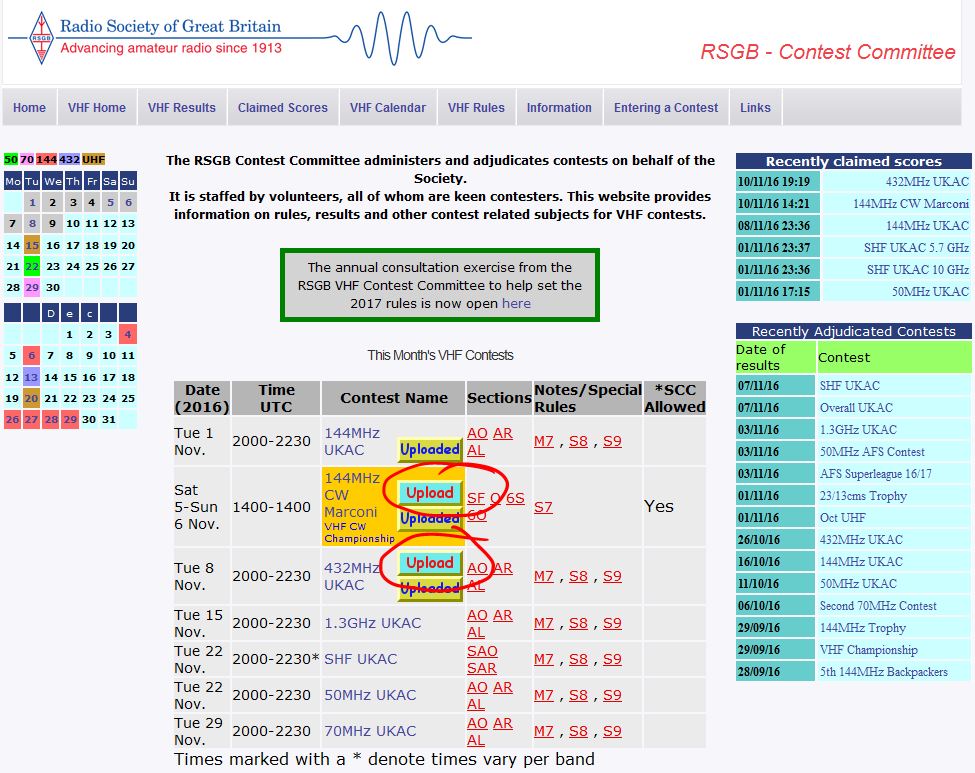
This link to the RGSB VHFCC site will take you to the current month’s VHF and up contests which will have an upload button for the recent contests:
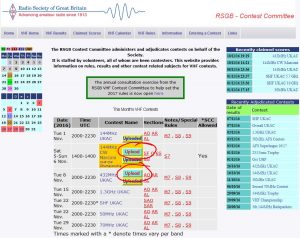
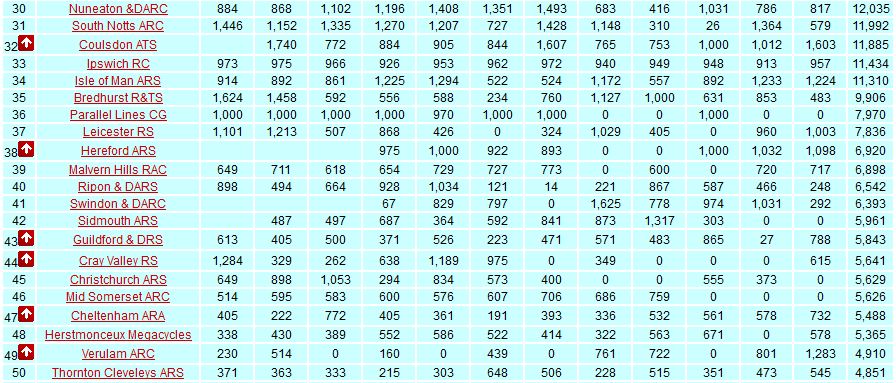
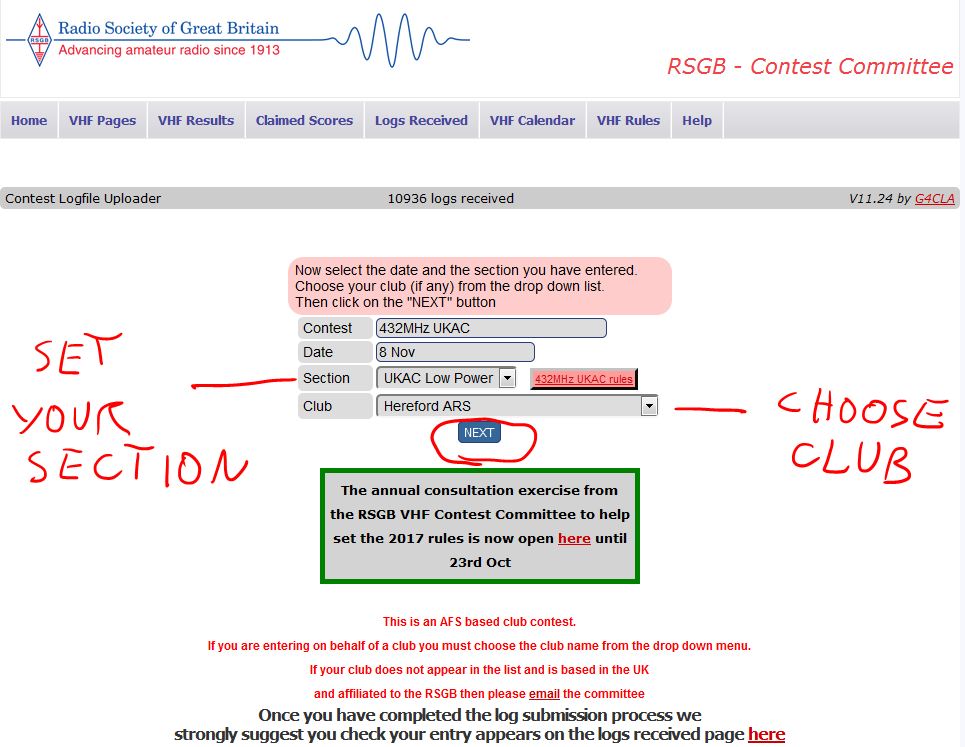
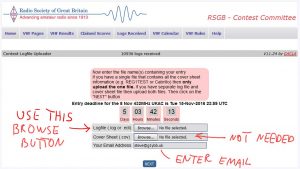
Clicking the upload button for the contest you just participated in takes you to a page like this (144MHz UKAC is closed right now so 432MHz is being used to demo) Set your power section and choose your club to enter on behalf of then click Next:

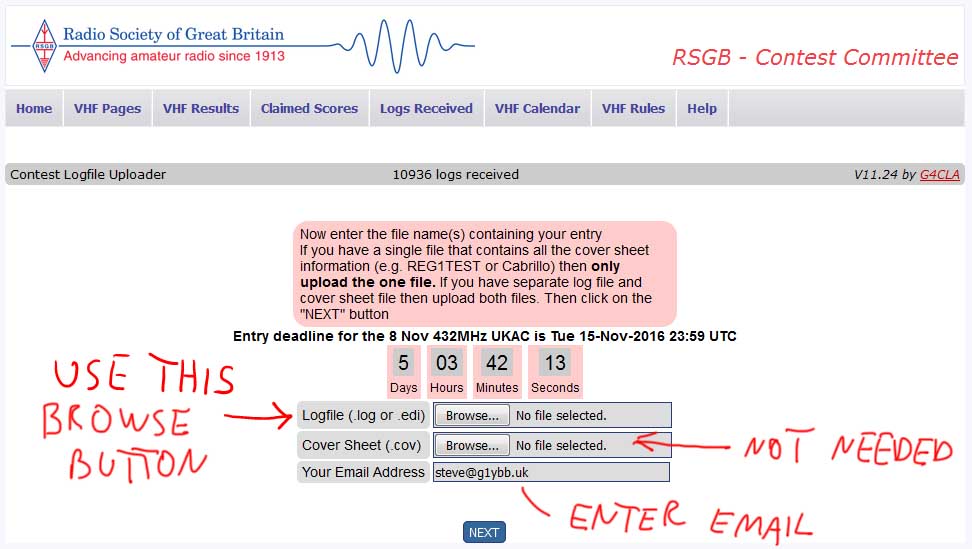
Now you actually upload the entry you just created. Click on the marked browse button and find the log EDI file created earlier. You can ignore the cover sheet browse button. Enter the SAME email address as in the entry details (else you will trigger a bug, as I found out…) and click Next:
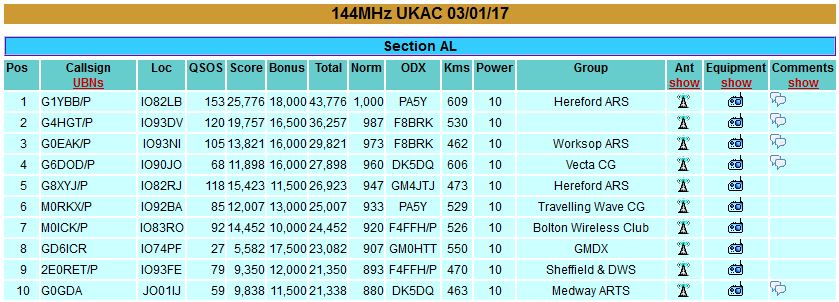
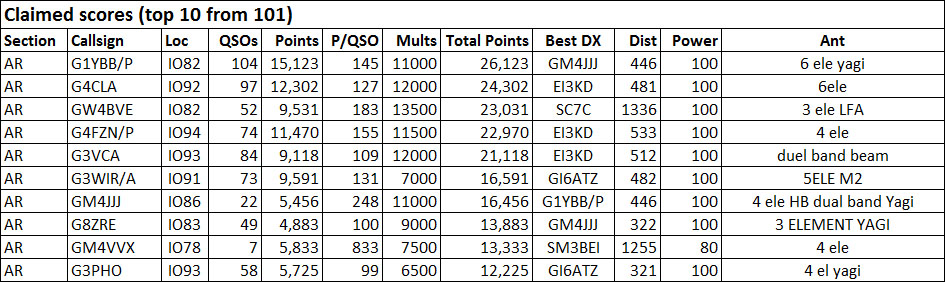
Your entry is now uploaded. Follow the option to enter a claimed score on the next page and everything will be filled in for you. I will screen grab next actual entry.
You should soon receive an email telling you your entry was received.
Last updated 4th March, 2017

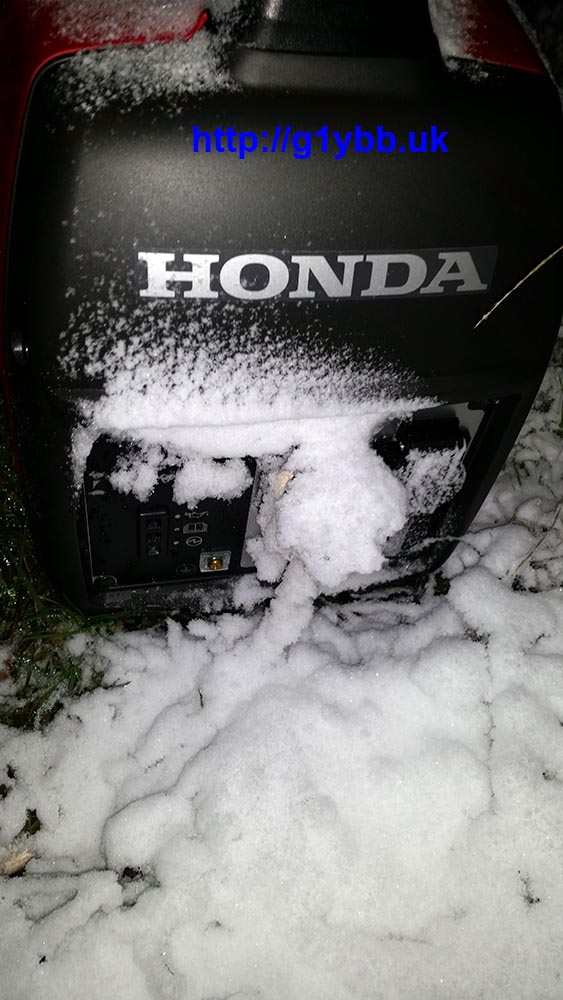
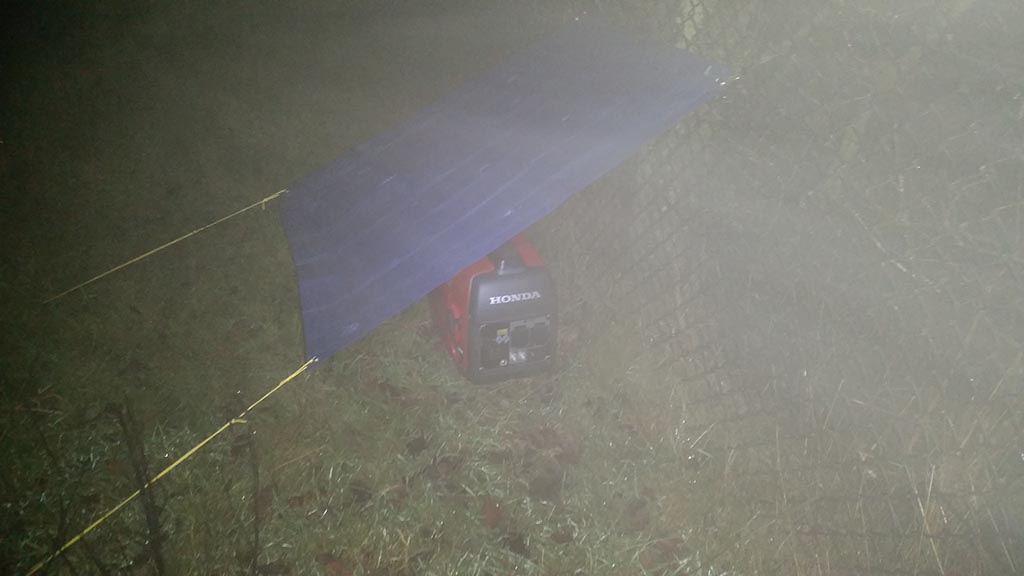 It is a £1 tarp 1 square metre from Tesco with an eBay lightweight key ring size karabiner on two corners and two tent pegs on tent guys. Takes literally 20 seconds to deploy here as the genny is set up next to a chain link fence.