I have decided that I want to start up activation of SOTA (Summit On The Air) summits, and where applicable WAB (Worked All Britain) Trig points. So this is going to require battery powered radio equipment.
I decided against (for now at least) the very popular Yaesu FT-817ND all band lightweight rig as I have no other HF transmitting equipment, and 5 watts only from my disadvantaged home location and antenna opportunities I felt will be too limiting.
So I have bought the Yaesu FT-897D for it’s versatility in being able to have fitted internally an AC PSU or battery power. I also prefer it overall as a base unit to the other potential option the Yaesu FT-857D. I will have to live with nearly four times the weight of the FT-817ND and twice the weight of the FT-857D.
Edit: I have since bought an FT-857D to use for SOTA activations.
Batteries.
Seeking a lot of advice from many members on the SOTA reflector I have bought 2x 8400mAh LiFePo4 Zippy batteries. Lithium based batteries are a lot lighter for same capacity than SLAB (sealed lead acid batteries) and are what everyone is using, including the model aircraft enthusiasts. These are 4 cell batteries that have the right voltage range required for the FT-897D (and FT-857D). If I was powering an FT-817ND I could have gone for a 3 cell LiPo battery as the FT-817ND doesn’t need as much voltage and just wastes the rest in heat. Not an issue for me. This particular battery can discharge at 30C (30x capacity) so more than enough for a 100watt rig. One SOTA activator with an FT-897D gets about 1½ hours use on SSB at about 75watts output power still keeping it in safe discharge zone.
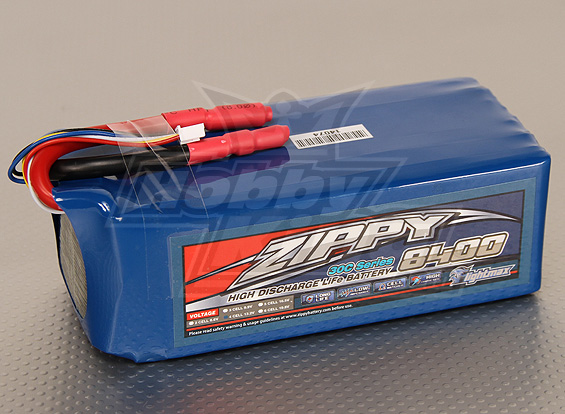 Zippy 8400mAh LiFePo4 battery
I bought these batteries from Hobbyking, and they came very quickly, free delivery too.
Link to product
Charger.
These batteries need a specialised charger to ensure safe charging and care of the battery.
I initially wanted an AC powered charger (against recommendations from experienced SOTA operatives) but at Hobbyking UK warehouse they had none in stock. So I ended up with a DC input charger.
This will ultimately be much more versatile meaning I can use it in the car or at home on a PSU.
The model I got is the Turnigy Accucel-6 50w 6a balancer/charger lihv capable.
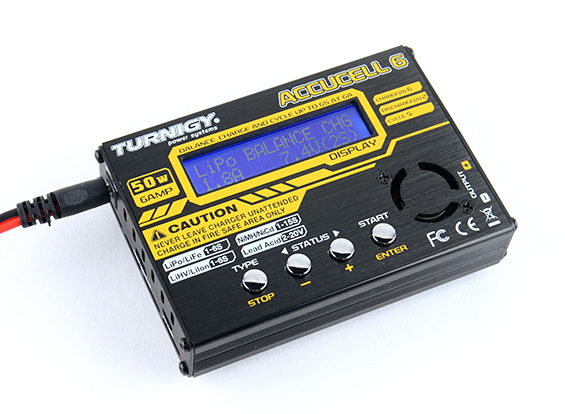 Turnigy Accucel-6 50W 6A Balancer/Charger
This I also got from Hobbyking.
Link to product
Edit: Since buying the above charger I decided it was too slow so I have bought a 150W charger. I still use the 50W so I can charge both batteries at the same time now.
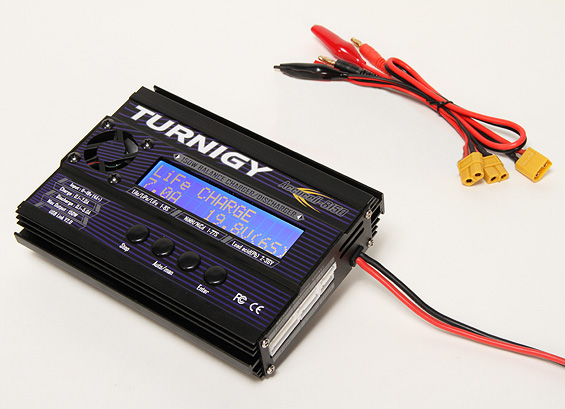 Turnigy Accucel-8 150W 7A Balancer/Charger
This also came from Hobbyking.
Link to product
Connectors.
The general concensus among the portable operators was to use Anderson Powerpoles as the DC interconnection connectors. These are rated at 45A and mate together to make pos and neg pairs. They are hermaphroditic which is quite useful and makes connection in the field simple and error free.
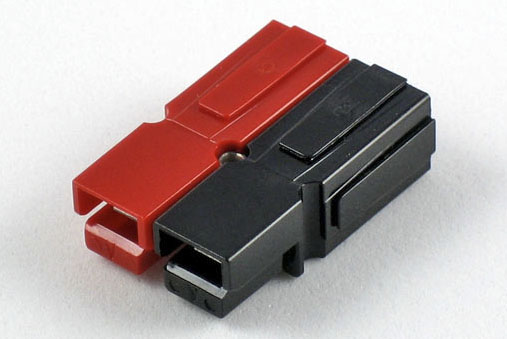 Anderson Powerpole pair
You can get these from many places, I looked for alleged genuine ones from eBay, and bought from a vendor with 99.9% positive feedback.
Link to product
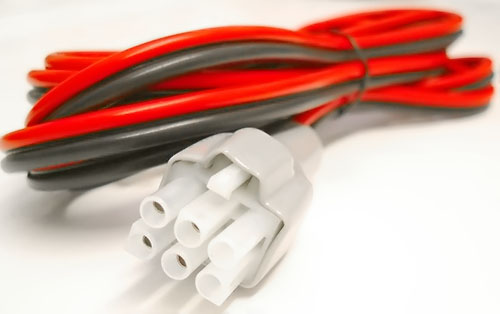
However, the batteries come with a 5.5mm bullet connector pairing and heavy duty leads. Too big to fit easily into the Anderson Powerpoles. So I was recommended some small leads with 5.5mm bullets one end, and a connector that can be replaced with the powerpoles on the other much easier due to more suitable cable size.
 5.5mm bullet leads
These come two in a packet very cheaply from Hobbyking.
Link to product
Battery safety.
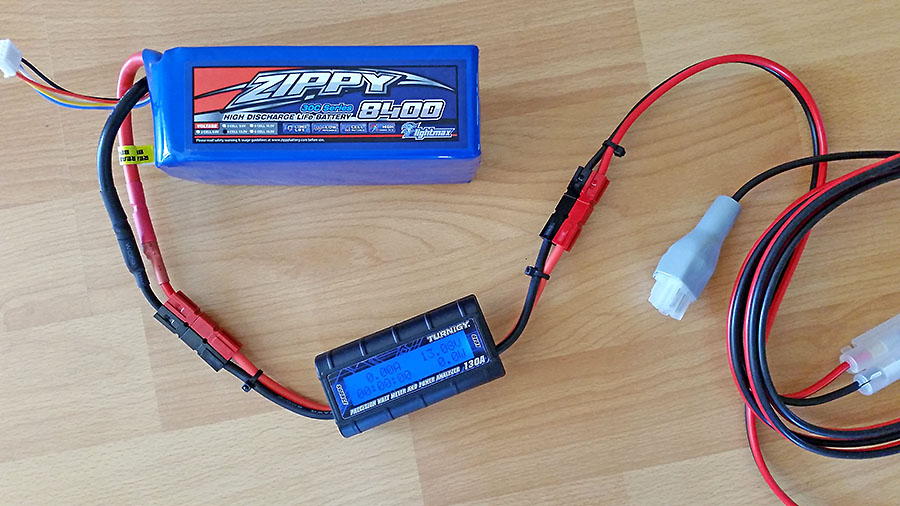
In order to extend the longevity of the batteries they need to be looked after. Over discharging them can lead to capacity loss or complete failure. The recommendation made to me was to monitor the battery use with an inline meter capable of measuring the Ah used. For this I found a Turnigy 130A Watt Meter and Power Analyzer.
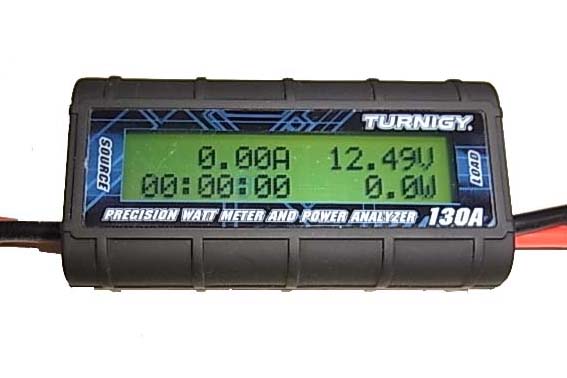 Turnigy 130A Watt Meter
I couldn’t find one like it in stock at Hobbyking, so I did take a punt on one from eBay. The vendor has 100% positive feedback so I risked it. It does work OK.
Link to product
Power lead.
Finally, to save myself having to mess about removing the rig power lead from the base station PSU all the time, and making up another Anderson Powerpole pair for the back of the PSU (when it has perfectly usable 30A binding posts), I bought a new DC cable to use exclusively for portable operation.
 Yaesu DC power lead
Ebay for this one. More expensive than I expected too. But looks like the original one.
Link to product
First stage of assembly.
This didn’t go as well as planned!
First I fitted a pair of 45A Anderson Powerpoles to the Yaesu DC power cable. This went OK, though was not easy. I needed a small jeweller’s screwdriver to push the contacts in to get that all essential final click. But I did manage it.
Next I tried to fit a pair of the Anderson Powerpoles to the the mAh meter. This was a failure. The wire size of the meter leads is just too big. No way on this earth could I get the contacts in. I think with the correct crimp tool it may be possible but even then I think it will be a game.
I abandoned that for a rethink.
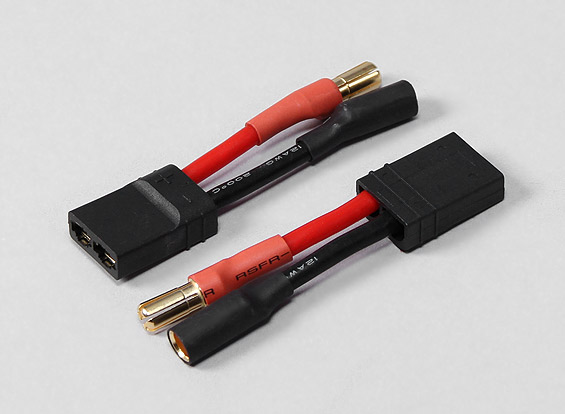
So I decided to fit an Anderson Powerpole pair to the bullet connectors. I at least then have the option of powering the rig from the batteries with no meter.
As the adapter leads with the bullets are so short, I decided to cut back the connector housing with side cutters to retain as much wire as possible.
I was then able to grab the brass contact just in front of the soldered wire end with the side cutters and twist to pull it out and then break it off.
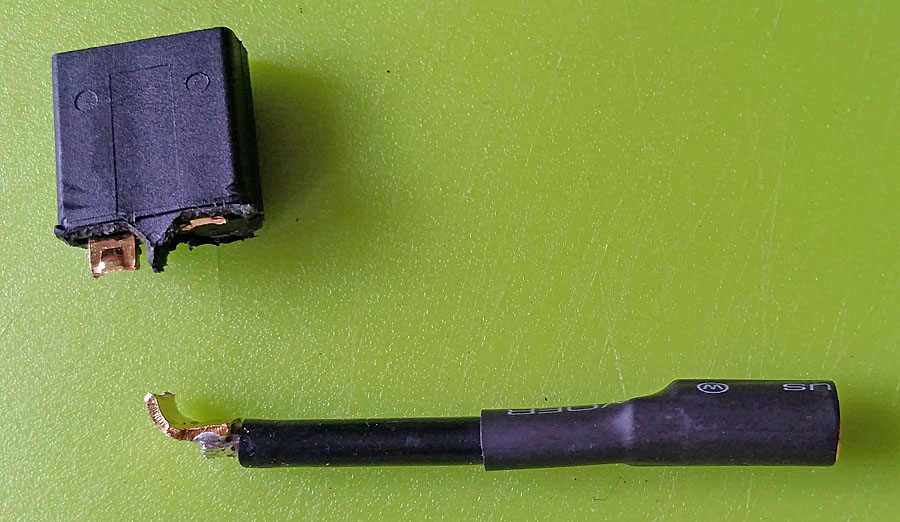
It was then easy to de-solder the brass contact from the wire.
Note: I did this to a second lead from another bag of two, the the wire was kind of spot welded on rather than soldered. I had to cut that one.
I then fitted these bullet connector leads to a pair of Anderson Powerpole connectors. One went in with just a lot of difficulty, the other one wasn’t that easy! I still have the mark in my hand 12 hours later from pushing it in with the jeweller’s screwdriver (the only thing thin enough to get in the tiny space). After thinking I would never do it, I did finally get it in.
It’s clear to me the only way to use these 45A contacts without needing the crimp tool is with relatively small gauge wire.
Though while writing this page I have just this second had an idea for a possible work around for me.
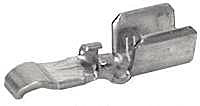
The contacts look like this:
I was forming the ‘flaps’ of the cable entry around the wire with pliers and a Yellow/Red/Blue simple electrical crimp tool. I might try cutting some ‘flap’ off which will reduce the overall resultant diameter and may give me a chance to fit it in. I am soldering the joint anyway, so should be secure.
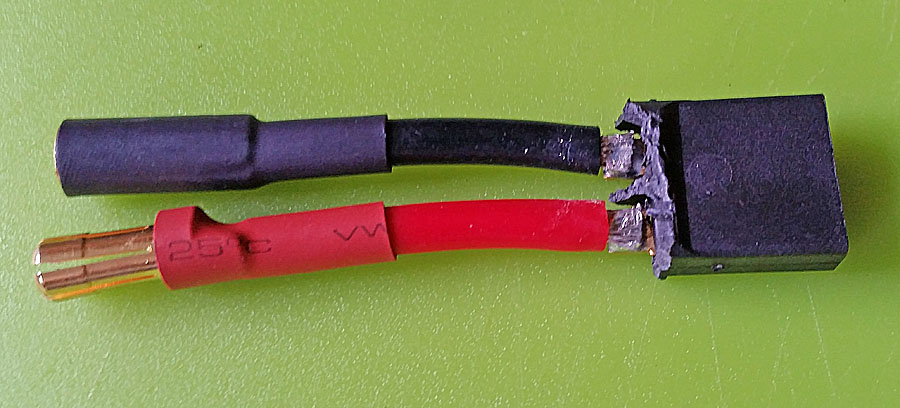
Second try at fitting plugs to the meter.
Another try this time cutting just a little off the connectors. I only cut about 1mm off, but that’s a lot in the scale of these fitting them in.
As supplied at the top, cut down slightly below:
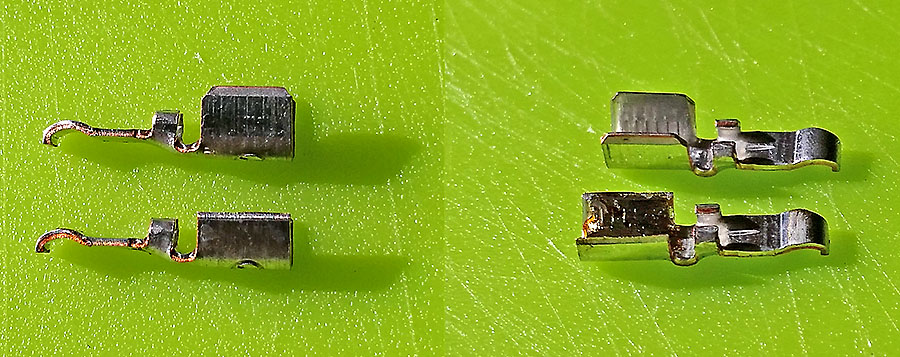
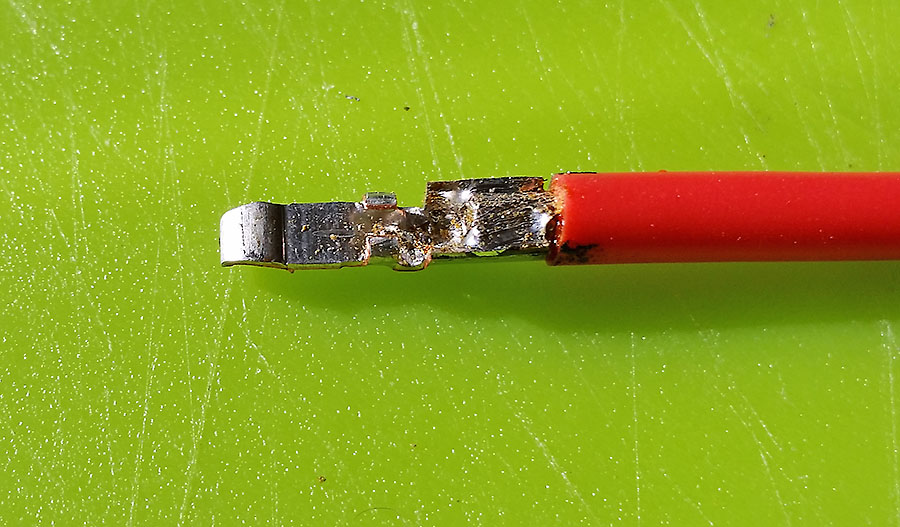
This enabled me to push the pre-tinned wires (as supplied to me) into the remaining contact area, and squeeze them up to grip, and sweat it in securely with solder:
I got the first one quite easily with my jeweller’s screwdriver. Yes! Second one (in the photo) I actually pushed in by hand! Which is not bad as the wire is very flexible and has next to no rigidity.
Got the second pair on with the screwdriver and all is done, phew!

Finished portable DC feed system:
All ready for the hill tops!