I was scrolling down my Facebook feed and spotted a post in I think one of the SOTA Facebook groups mentioning a BX-184 CQ Parrot. It looked interesting at first, then awesome! Within 20 minutes I had it ordered.
This is a modification to the standard MH-31 microphone that comes with the FT-817, FT-857D and FT-879D etc. It will record and playback a message, perfect for calling CQ Contest or CQ SOTA etc, but without the requirement to carry and connect up another gadget as it fits completely inside the microphone body. It was designed by Oliver DH8BQA and he describes it on his website here http://www.dh8bqa.de/bx-184/.
It is available for sale on the German Funk Amateur site here Funk Amateur BX-184. However they also do another kit that includes an MH-31 microphone body if you don’t want to disturb your original mic and that is the option that I took Funk Amateur BX-184M. The website is all in German so if like me you don’t speak German Google Translate will help a lot! There is also now a USA vendor here http://www.box73.com/product/2
It came pretty quickly and this is what you get in the box:
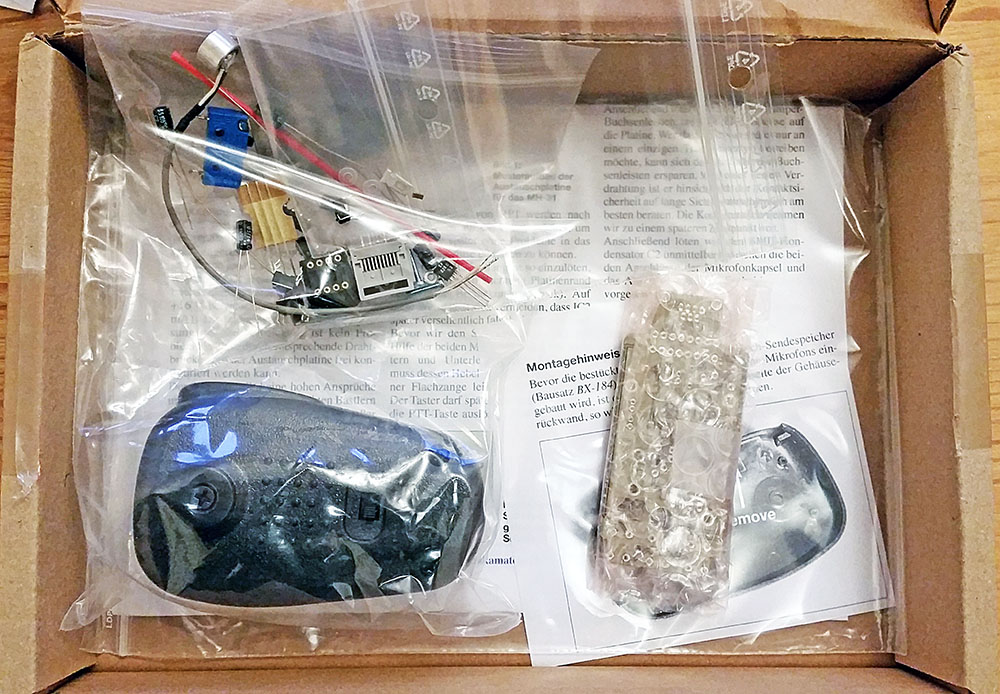
A complete kit with all you need. The PCB is part SMT (surface mount technology) and part through hole components. You just need to fit the through hole components.
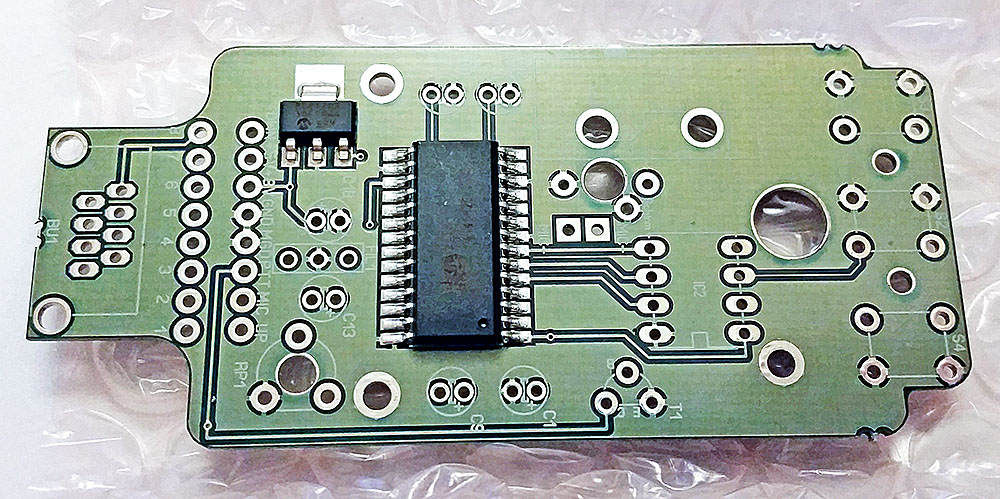
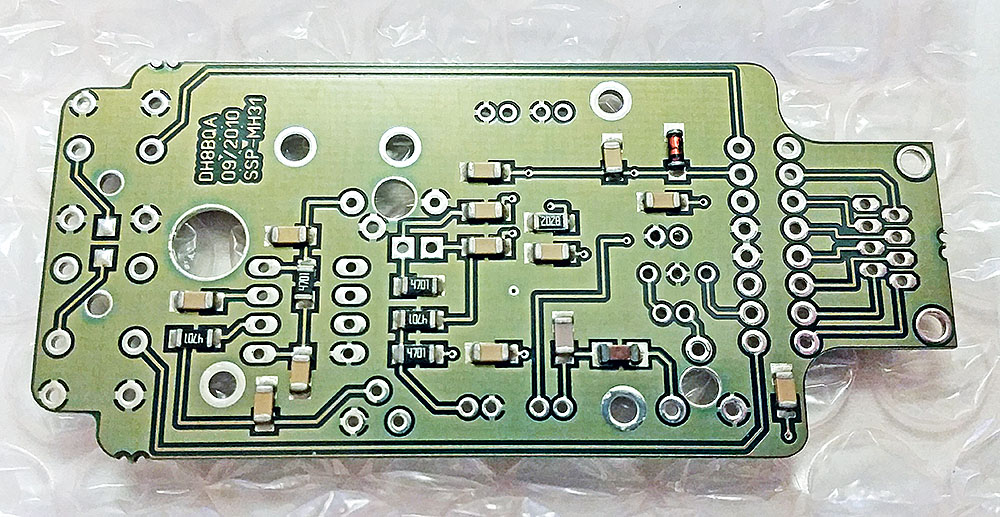
The double sided PTH PCB is very nicely built.
Top:
Bottom:
Before it arrived I did some research and found some mods made by DG2IAQ on eHam which sounded worthwhile:
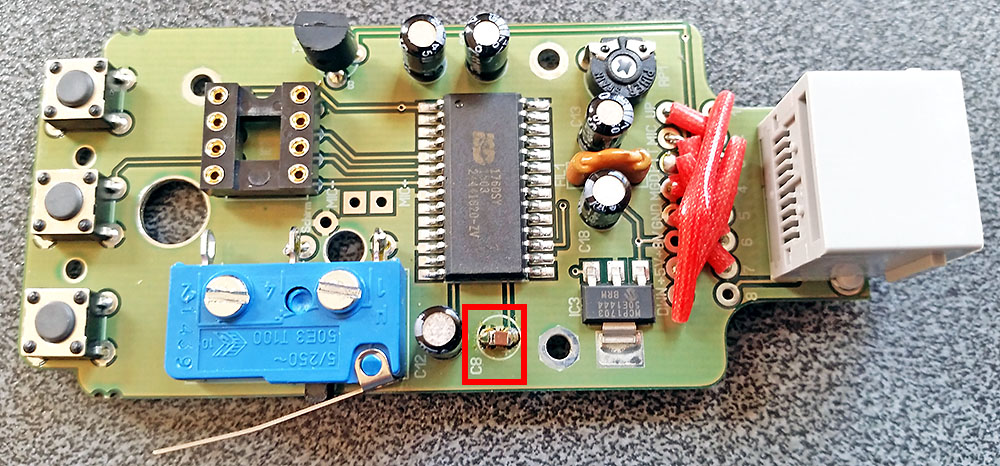
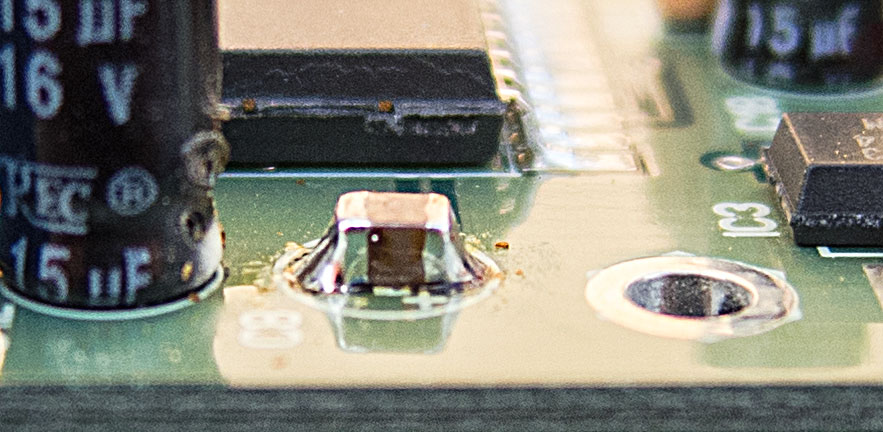
I should have fitted this first as the 15µF cap next to it made it awkward to get a good solder joint on the GND side of the capacitor due to the ground plane wicking the heat away. Got there in the end though:
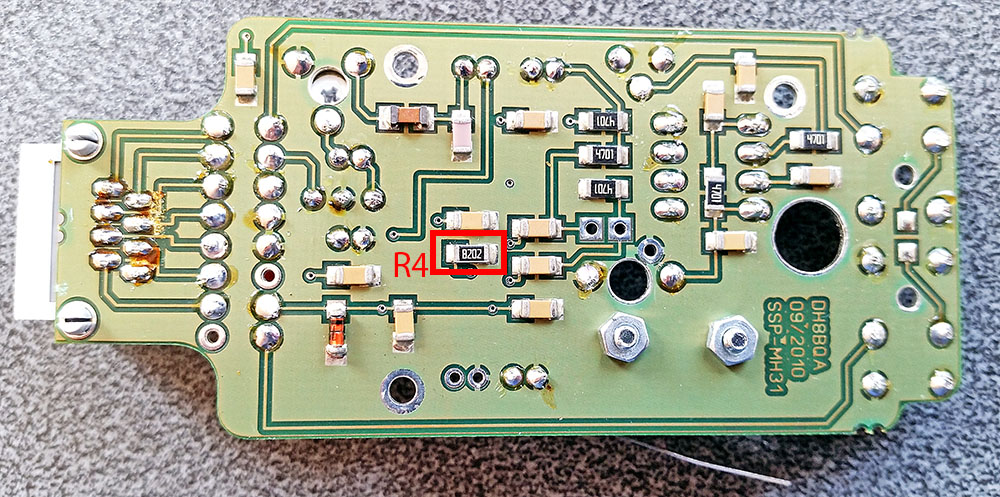
R4 is an 82K 1206 sized resistor located on the rear of the PCB (this is easy to locate as the kit comes with build instructions in German with a good circuit and layout supplied. English instructions can be downloaded here, page 5 onwards English Build Guide):
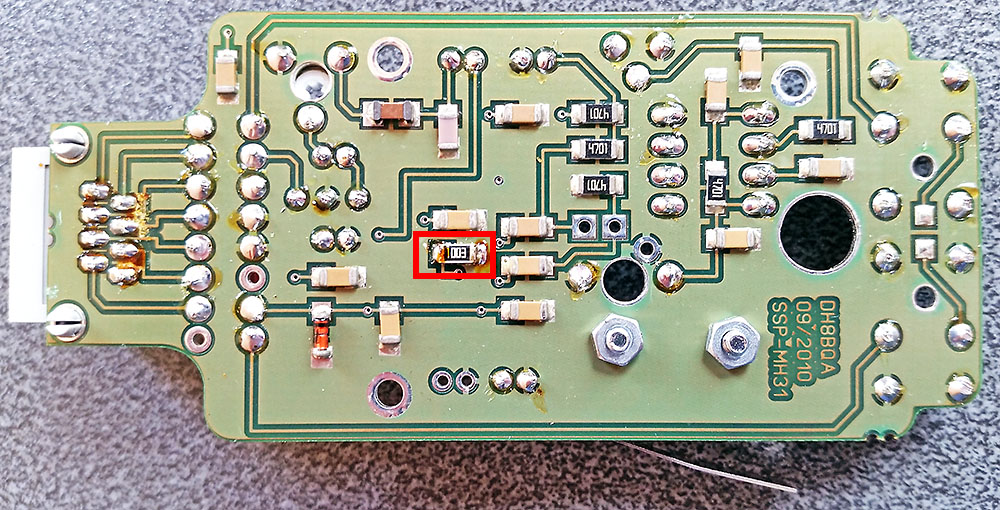
And with a 100K 1206 fitted in parallel (on top of the fitted resistor) as suggested above:
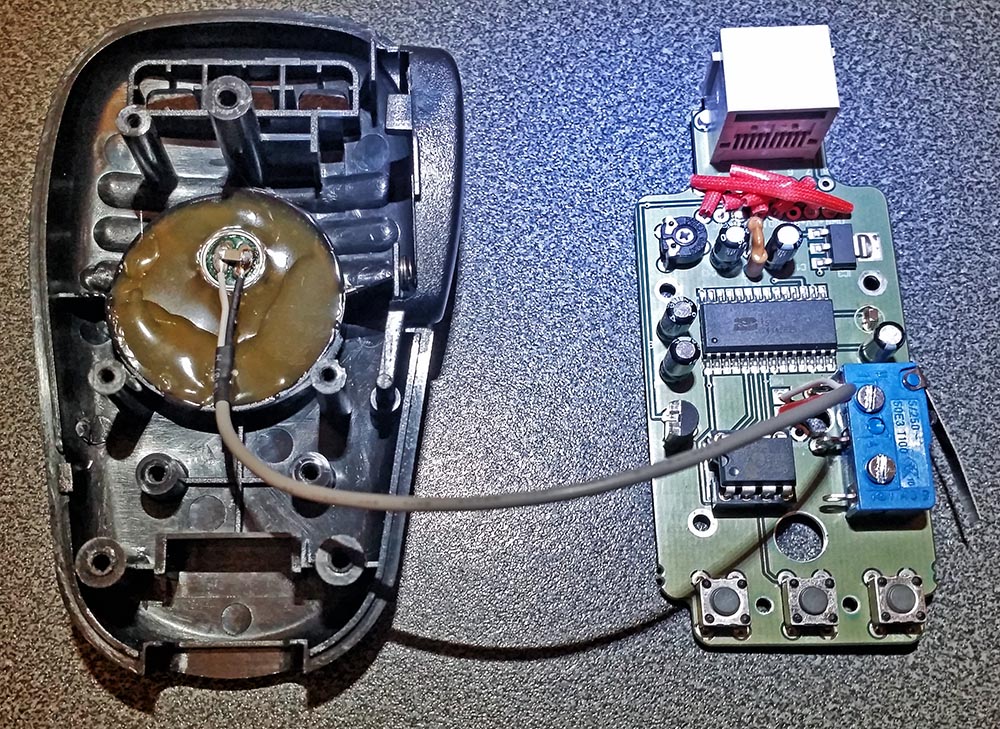
With all parts now fitted (including a 1206 capacitor fitted across the supplied electret insert terminals) all that is left to do is mount the electret insert into the microphone body and solder that to the PCB.
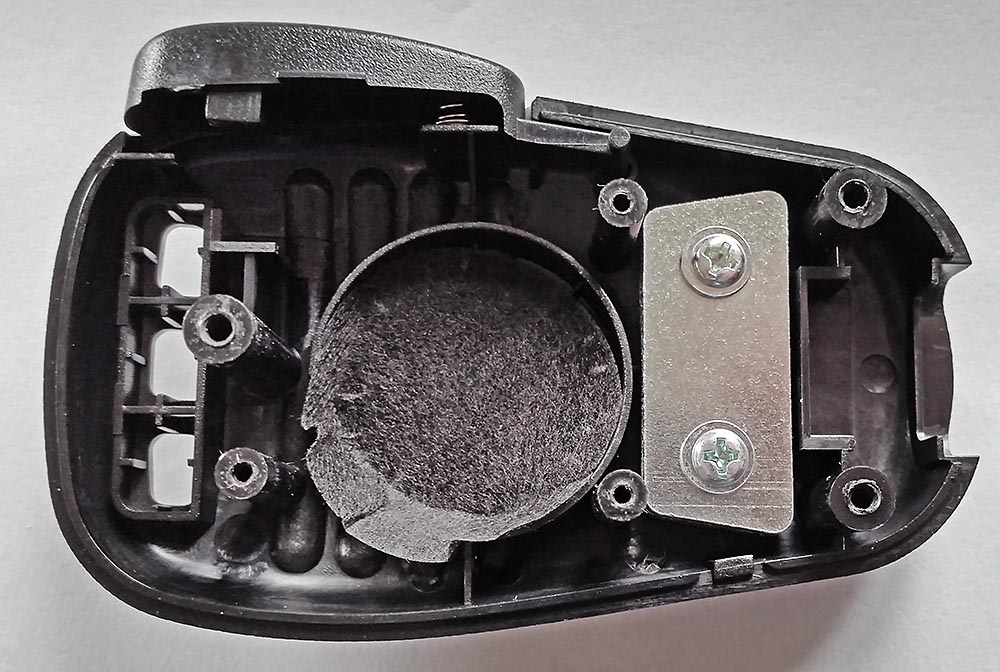
Next I hot melt glued the electret insert into the mic and filled up the void as the instructions said. Actually I filled more than the picture in the build instructions showed by mistake. Then solder the screened cable to the PCB and fit the IC and it’s ready to be assembled:
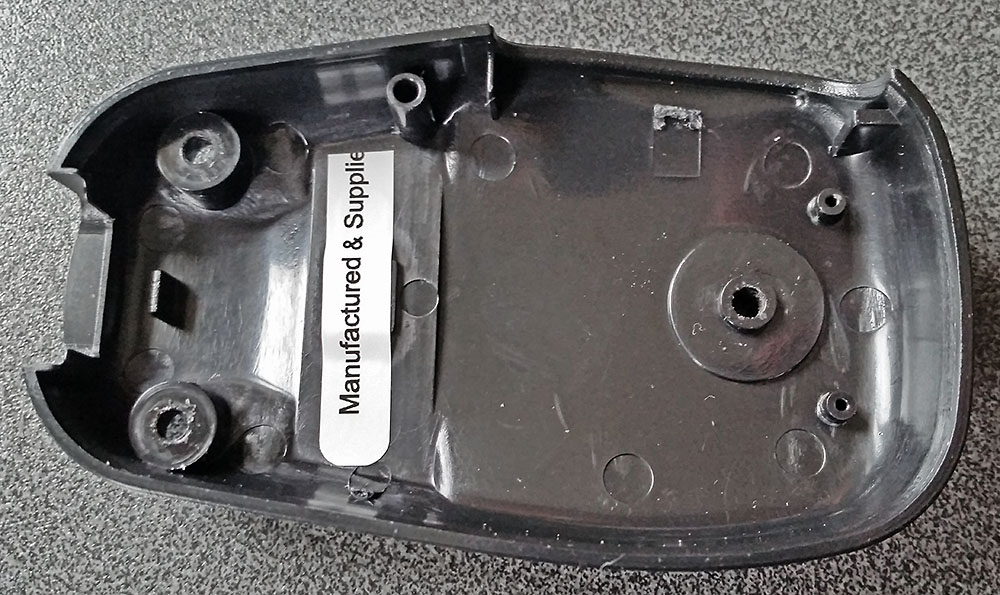
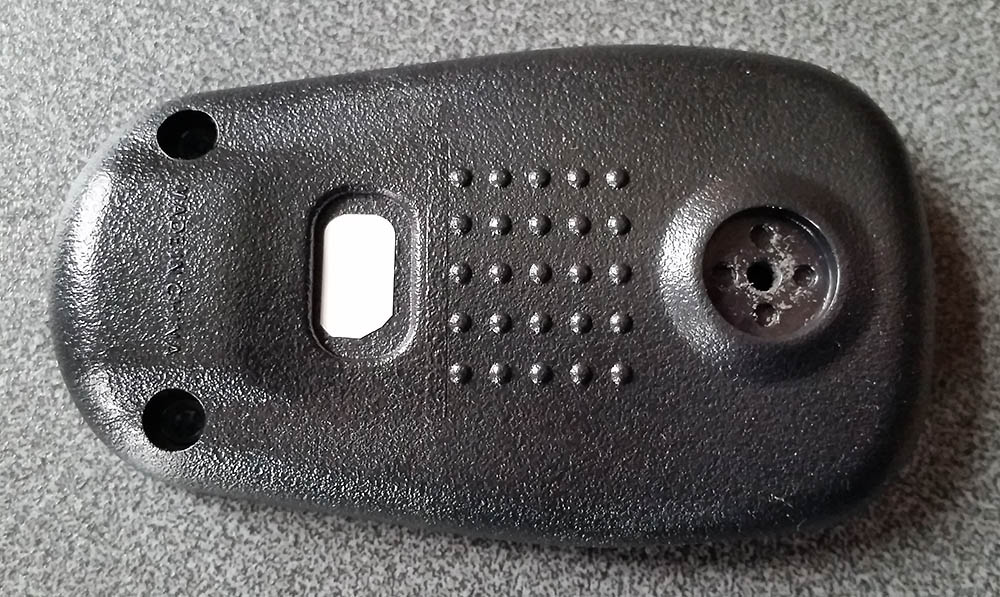
As the replacement PCB does not have the two position slide switch, there is the unused hole in the back of the mic. For this I just used some good quality sticky label material I have to hand.
One piece inside:
Once assembled I compared the standard supplied Yaesu MH-31 mic for weight against the BX-184 CQ parrot. A 40% saving in weight, I’ll take that:

Here is same CQ call live using the BX-184:
And the replayed recorded CQ call from the BX-184:
I might need some on air radio reports for final setting but it doesn’t seem to be clipping at all though does have a little more punch.
I have since used this ‘in anger’ in 144MHz contests. The first contest I got some complaints about over driving and being wide (complainant was also wide to me for that matter!!). But I turned SSB mic gain down in the FT-817 and back at home I did turn down the audio output level on the microphone itself and did some tests between it and the standard MH-31. Subsequent contests have resulted in zero complaints but some good audio reports.