As I use my new Yaesu FT-857D for portable operations including backpacking for things like SOTA activations I wanted a way to transport it securely to keep it from getting damaged. I have seen the select knob broken off on FT-857Ds so did not want that to happen. And keeping it from getting bashed and scratched would be nice whenever possible.
For my initial SOTA activations and portable operations I carried the FT-857D in a Lowepro camera rucksack inside my main backpacking rucksack. This kept it nice and safe but weighs over 1kg total and takes up a lot of space so I needed a better option. I didn’t like the look of any of the tube based manpack builds I saw on the internet a lot so I decided I needed to make something as I could not find a suitable lightweight container I could use. Talking with my friend he suggested some Foamex sheet that he uses as it is quite light and strong. This seemed like a plan so I drew up a two part cover using some 5mm Foamex which seemed strong enough to support the weight of the radio:
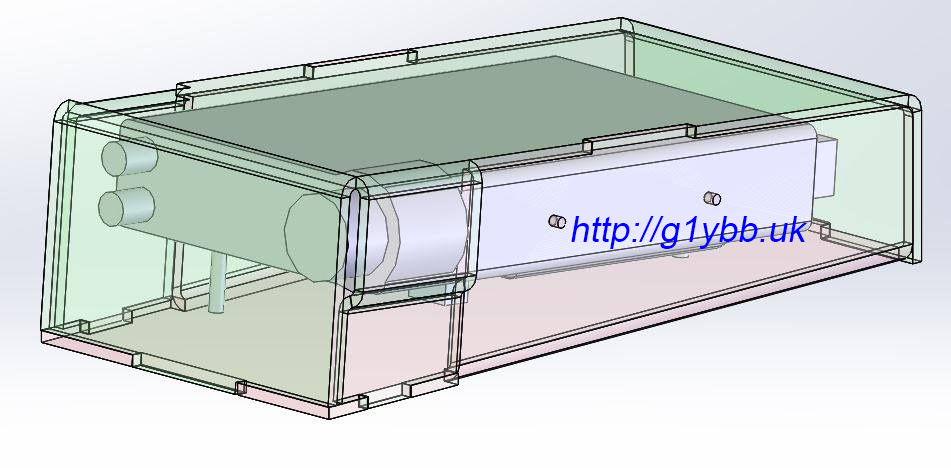 The pink half will be fixed to the radio using the mobile mount screw holes and the green cover will slip on and be retained by a Velcro strap. The fixed base protection will allow it to be used on grass and stones without any damage or dirt ingress. The green cover protecting the knobs from damage in transit in the rucksack. The microphone will be retained in the space at the front, in a bublewrap bag. The 3D modelling predicted the total weight of the two parts of the protection to be about 500 grams.
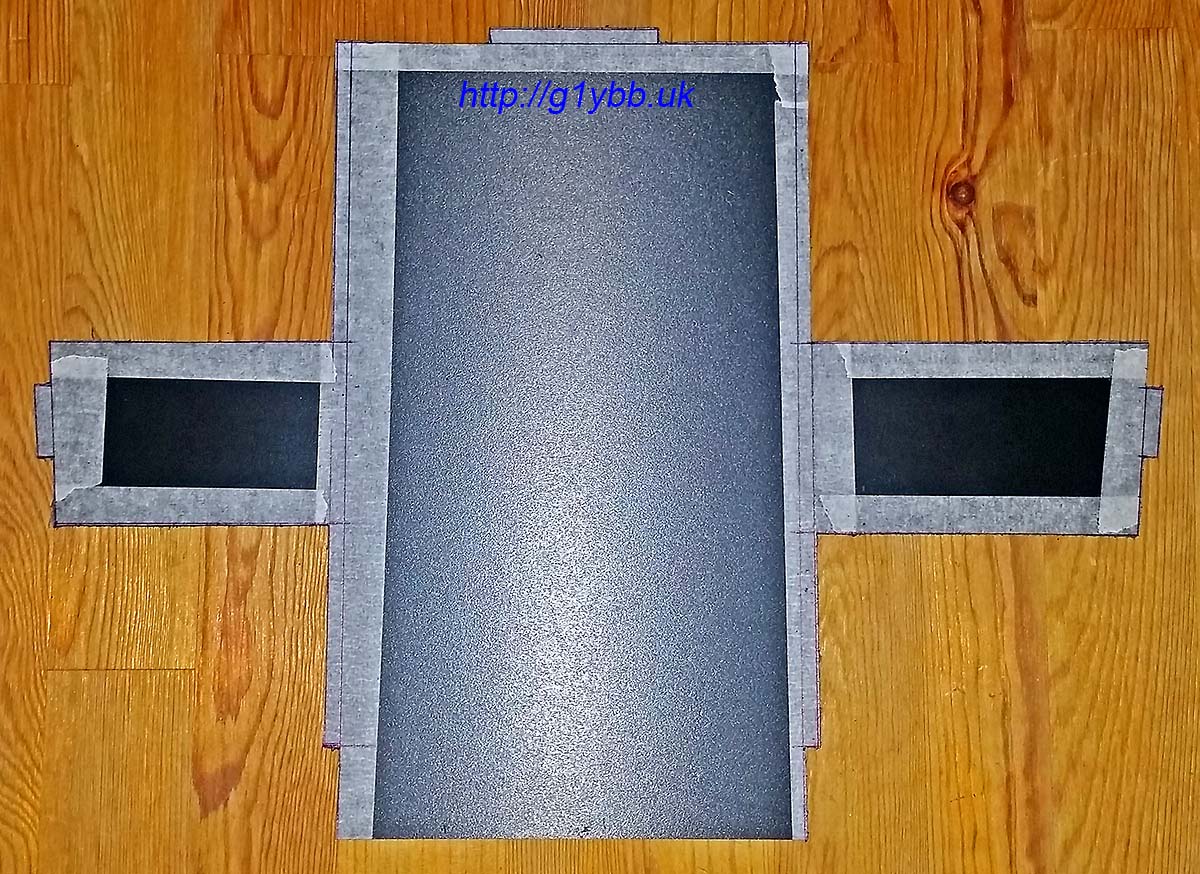
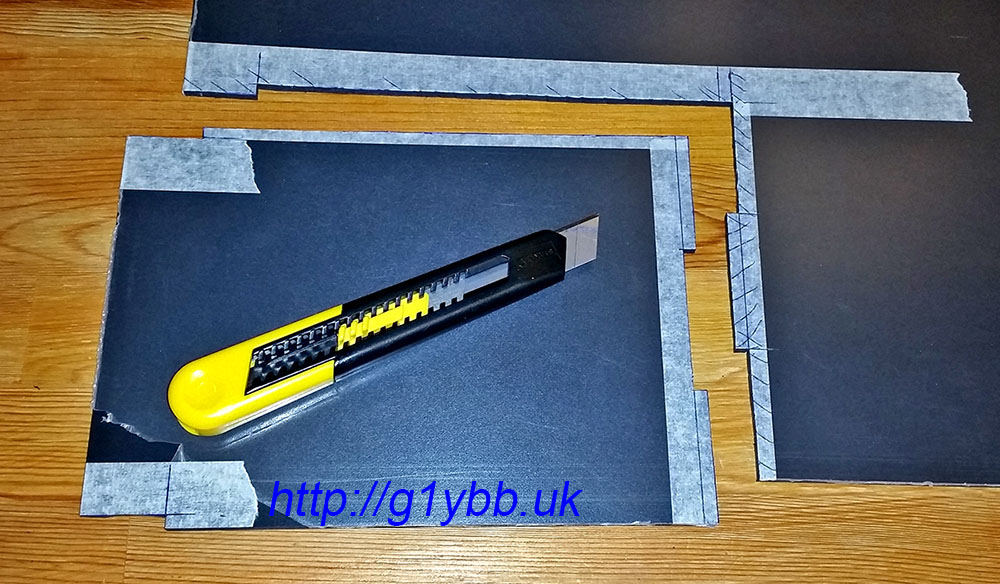
I planned to use heat to form the shape of the parts, so marked out a sheet for cutting first using masking tape:

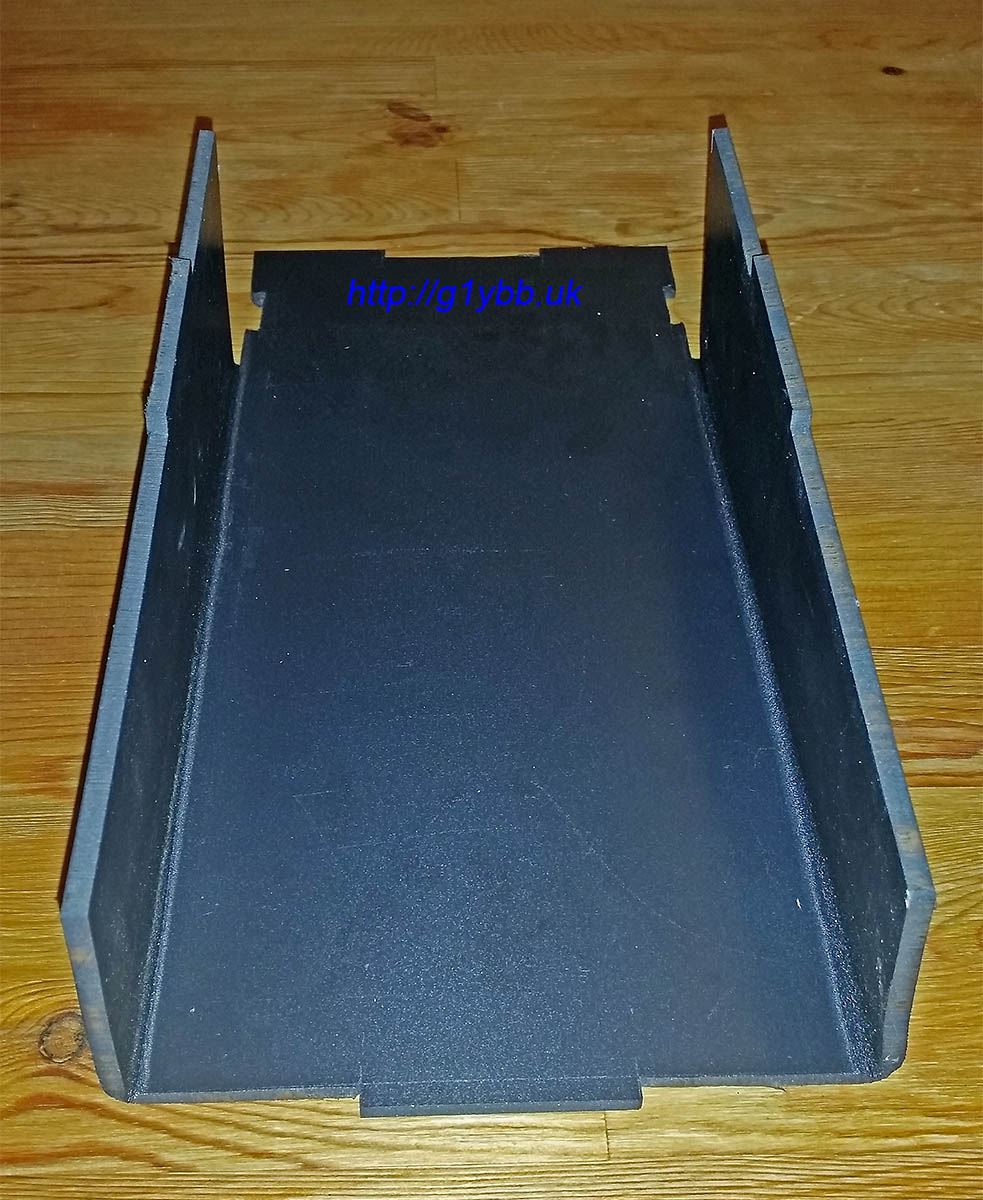
Next I took it up to my brother and got it cut out on a bandsaw then scraped all the sharp edges off with a steel ruler (my favourite deburring tool). Next job was to fold up the sides. My brother already made me a piece of MDF to match the width of the FT-857D to fold it around. I used a heat gun to soften the foamex and fold it up, holding in shape till cooled with a glass worktop saver:

Both sides folded up:
Next drill some holes in the sides to mate with the mobile mount holes on the FT-857D. The rear extension will protect the DC input filter and the front will carry the microphone:

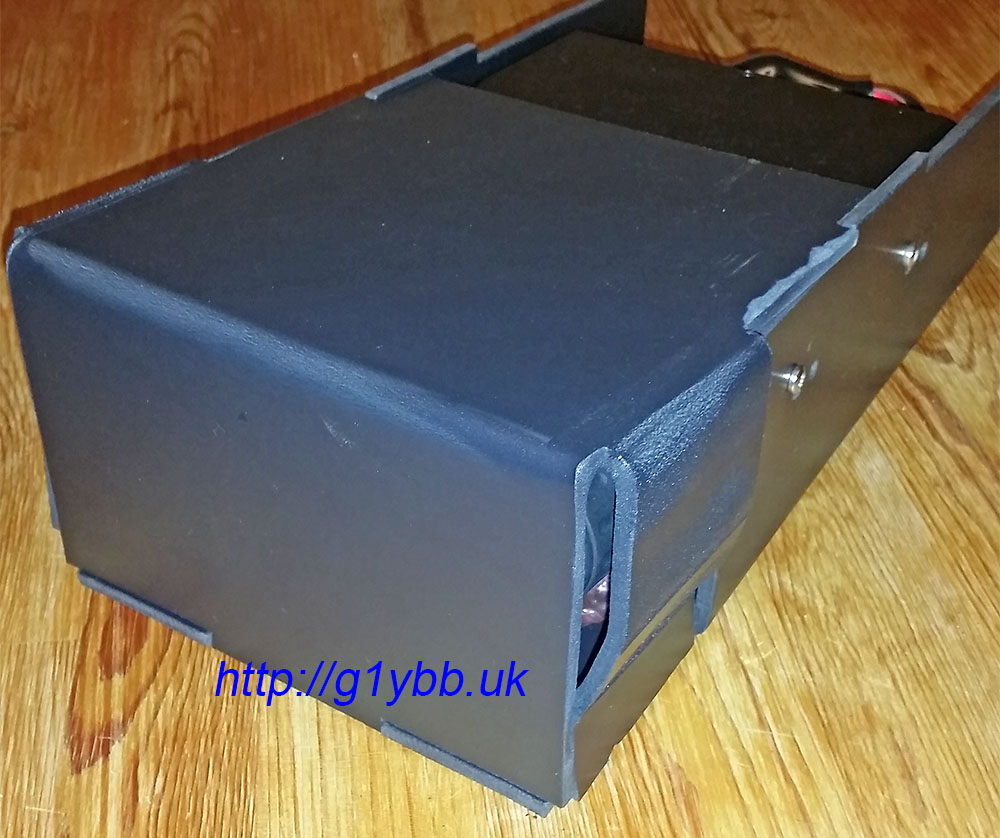
The sides are higher than the radio for the lid to clear the band Up Down buttons when fitted. Unfortunately the foamex panels I have available were not big enough for the lid as it has flaps on four sides making it take up more real estate. So I decided to make it in two halves and cement them together. The front half will be the more complicated one as it has to go around the tuning knob bulge so I started with that half:
The folding up of this part was more complex with staggered shapes but the length of the folds were shorter so at least it was a bit easier. It took a little reheating to get the shapes to sit exactly where they needed to be so the cosmetic appearance was not as good as I would like but mechanically the material still seemed structurally sound:
As the rear half of the cover was simpler I decided to cut it out with a knife rather than take it up to my brother to cut it with a band saw. It was straightforward enough just a bit heavy on one hand and shoulder:
And folded up and glued to the front half:

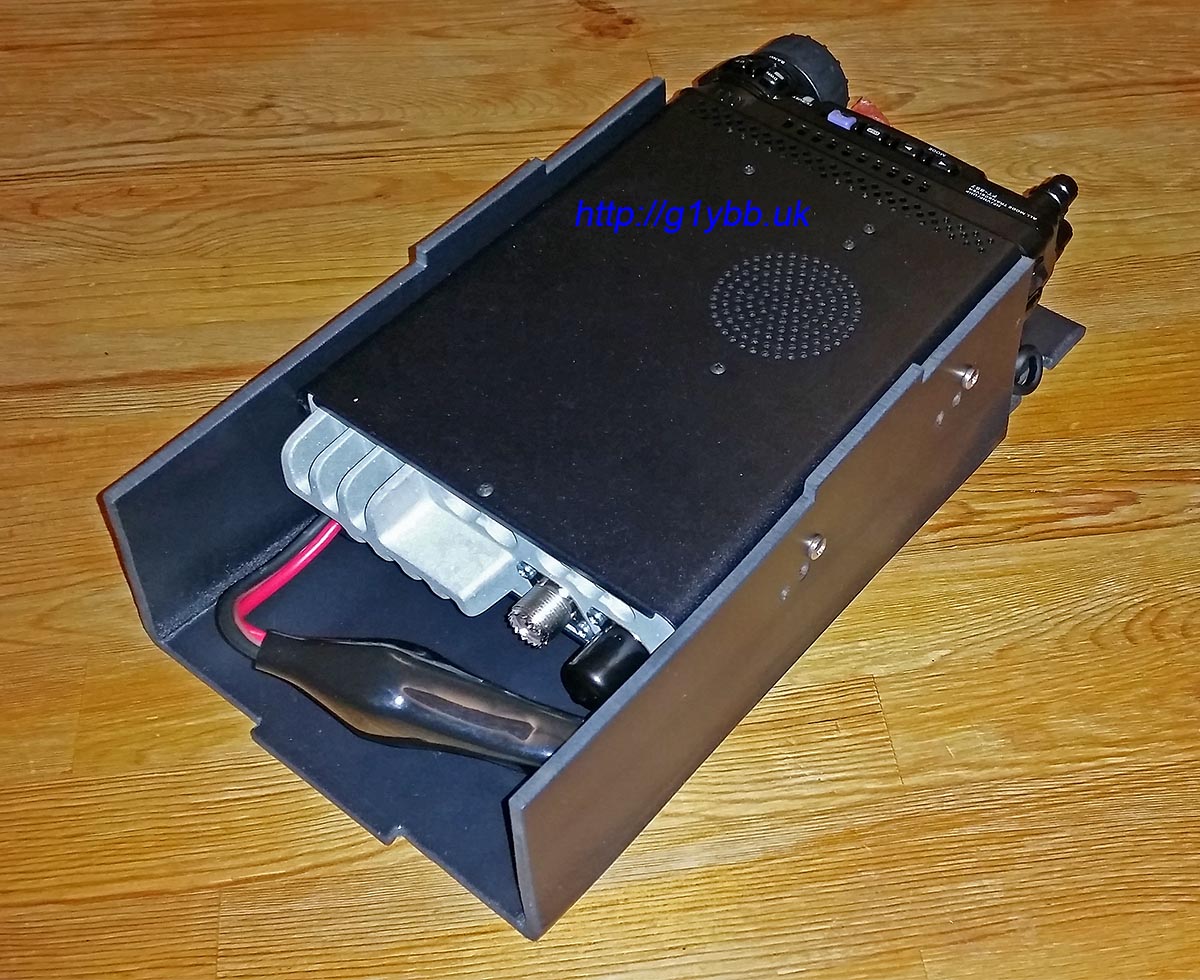
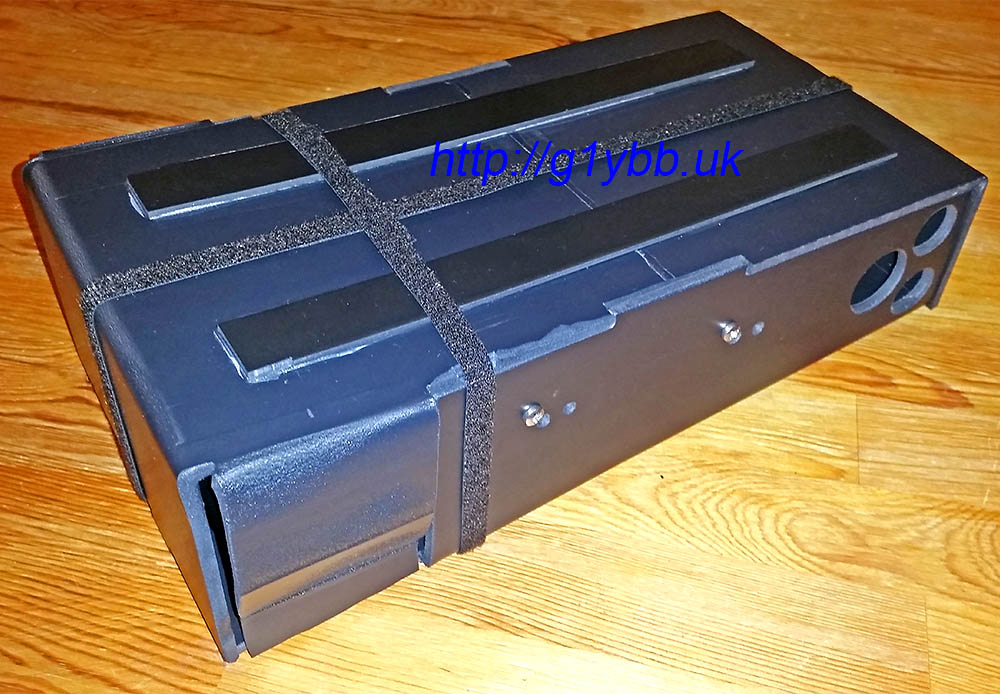
The join felt a little weak to be so I decided to glue some strips of thinner foamex along the top to strengthen it, and also make it a feature I could take advantage of. I could stand the base on the cover when operating to raise the operatin heaight and angle up and use the strengthen strips to locate the base so it didn’t slide or get knocked off. I added feet to the base to locate on the strips and finally drilled some airflow (and lightening) holes either side of the PA heat sink and along the base to recover some of the added weight from the strips. The video below shows the strips and feet in action. I decided to ditch the bubblewrap bag for the microphone and utilise the button for mic clips and drill a hole in the base for that to locate in and secure the mic in position with a small piece of foam. Finally two 10mm strips of Velcro keep the lid securely on and are located in small notches to stop the Velcro from moving in transit:
I’m looking forward to getting out and using this soon. The only cost to me was the Velcro from eBay and the glue, the foamex I am lucky that a friend had some to give me. I think the 540grams extra weight is worth the piece of mind knowing the radio should be safe and it takes up very little extra room than the radio itself and a lot less room than the current bag I have used to transport the radio. It’s not as cosmetically attractive as I would ideally like but this is the first time I have used this foamex and formed it with heat.
Finally here is a video showing how it looks in action and how it goes together for use and transport.
Edit: To assist others who may want to make their own version, I have added below the drawings I worked from to mark out and cut the two halves:
Base Drawing
Top Drawing