As I was looking to resume my contesting activities but SOTA style backpacking (for the RSGB backpackers contests) I needed a lightweight portable mast that is strong enough to stand up to some Welsh Mountain top wind and hold up a decent yagi. I looked around the Internet to see if anything was available already but nothing seemed to fit the bill for me. So I decided I would make one myself.
The biggest problem I had was finding tubing that was available and would telescope inside each other. The UK still mostly stocks imperial sized tubes, and each size seemed to be a fraction of a mm too big to fit in the next size up. I did find some metric tubes with a 2mm wall thickness in 5mm diameter step sizes. The sizes were 30mm, 25mm and 20mm. I would have preferred the smallest to be a little bigger like 25mm but I figured it would be OK well guyed.
I wanted the mast to be telescopically erected like I do with the SOTA fishing pole mast so I worked out how high I could reach and modelled up the mast in 3D CAD to find out what the end result would be and what length tubes to order. Also so I knew what lengths and total length of guy rope to buy. Also by applying correct materials to each item and modelling them exactly it enables me to know with pretty good accuracy what I am letting myself in for weight wise for the entire system:
I decided to make the top section longer, both to get a little extra reach and to have a little extra to leave the antenna fittings permanently attached to reduce assembly time. It’s a little long to carry at 2.5metres but should be OK:

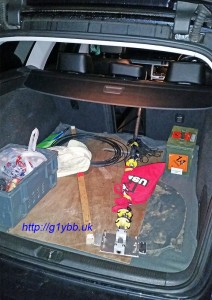
It does fit inside my Passat estate very nicely though:
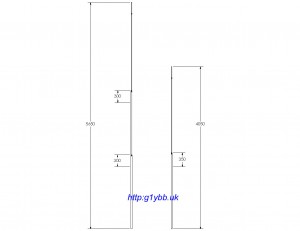
Using these lengths and with 300mm of pole overlap a maximum height of 5.65m is achievable. Removing the thickest section enables me to keep it to the 4m limit nicely for backpackers and save about 1kg of weight:
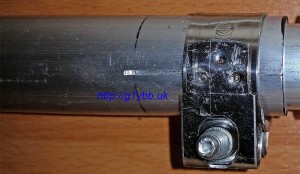
To clamp each section I planned to slit the ends in the normal way and use jubilee clips (worm drive hose clamps). Talking to a friend he suggested a different type of hose clamp with a bolt so it would ultimately be stronger. eBay came up trumps and I ordered three clamps like this:
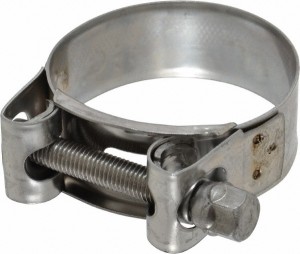
Then I just had to cut slits for the clamps to compress the tube down. The difference in diameters are 1mm so I needed to lose at least 3.141mm off the outer tube. Four 1mm hacksaw cuts did the job. The heavy duty hose clamps are nice and wide (20mm) which helps increase the clamping area:
I wanted 3 sets of guys for the full height mast, one at the top of each section. I would be using 4 guys rather than 3 as it suited my expected erection method. No commercially available guy rings I could find would fit so I discussed options with my friend and he offered to injection mould me some from a very strong and light plastic which would be perfect. I modelled that up and sent him the design: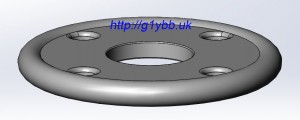
More details and load test of the guy ring are here. As two rings would be on the 20mm section it would be moulded to fit that and I would enlarge the bore for the next section down with a step drill.
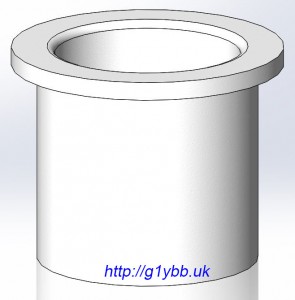
To sit the guy rings nicely I added some nylon bushes to hold them above and clear of the hose clamps and also to enable practically friction free rotation. I was able to find online an existing bush to fit the 25mm pole but not the 20mm pole. Luckily I have another friend who works in a tool room who turned me up what I needed in some nylon.
Commercially available bush, 25.5mm bore for mid section:
Custom made bush for 20mm top section:
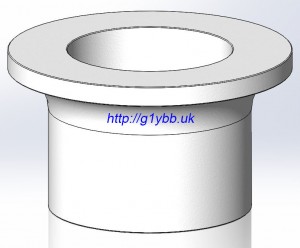
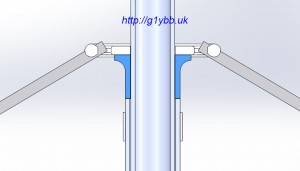
Section view of bush in use (bush in blue). The idea of the bushes are they lift the guy ring away from the hose clamps to reduce risk of guy ropes snagging on the clamp, add a low friction intermediate interface between the aluminium tube top or the hose clamp and offer a flat surface for the ring to seat on to reduce the chances of the ring jamming diagonally across the pole:
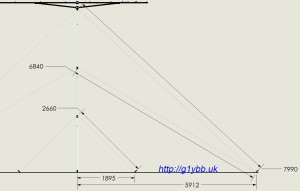
For the guys themselves I looked at various ropes and cords available and decided on 550lb paracord. It’s light and strong and not too expensive. From the 3D model I was able to buy the right amount and predict where to place them allowing me to scope out my intended site to make sure I had room to set the antenna system up:
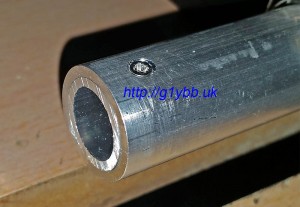
Whilst things were coming together I decided to calculate the wind loading on the 9 element DK7ZB I was also building. The loading on the 20mm square boom alone was quite frightening at typical Welsh mountain top wind speeds and as I am using trusses to support the boom that increases the boom height above the guy point and I was concerned about the small diameter top section. So I got a short length of 5/8″ T6 alloy (the whole mast is T6) that was a perfect fit in the 20mm tube so added that to the top section to span a decent amount either side of the guy point. An M2 countersunk screw was used to just hold it in position:
Close up of the bushes and guy rings before fitting the guys, which stay with the mast to make deployment faster:

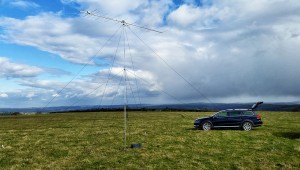
First trial erection went completely to plan, set up on my own.
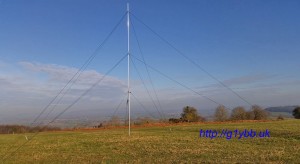
The finished weight of the mast INCLUDING guy rings AND guy ropes is about 3.5kg. It’s actually currently weighing 3.7kg but that includes some aluminium blocks and plates, and stainless steel bolts, that are part of my yagi mount so not actually part of the mast. It doesn’t include the guy pegs and hammer of course. However for backpackers contests I can save nearly another 1kg by leaving the 30mm section behind and still achieve the 4m height limit. For the guy pegs I bought some 25x25x2mm aluminium extruded angle and cut them into 50cm stakes. The 4 stakes weight 387grams for all four including a bit of mud still on them.
And with a 144MHz yagi:
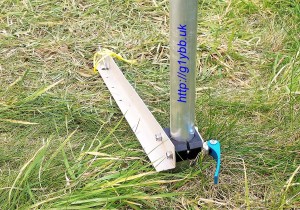
In order to stop it spinning in the wind as I was using Armstrong Rotator method, I came up with a simple clamping system using some 3D printed half round pressure clamps and a bicycle quick release to lock/unlock it. Arm fixed in place to the ground with a simple guy peg:
