For this year’s RSGB Backpackers series we were unable to take part in the first session due to my being overseas on a very important assignment, namely my YL’s special birthday. So we start this year’s series 1/5th behind already!
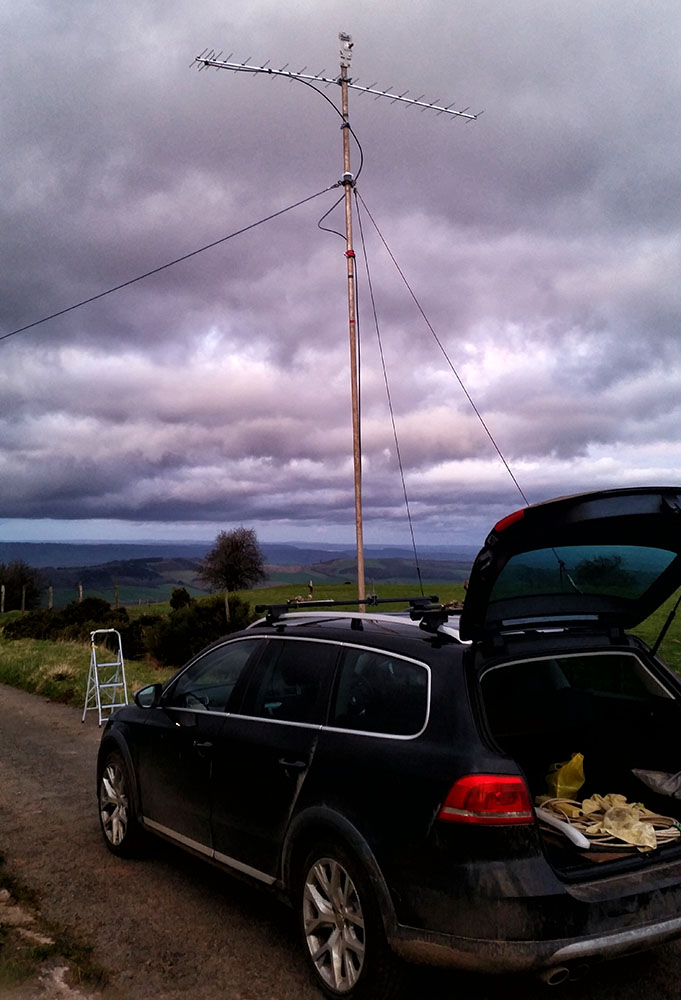
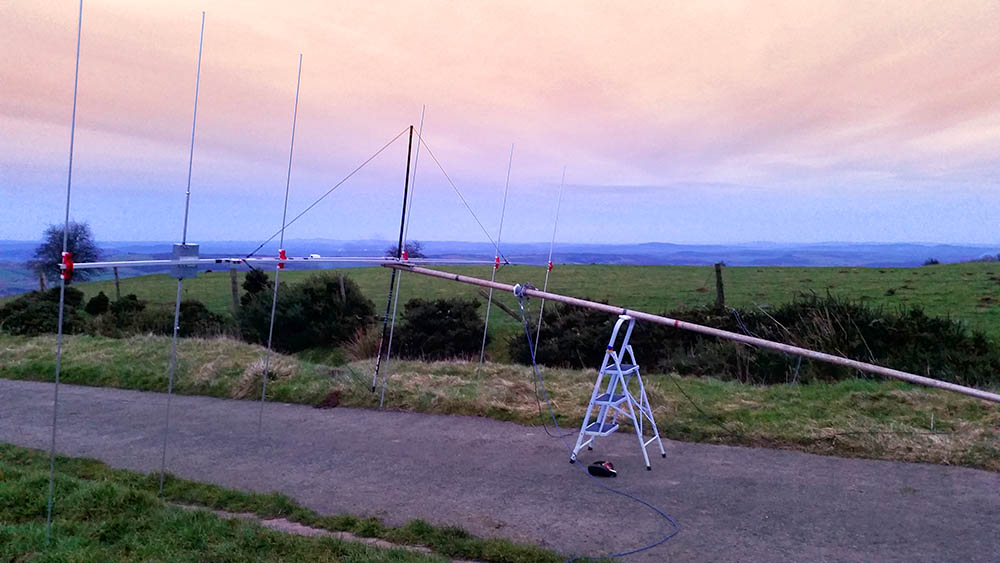
Well what a day this was! Leaving town the tops of the trees were moving gently in the breeze. Arriving at the bottom of the hike up the mountain, again trees moving gently in the breeze. However at the top of the mountain at 800m which is very exposed a full blown gale was blowing.
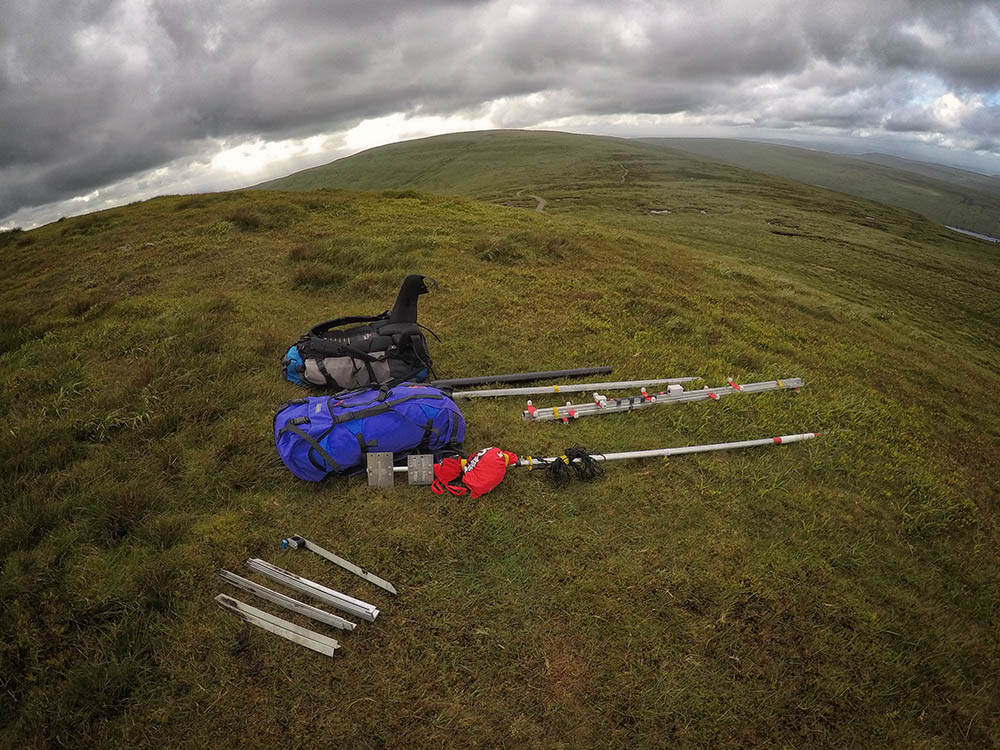
This was going to be interesting. We’ve had a gale blow up during the contest up there but never really set up in bad wind. This made it take much longer than it normally would and turned out we were setting up for over 2 hours! We also had an operational cock-up setting up the tent which resulted in both poles of my 4 season mountaineering tent getting bent. These cost me £100 to replace! (Once they arrive I will send off the bent ones for repair so at least I have spares.)
Paul G1YFC brought his GoPro and did this cool video of the day.
Radio wise we had a great day. Good activity and great collection of UK squares. Activity in the PW only part of the contest was pretty slow. Only 7 QSOs in last hour, but one was a new square so worth sticking it out. We always stick it out right to the bitter end. Very often we have had a little flurry and some multipliers at the end.
The wind continued to batter us the entire time we were up there and with the bend in the poles the tent didn’t perform as it should so I had to sit in the corner of the tent to stop the pole pushing in with my shoulder. So for 7 hours I had the tent pole bashing me on the head and shoulder! Worth it though as the take off is fantastic.
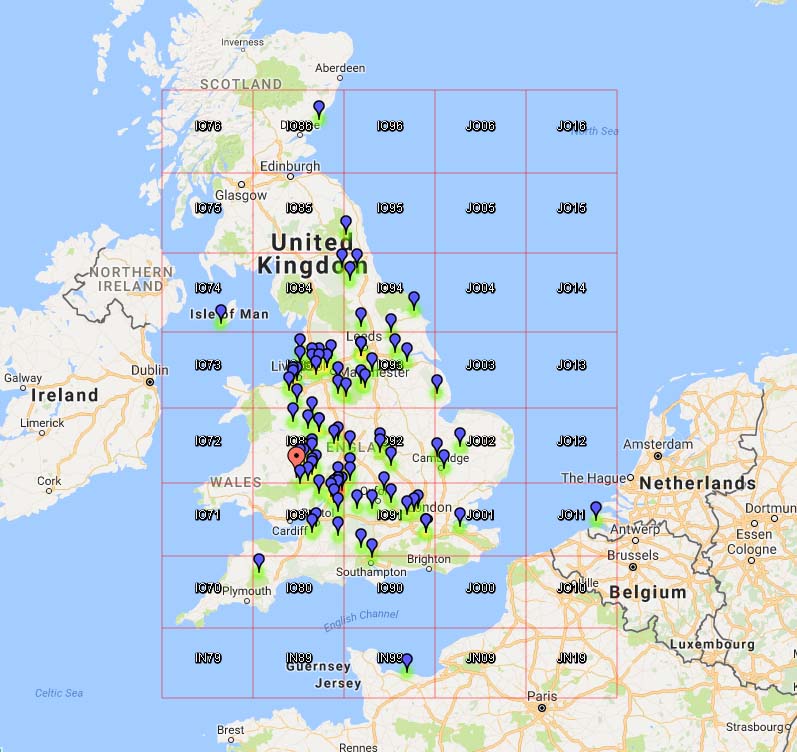
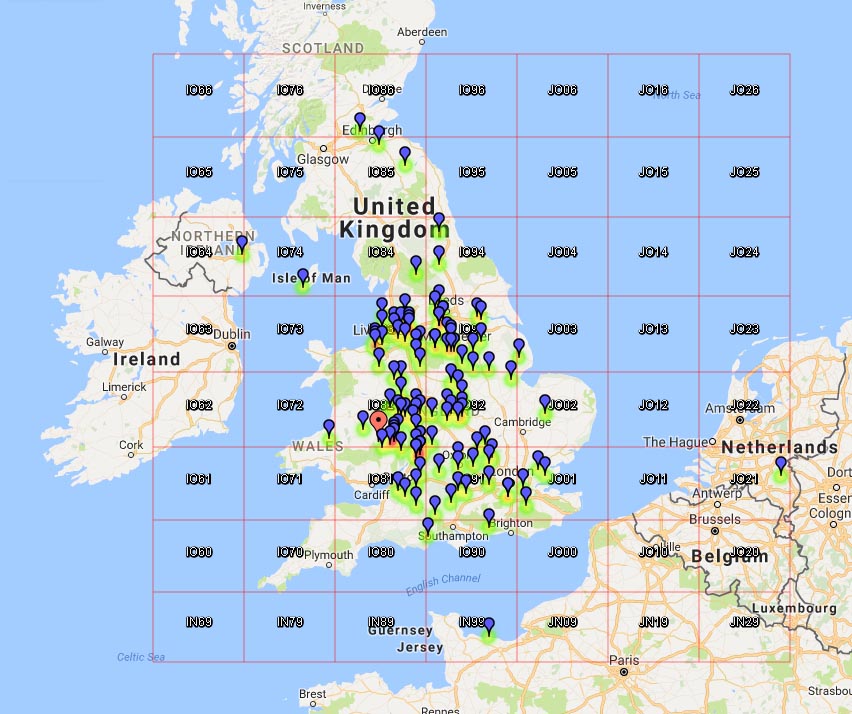
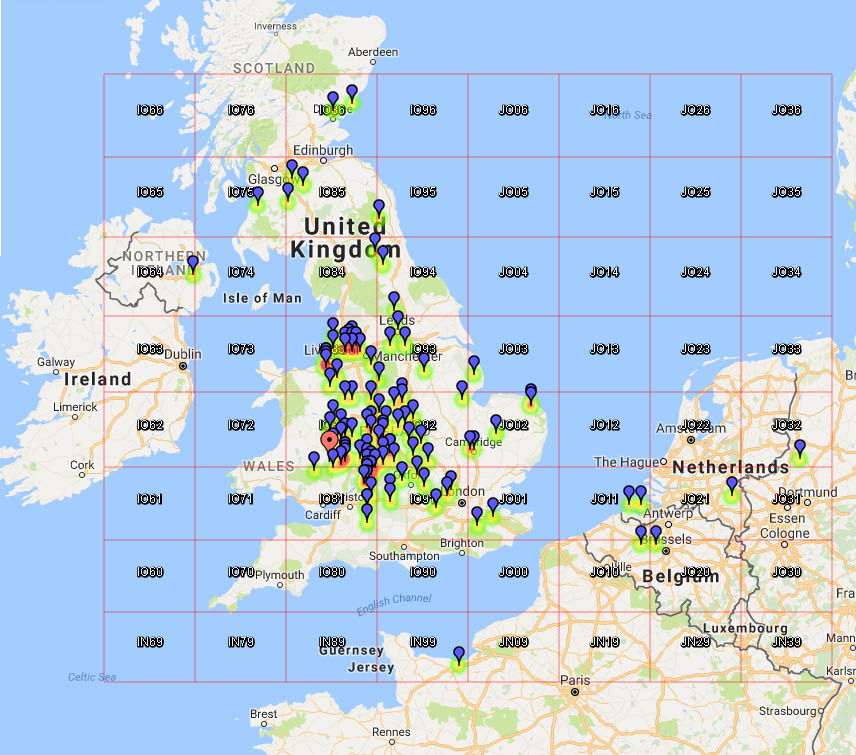
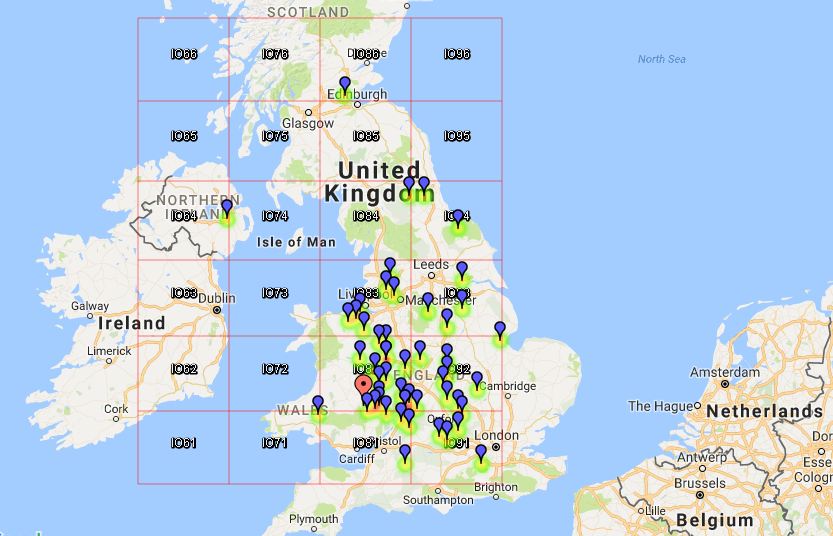
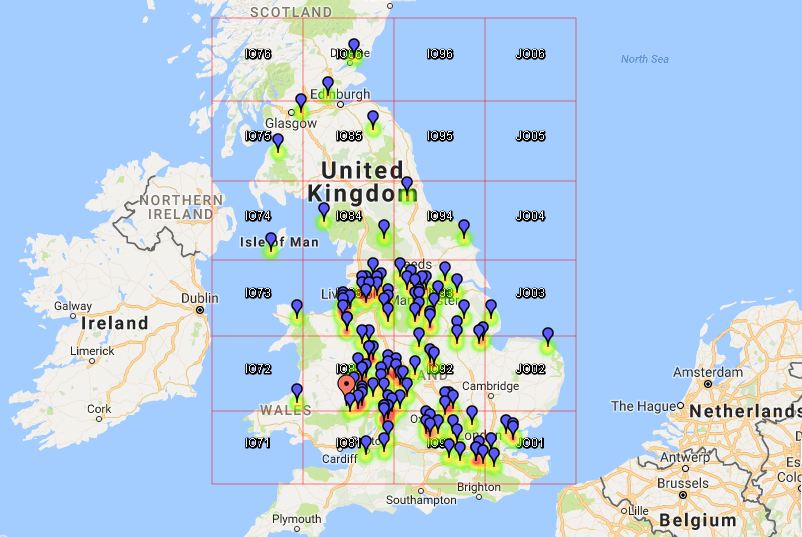
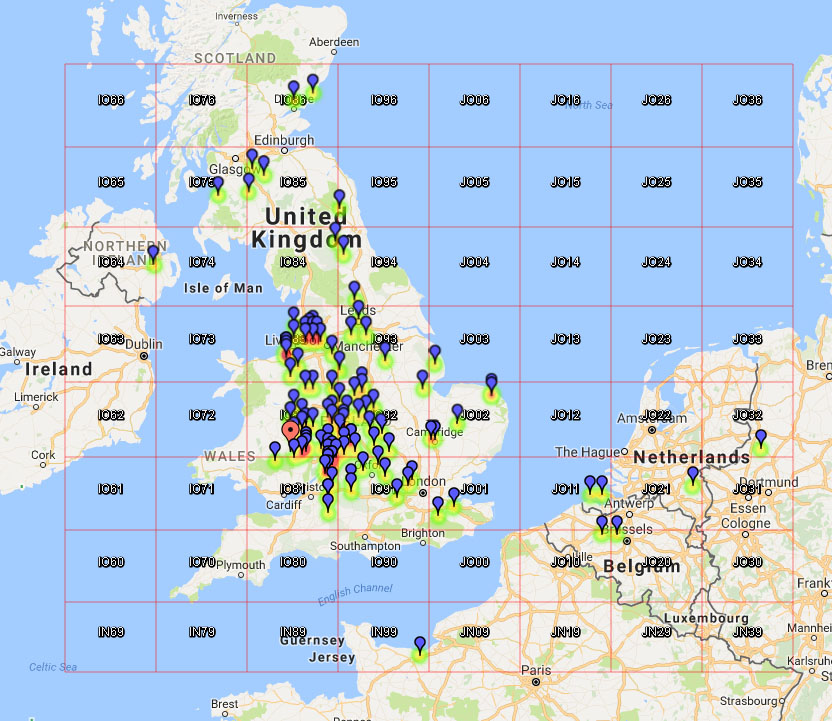
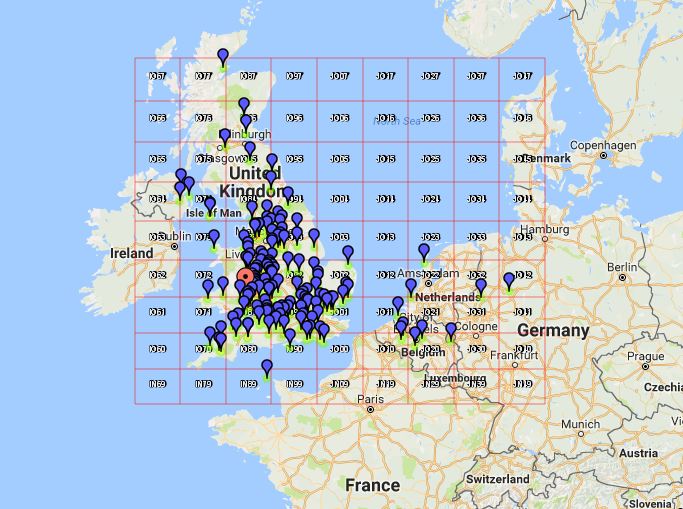
QSO Map:
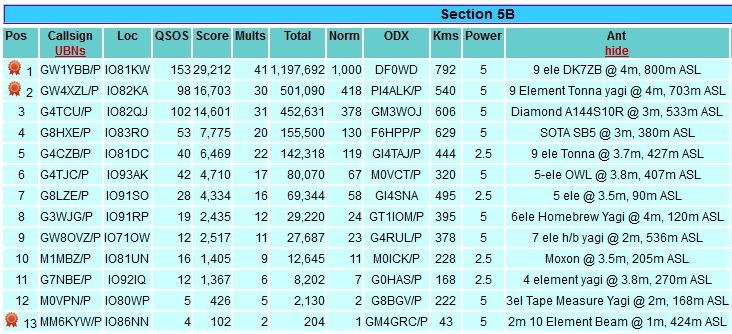
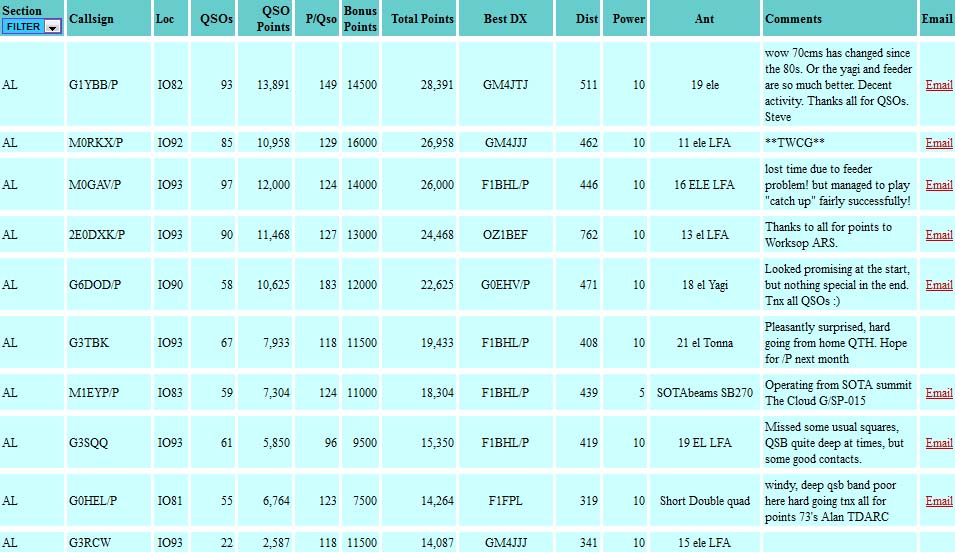
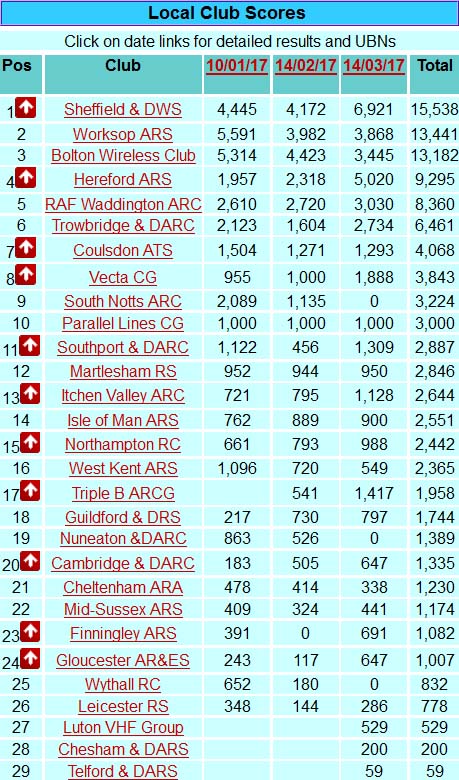
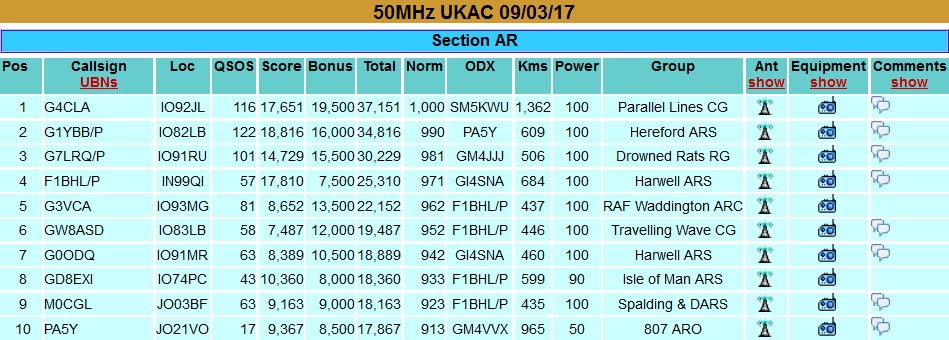
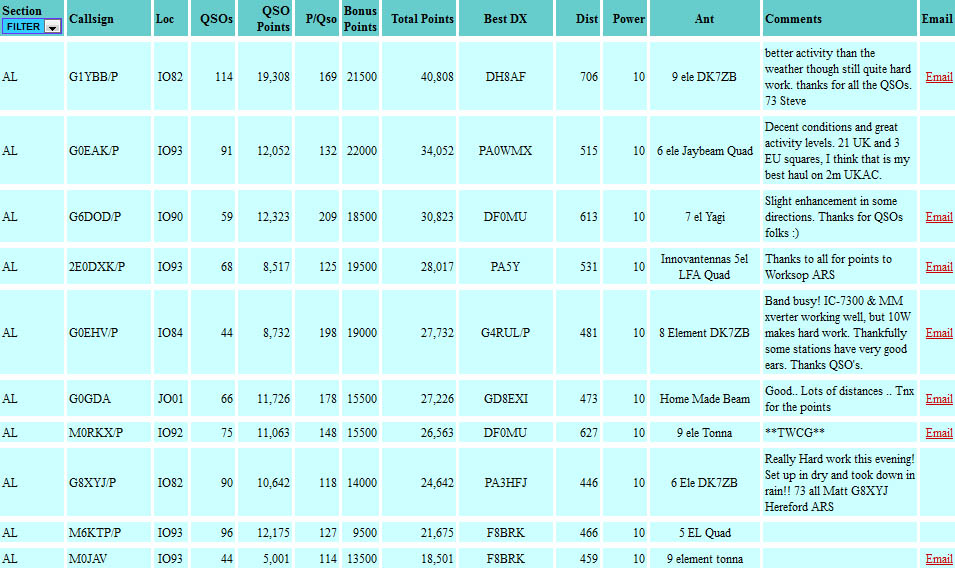
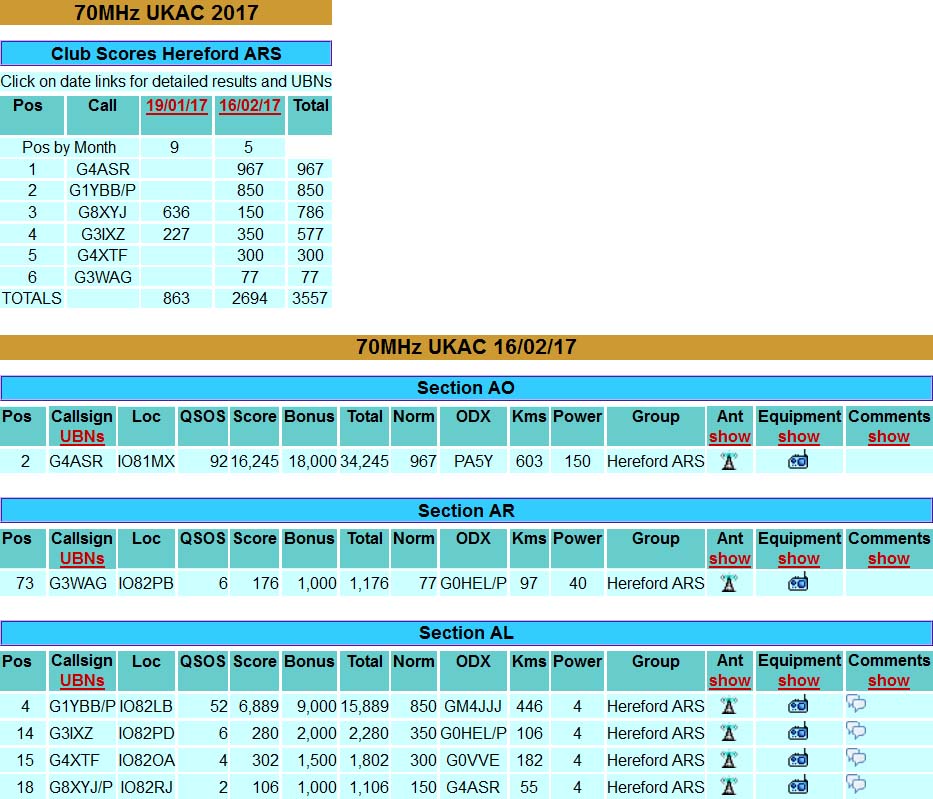
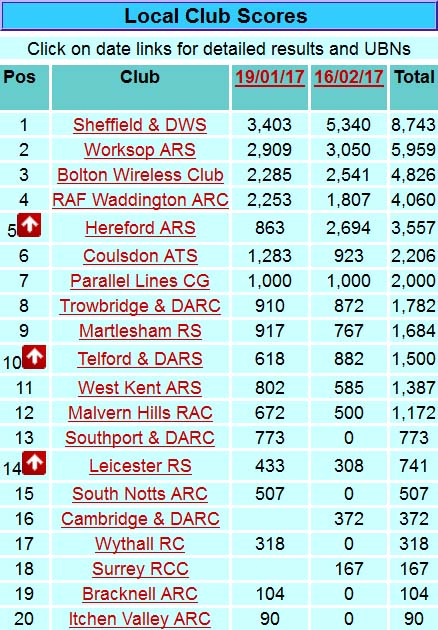
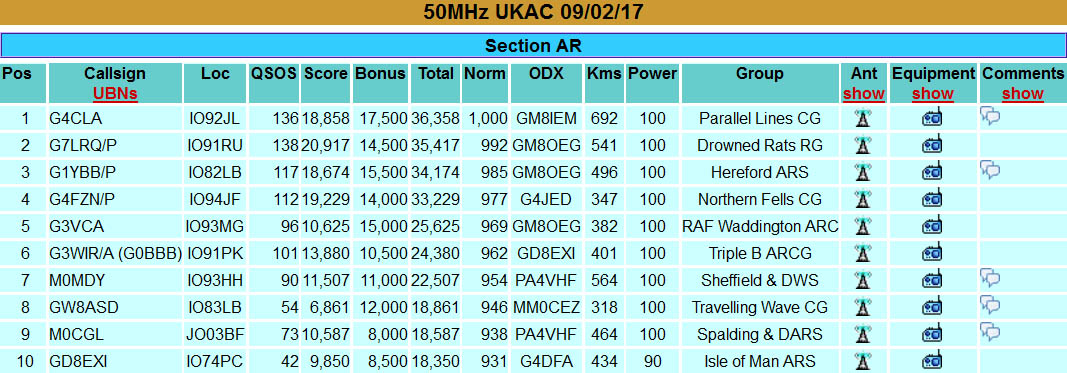
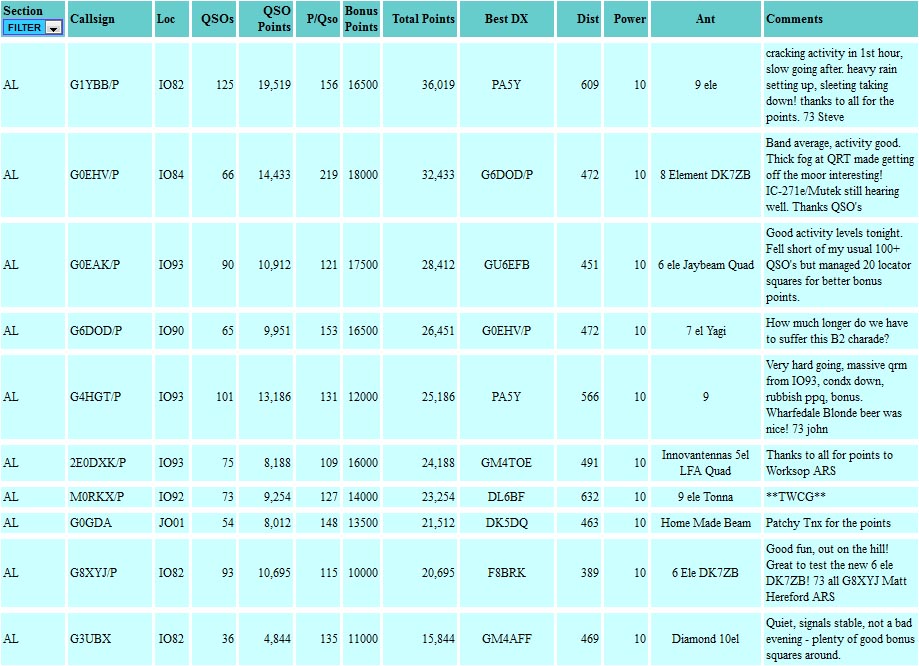
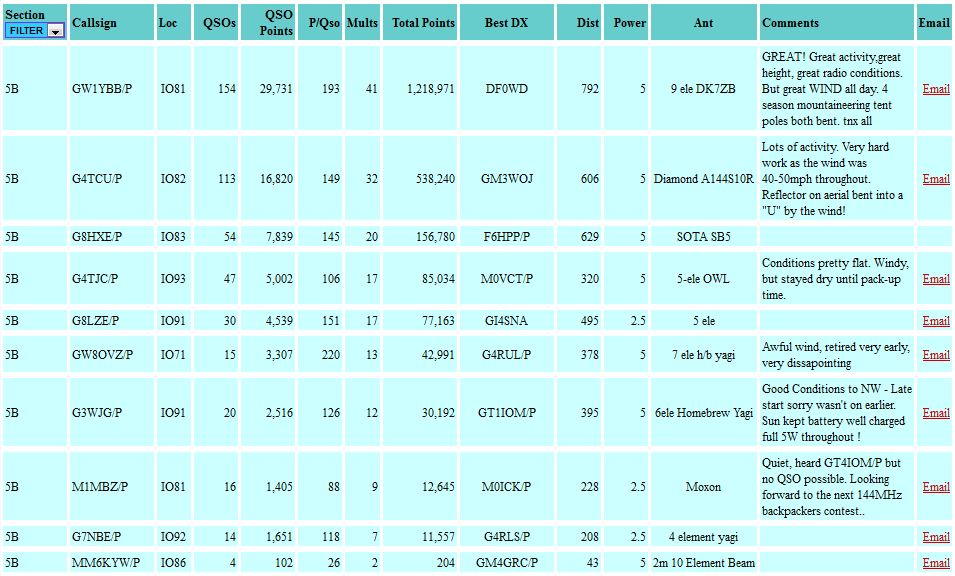
Claimed Scores (10 from 13 entries):
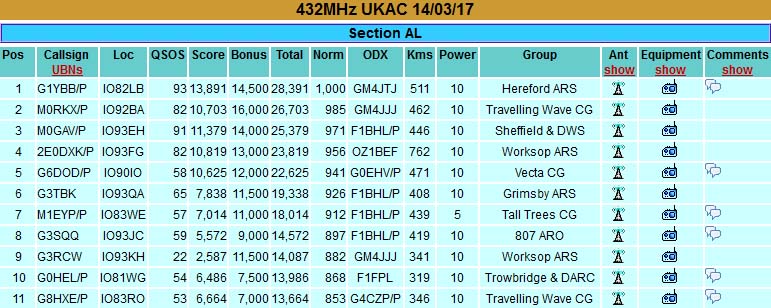
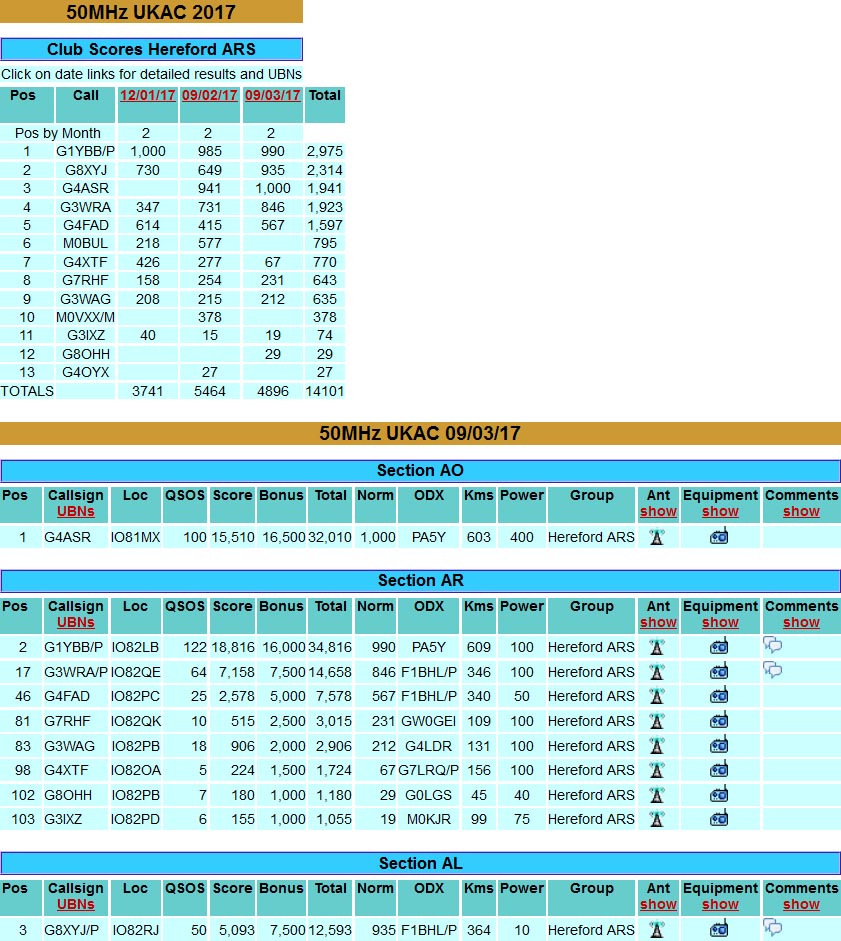
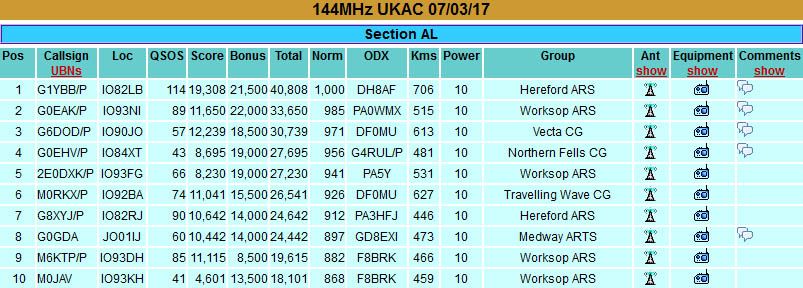
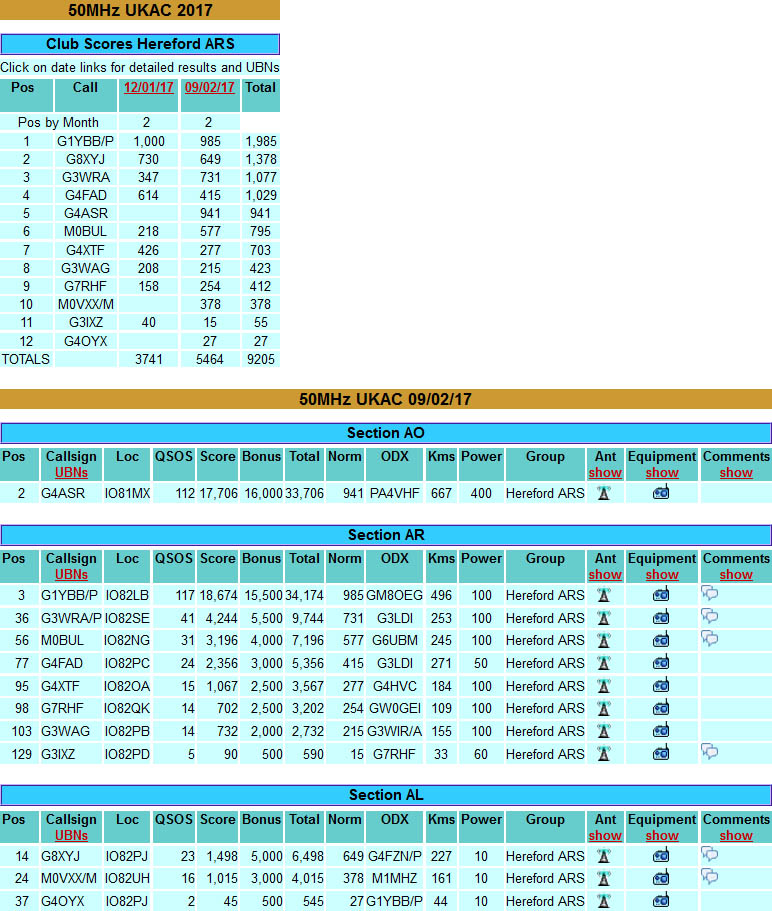
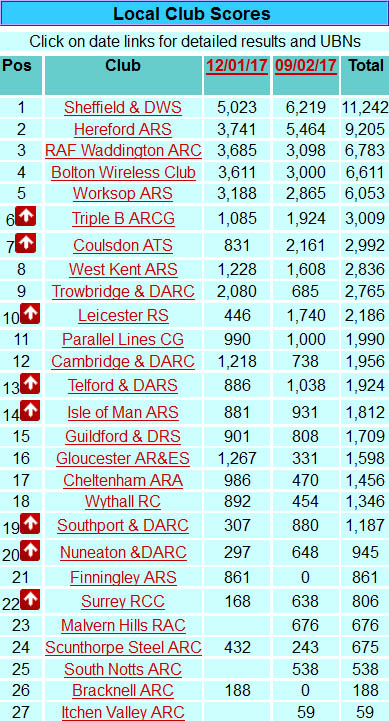
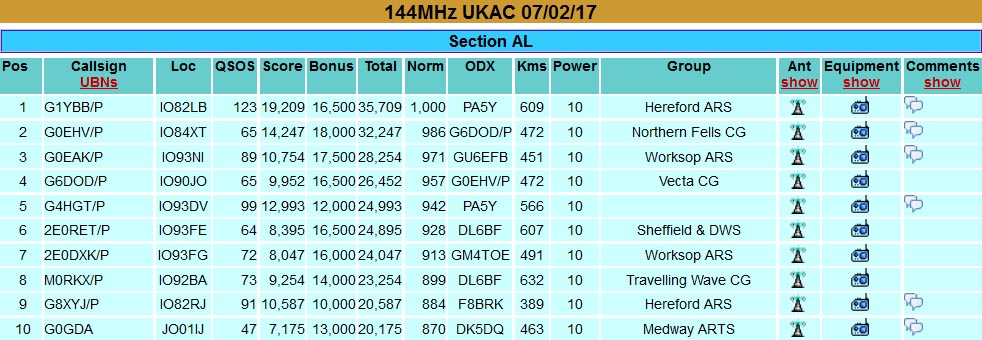
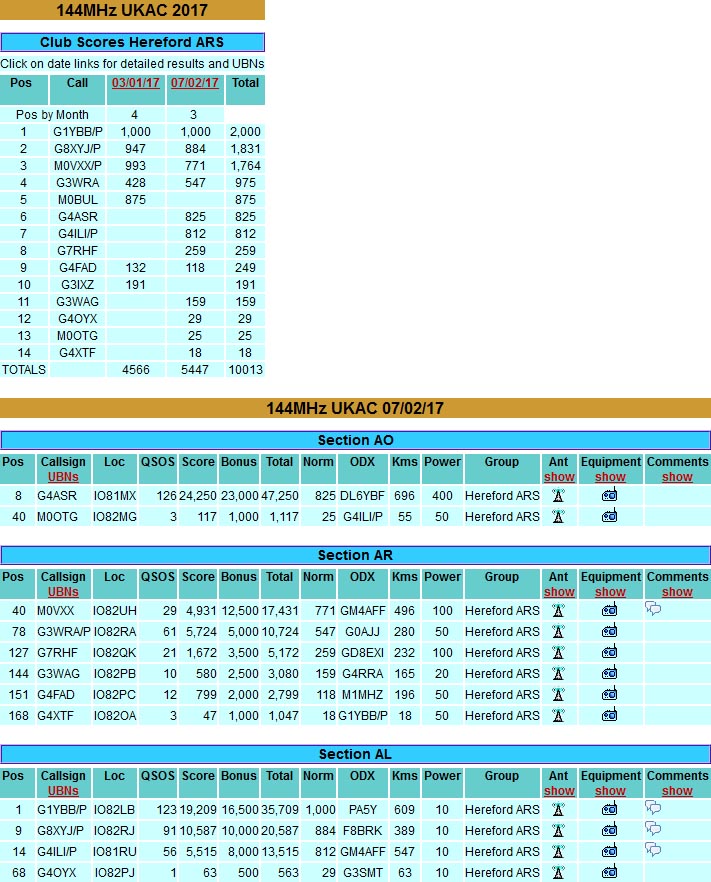
Results: