Portable and alternate callsigns on LoTW

In order for your QSOs worked when not at home to appear correctly on LoTW (ARRL’s Logbook of the World) you need to add the portable and alternative callsigns to your account.
Assuming you have your main account set to your normal callsign (eg G1YBB), to add a portable callsign in your home country (eg G1YBB/P), or an overseas country where you add a prefix or suffix for the country you are working from (eg G1YBB/VP2) is quite straight forward. The process described below may not be the only way to do this but it works for me, and keeps things organised.

First, once you have your initial callsign certificate installed in TQSL you can then request certificates for your further calls, like GM1YBB/P.
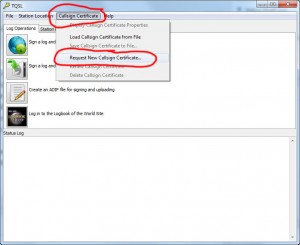
Got to “Callsign Certificate” then “Request New Callsign Certificate…”:
LoTW new certificate start
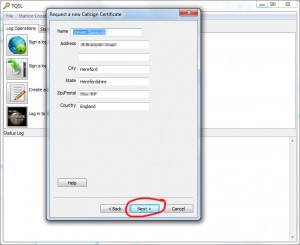
In the next window fill in the desired callsign and DXCC country and click “Next”:
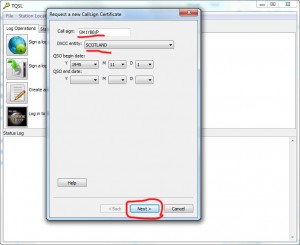
LoTW new certificate next
Hit “Next” again:
LoTW new certificate next again
Enter an email to receive your new certificate and hit “Next” again:
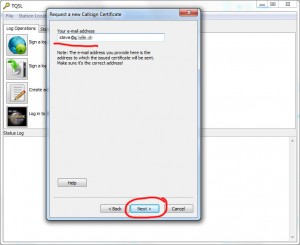
LoTW new certificate email
At the next widow either enter a password for the certificate or don’t enter anything. Then hit “Next”:
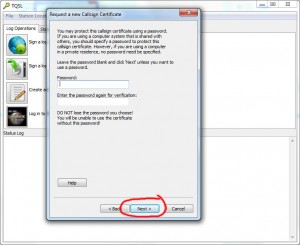
LoTW new certificate password
Now sign the new request with your base callsign and click “Finish”:
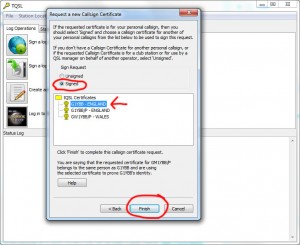
LoTW new certificate sign
And finally click “Yes” to send the New Certificate Request:
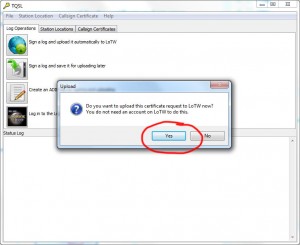
LoTW new certificate send
Repeat this process for all callsigns you plan to use, and when the certificate arrives install it.
You should then have a small list of callsign certificates. (As I have just this second applied for the GM1YBB/P callsign it is not yet available):
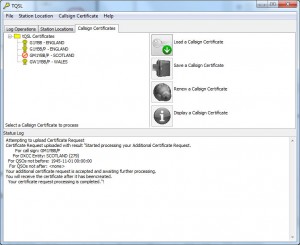
LoTW certificate list
Now we need to add the locations that the logging software can use to send the QSOs to the correct callsign log.
For this we head over to the “Station Locations” tab. Here you can see ones I have already used:
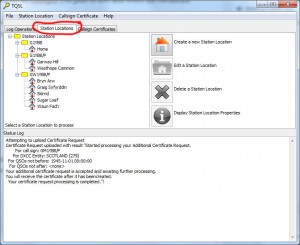
LoTW station locations
Click the “Create a new Station Location” button (house icon), use the callsign pulldown to choose the correct callsign and enter the location details and click “Next”:
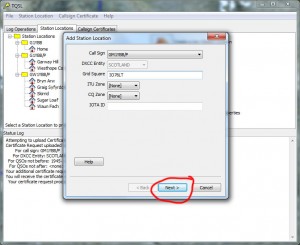
LoTW new station location
At the next screen you need to name the Station location. This is the name your logging software will need to use to load the QSOs with the correct information. Click “Finish” to complete:
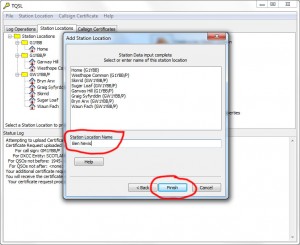
LoTW new station name
And now we have a new location in our available Station Locations:
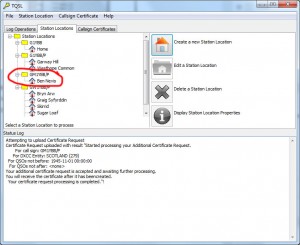
LoTW new station list
We will repeat this process for each NEW portable spot we operate from.

Now we have that all set up, it’s a simple case of using what we have done in our logging software. In Log4OM each configuration you have set up will have it’s own LoTW setting although some are common. Setting up multiple configurations for Log4OM is shown here.

The user ID is your main callsign and the password is the password you use to log in to the LoTW site. That is used for ALL variations of your station locations and callsigns. The unique part that identifies where your logging software uploads the QSOs is the Station ID, which is the Station Name given to the details in TQSL above. You will very likely (certainly in Log4OM) have to give the path to the ARRL LoTW TQSL installation on your PC too.
Here is the info entered into the Log4OM settings for my GW1YBB/P Waun Fach configuration:
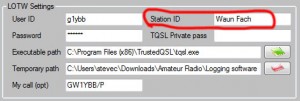
LoTW Log4OM
Repeat for your other location based configurations in Log4OM.

Setting up QRZ.COM
Setting up eQSL
Setting up HRDLOG
Setting up HamQTH
Setting up ClubLog
Setting up QRZCQ.COM
Setting up Log4OM
Portable and alternate callsigns on eQSL

In order for your QSOs worked when not at home to appear correctly on eQSL you need to add the portable and alternative callsigns to your account.
Assuming you have your main account set to your normal callsign (eg G1YBB), to add a portable callsign in your home country (eg G1YBB/P), or an overseas country where you add a prefix or suffix for the country you are working from (eg G1YBB/VP2) is quite straight forward.

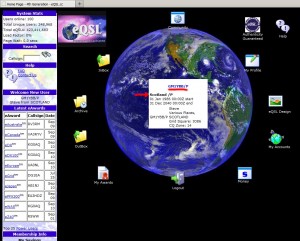
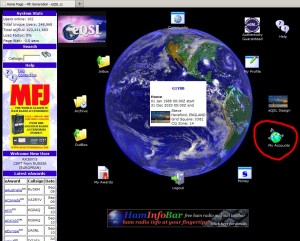
Go to “My Accounts”:
eQSL My accounts
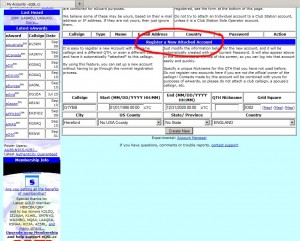
And scroll down to Register a New Attached Account:
eQSL register new account
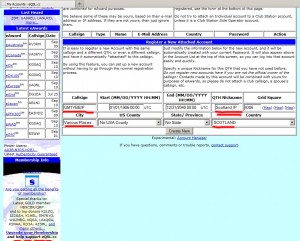
Now fill in your desired new call. I am going to add GM1YBB/P. Note the QTH Nickname is the crux of this stage. This is how your logging software will know the correct log to upload your QSOs to. Once done click

“Create New”:
eQSL create new
Once you click that it takes to to a page saying it will now log you in, but never seems to work for me, so I just go back directly to the home page and click on “My Accounts”:
eQSL My accounts
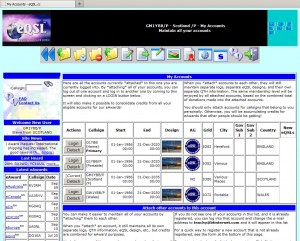
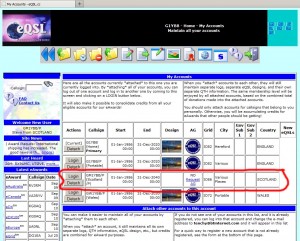
Now you can see the new GM1YBB/P account. (I now notice I have nicknamed it differently to the GW one which is annoying, but I might be able to edit that – I can and have since):
eQSL all my accounts
The all important nicknames are in the brackets: Home, Portable, Scotland /P, and Wales.
Click on the “login” button to go to that account(you don’t need to re-enter your password):
eQSL new account logged in
From there you can click “My Profile” etc and set up your account just like the base callsign account.
To add new accounts repeat the above process, ensuring nicknames are unique.

You can access all accounts in turn via the login buttons seen after clicking “My Accounts”:
eQSL all accounts logins
Now head over to your logging program and enter the details required for eQSL uploads. In Log4OM, as this is my GM1YBB/P info, then it must go in ALL and ONLY the GM1YBB/P configurations I have set up. This is why once I have set up my first Scottish portable configuration, I clone that for subsequent ones and edit the station details as shown here.

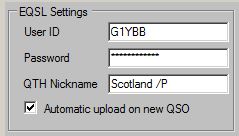
The user ID is your main callsign and the password is the password you use to log in. That is used for ALL variations of your callsigns. The unique part that identifies where your logging software uploads the QSOs is the nickname.
Here is the info entered into the Log4OM settings for my GM1YBB/P configuration:
eQSL Log4OM
Repeat the above steps for all your varied callsigns.

Setting up QRZ.COM
Setting up LoTW
Setting up HRDLOG
Setting up HamQTH
Setting up ClubLog
Setting up QRZCQ.COM
Setting up Log4OM
Portable and alternate callsigns on QRZ.COM

In order for your QSOs worked when not at home to appear correctly on QRZ.COM you need to add the portable and alternative callsigns to your QRZ.COM account.

Assuming you have your main account set to your normal callsign (eg G1YBB), to add a portable callsign in your home country (eg G1YBB/P), or an overseas country where you add a prefix or suffix for the country you are working from (eg G1YBB/VP2) is quite straight forward.
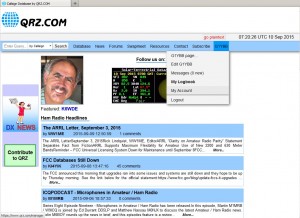
Go to “My Account”:
QRZ My account
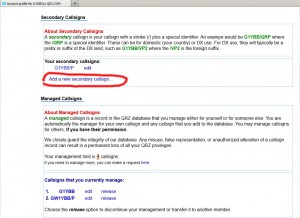
And scroll down to Secondary Callsigns and click “Add a new secondary callsign…”:
QRZ secondary callsigns
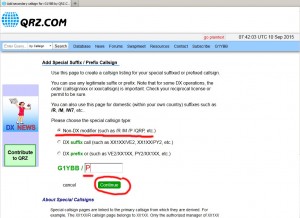
For portable it is already selected, add your P and click continue:
QRZ add portable
That is nice and easy. There is no mention of any limit to the number you can have of secondary callsigns.

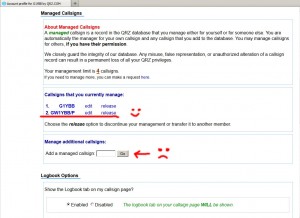
For UK calls, QRZ.COM does not seem set up for us crossing our internal borders. I could find no way at all to add GW1YBB/P. It needs to be added as a managed callsign and you need to get the QRZ.COM support staff to do this. They are pretty responsive though, time difference allowing. The settings page states there is a max of 4 ( so 3 extra after base callsign) but does also say you can request more. So for a SOTA activator who may require G, GW, GM, GI, GD, GU etc my feeling is the support staff will help you out there based on my experience with them.

In the image below there is a box for you to add a managed callsign, but it doesn’t work. (QRZ.COM know this)

The link to request the callsign to be added is here:
https://ssl.qrz.com/support

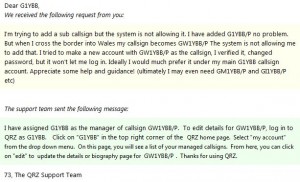
Here is what I sent, and the quick response once they woke up in the morning:
QRZ support response
Once that is done, it will appear in your managed callsigns list:
QRZ managed callsigns
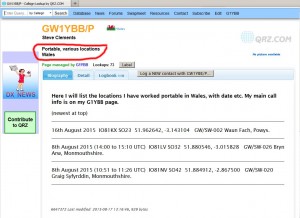
Clicking edit on your secondary or managed callsigns from the “My Accounts” allows you to set your profile info, and turn on the display of your log page in usual way. You can also edit your address details to make more sense for portable operations as I have done (circled in red below).
What I have decided to do is to add a line of text for each portable spot I operate from so stations working me always know where I have been. This is the page another station will see if they work GW1YBB/P and search for that in QRZ.COM:
QRZ GW1YBB portable info
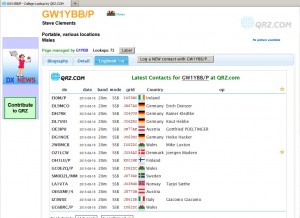
And on my log page is listed only QSOs I have made with the portable callsign (GW1YBB/P) in this instance:
QRZ GW1YBB portable log
So how do we get these contacts uploaded to the correct place?

This can vary depending on personal preference or whether you have a paid account on QRZ.COM.
Without a paid account your only (unless you want to type them in directly on QRZ.COM that is!) option is to upload ADIF exports from your logging program. With a paid account you can do it automatically as you enter them in programs like Log4OM.

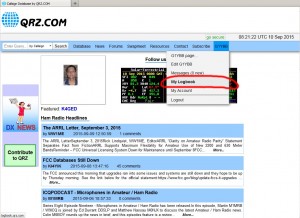
First you need to get into “My Logbook”:
QRZ my logbook
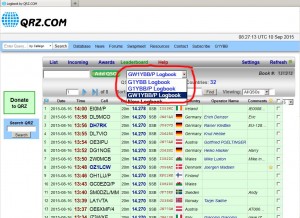
Here you can see I have 3 logbooks set up so far. I can select each to view the contacts from the circled pulldown, and should I want to, add QSOs one at a time using the Add QSO button:
QRZ 3 logbooks

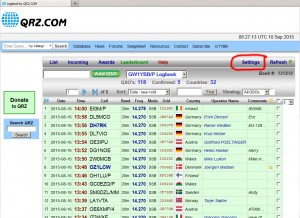
But we don’t want to do that most likely. So click the “Settings” button AFTER choosing the logbook you want to upload to:
QRZ logbook settings
Now we are getting to the business end.
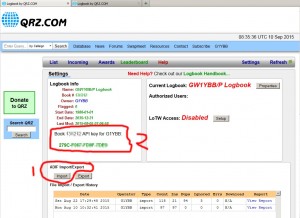
If you are wanting to upload an ADIF export from your logging software (containing ONLY QSOs for the callsign in question) use the button in red circle number 1. Simple enough.
If you are a paid up member and can get your QSOs uploaded automatically as you enter them by your logging software, then number 2 is what you need.
The API key for each log book is unique and that is how your logging program transmits the QSOs to the correct logbook:
QRZ upload and API key
So copy that API key to your clipboard and head over to your logging program and enter that for QRZ.COM uploads. In Log4OM, as this is my GW1YBB/P API key, then it must go in ALL and ONLY the GW1YBB/P configurations I have set up. This is why once I have set up my first Welsh portable configuration in Log4OM, I clone that for subsequent ones and edit the station details as shown here.
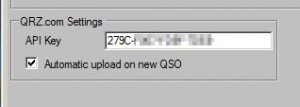
Here is the API key entered into the Log4OM settings:
QRZ Log4OM
Repeat the above steps for all your varied callsigns.

Setting up eQSL
Setting up LoTW
Setting up HRDLOG
Setting up HamQTH
Setting up ClubLog
Setting up QRZCQ.COM
Setting up Log4OM
Portable logging with Log4OM and online log sites
As a relative newbie to the world on online logging I have had a rapid learning curve to embrace all the new (to me) facets. I have written local logging programs back in the 80s to suit my needs but after such a long break things have moved on a great deal.

For general (non contest) logging I am using the very well featured Log4OM. This is free and has more than enough features for anyone’s needs. I won’t go through those but I will explain how I have it set up. This may not be the best way but it works well for me so I will share it.

If you only operate from one home location everything is dead simple. But if like me you operate portable and also cross the border then you need to make use of its features. I am using my plain G1YBB call at home, and G1YBB/P and GW1YBB/P just as much.
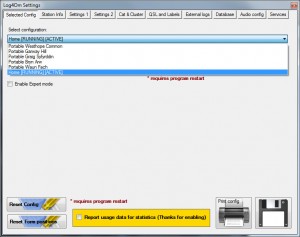
To deal with this I am using the configurations in the settings. I have one for home, and one for each portable location:
profiles
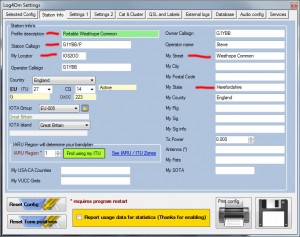
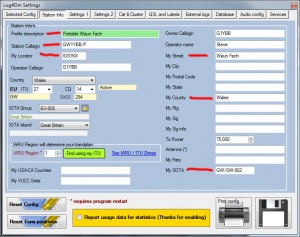
The first English portable configuration is a copy of the home location one. Once it is created I change the station details to suit the location, marked with the red lines:
1st portable station details
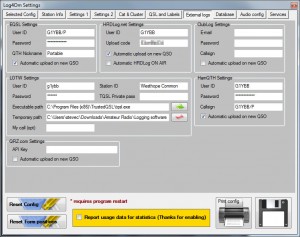
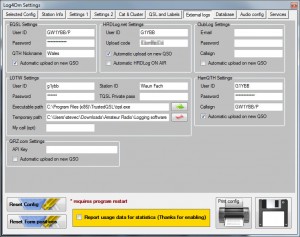
Next up is to set the External Logs settings. You need to set up the external log sites first but I will explain those on other pages, one per site. Each varies exactly how you deal with it but here are my settings for the Westhope Common G1YBB/P configuration:
external logs Westhope
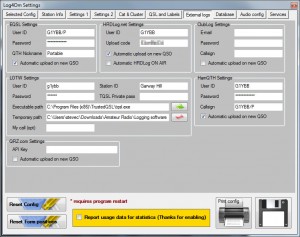
Here is another G1YBB/P location external logs settings to compare settings:
external logs Garway
Station details for a Welsh portable location, including SOTA identifier:
Welsh portable station details
And the corresponding external log settings:
external logs Waun Fach
All of the logged contacts for G1YBB, G1YBB/P, and GW1YBB/P go into the same single database file, but using the profiles as above they are filterable and identified, and will appear on the online sites against the correct callsign when set up as in the following links.
Setting up QRZ.COM
Setting up eQSL
Setting up LoTW
Setting up HRDLOG
Setting up HamQTH
Setting up ClubLog
Setting up QRZCQ.COM
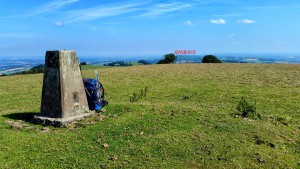
GW/SW-002 Waun Fach 16-8-15

Today I thought I would activate the highest point in the Black Mountains for a score of 8 points. I was going out for a walk with my girlfriend anyway so I roped her in to share the carrying of the weight as I am currently using my hefty Yaesu FT-897D.
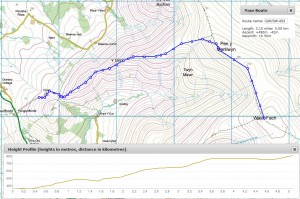
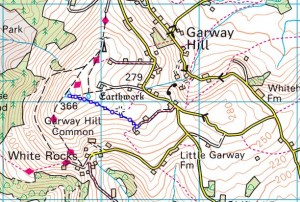
We parked at the end of a small lane above Pengenffordd to start the 3 mile walk. The ascent was 490 metres of slogging, but the route we chose is up a very nice ridge and we had fairly good visibility today. Thankfully it was fairly cloudy or we have been even more soaked in sweat by the time we got to Waun Fach.
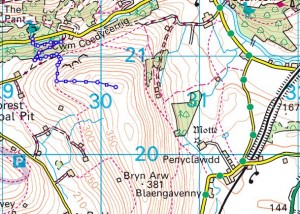
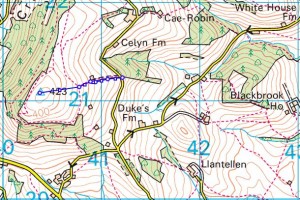
Waun Fach route
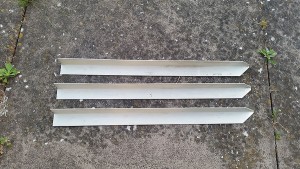
There has been a lot of path work done on Waun Fach recently and there is a nice dry stone path heading from Waun Fach towards Pen-Y-Gadiar. I didn’t actually recognise the summit as the peaty bowl seems to have gone. I did come prepared with some home made peat/snow stakes though and they were required. They are 535mm long, 1×1″ made from 1.5mm thick aluminium.
Soft ground stakes
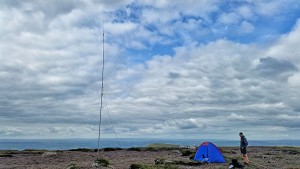
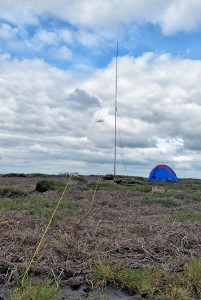
There was a small patch of decent ground inside the curves of the new path and we set up there. Something else new to me on Waun Fach were biting midges! I’d planned to use the beach shelter to operate from, but it became a midge shelter too!
Station setup
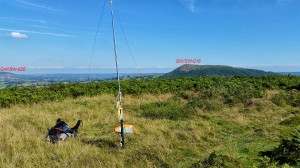
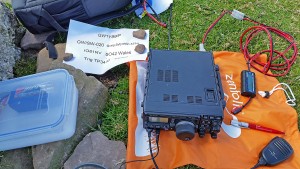
Waun Fach station
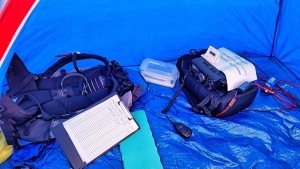
Inside the midge shelter
Midge shelter
Improvements from my first day’s activations last week are the use of my digital clock from my VHF contest kit for QSO times and printed log sheets and clipboard rather than a make-do notepad. Also peg hammer (although not needed here, pegs just pushed into the soft peat) reduced from 300 gram rubber mallet to 106 gram bright yellow plastic hammer for £1.

Unfortunately I couldn’t get any service on my 3 network when I wanted it (it did kick in now and then) so I was unable to spot myself even by SMS. Or even tell my mate what frequency I was on to spot me. So QSOs were slow. Instead of 2 or 3 a minute it was a QSO every 2 or 3 minutes at best.
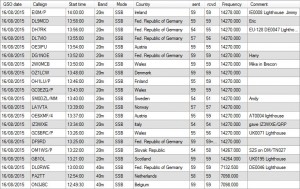
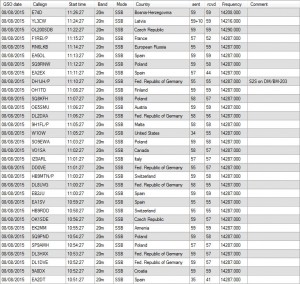
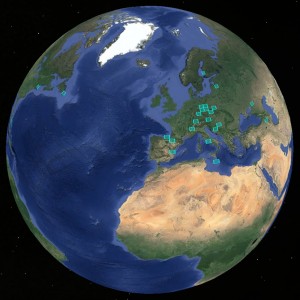
I did manage 21 QSOs with one Summit 2 Summit QSO. A lot of lighthouses were being activated today!
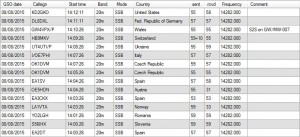
Waun Fach Log
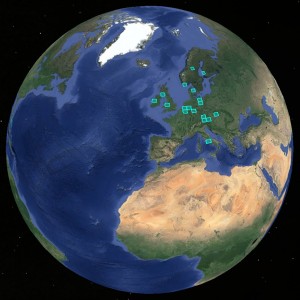
Squares Waun Fach

GW/SW-026 Bryn Arw 8-8-15

The last SOTA summit I am activating today on my first day out doing SOTA after G/WB-013 Garway Hill and GW/SW-020 Graig Syfyrddin.

This was a longer and steeper approach than the previous summits and also it was by now midday and the sun was beating down. I looked at where some activators had parked on Google Streeview but couldn’t really spot any space to park. So I decided to use a spot I know at the boardwalk start at SO293212. One good advantage is the car was left in tree cover and the woods were nice and shaded for the initial ascent. The route I took is 1.2 miles long and involves 201 metres of ascent.
Bryb Arw route
Didn’t take any pics really on this activation as I was a bit hot and bothered by but I did remember to take a quick pic halfway through taking the mast and antenna down.
The view is towards GW/SW-016 Ysgyryd Fawr with the beginnings of GW/SW-020 Graig Syfyrddin on the far left.
Bryn Arw view
Once set up I found clear frequency on 20m and spotted myself on SOTAwatch using Rucksack Radio Tool via the internet on the 3 network. Another nice pileup soon had more than enough QSOs to quality the summit.

When it had gone quiet I decided to try 40m again, so dropped the ends of the link dipole down to make the join to activate the 40m antenna. I eventually found a free frequency not too close to any splatter and spotted myself again. A couple of calls and the pileup was there again like magic. Lots of UK stations now as well as overseas of course. I did get some reports of an odd audio clipping which I am yet to diagnose. This is the first time I have used this rig on 40m so I hope it’s OK. Worryingly the other other alternative is I deep discharged my LifePo4 battery which is a worry. Something for me to look into.

Overall 65 QSOs and two more Summit to Summit contacts.
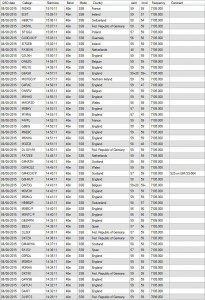
Bryn Arw 20m 8-8-15Bryn Arw 40m 8-8-15Squares Bryn Arw

GW/SW-020 Graig Syfyrddin 8-8-15

My second activated summit after G/WB-013 Garway Hill on a lovely Saturday morning.

There is a small space to park one car at SO412212 that is possible to get off the road enough and be clear of all nearby gate accesses. A fairly gentle but continuous slope takes you up the obvious track leading to the top field and trig point. I used to drive up here to the summit in a Mini 1000 many years ago. The walk up is only a half mile and 121 metres of ascent.

Craig Syfyrddin parking
A glorious sunny almost completely wind free summit visit. Perfect calm except for the swarms of flies. I actually tried putting my Goretex shell on because of them but as it’s black and I was hot anyway that lastest about 10 seconds.

The view back towards Garway Hill.
View to garway
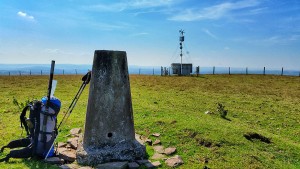
The weather station up there.
Weather station
View towards an alternative approach that I have used when geocaching in the recent past.
View from Graig Syfyrddrin
Again here the wind was so gentle I probably didn’t need the guys again, but it was good practice to set it up for me as the Garway activation assembly didn’t go as smoothly as I would prefer. Not a problem today but in poor weather I want to be on the ball.
Station set up
I positioned the radio in the shade of the trig point to make the display easier to read and to keep it cooler. I noticed once I’d settled down that the flies mostly left me alone. It must be moving targets that attract their attention.
Operating position
I didn’t see a soul on this summit from the car and back. I found a clear frequency and spotted myself on the SOTAwatch using Rucksack Radio Tool via the internet on the 3 network and started calling and soon I had another pileup. Quite a bit of activity but did quieten down. Aware of conserving battery I closed down and moved on with 32 QSOs in the log. One more Summit to Summit contact.
Graig Syfyrddin log 8-8-15Squares Graig Syfyrddin
Onto the last summit today GW/SW-026 Bryn Arw…

First SOTA summits 8-8-15

After much research, advice, shopping, antenna building and soldering, today I did my first SOTA summit activations.

I’d planned to do four summits, but battery charging took longer than expected so I only had one charged to use. So I decided to skip G/WB-024 Aconbury Hill partly due to the batteries and partly due to my not knowing the terrain, so decided to start with G/WB-013 Garway Hill as this hill is well known to me as I have spent many long nights up there on the radio in the times when you could still drive up to the very top. Next stop would be GW/SW-020 Graig Syfyrddian which is the next closest and another hill I used to drive to the top of in my Mini 1000 for some all night radio. Final stop was GW/SW-026 Bryn Arw, a smaller top in the Black Mountains I recently visited for the first time knocking off some geocaches. I skipped GW/SW-016 Ysgyryd Fawr as with it being the weekend and a lovely day it would be teeming with people.

G/WB-013 Garway Hill
I parked at the end of the track at SO444247 and set off for the fairly gentle half mile walk  and 64 metres of ascent. This is a good thing as my sack weight was pretty hefty. Hefty enough to start me thinking I should add an FT-857 to the family of FT-897D and FT-817 I currently have.
Garway walking route
The familiar summit building at the top.
G/WB-013 Garway Hill
A few of the locals.
Garway Hill residents
View from the top with two summits in distance, one of them my next stop.
Summit view
My portable station ready for unpacking.
Portable station
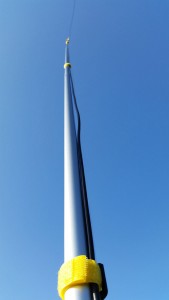
Time to set up the antenna. As my coax is heavier than some and I like to use as much of my 8metre pole as possible I am velcro cable tieing the coax to the mast so it doesn’t hang off the pole and cause more of a bend than required.
Coax strapped to mast
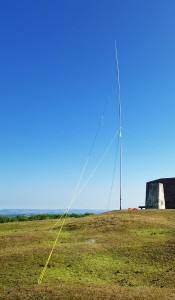
Although it was such a light breeze and lovely day that the pole would probably self support on the fishing umbrella stake I am using at the mast base I still prefer to attach my guys. This also helps let me keep it nice and upright. I’m using white nylon cord for part of the guys but at the ground and the ends of the dipole I am using high visibility yellow nylon tent guys. These are £1 for a pack of four each 3.5metres from Poundland.
Antenna and mast
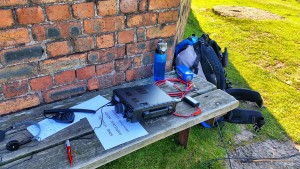
I decided to set up on one of the benches in the shade so I wouldn’t have to contend with the bright sun and reflections and also keep cool. I actually had to put my Goretex shell on as the light morning breeze was a little chilly.
Garway station
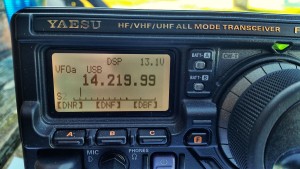
Once switched on I could see there was something wrong with the radio. Where was my solid S7 to S8 of noise?! I always loved hilltop operating, and this is another reason to love it! I probably could have turned off my base station DSP settings if I had thought about it.
Free from noise!
I started on 40m as I have not yet used 40m as no antenna at home, but it seemed a bit manic with a lot of Italian sounding strong rag chewing going on. So I reverted back to 20m. I worked a few portable stations tuning around the band then found myself a clear frequency and spotted myself on the SOTAwatch using Rucksack Radio Tool via the internet on the 3 network. A couple of calls and the pileup started. I was surprised how well the spotting works! This was like old times contesting. However I soon found my make do enquiries pad I brought for logging was greatly lacking for a single op. First item on the things to improve next time!

After about 40 minutes the pileup had gone and I had 40 QSOs total in the log. I’d also used 2.3Ah of my 8.4Ah battery. I got three Summit to Summit contacts too.
Garway 8-8-15Squares Garway Hill
All in I am pretty pleased with the first activation and all the equipment.

Onto the next summit GW/SW-020 Graig Syfyrddin…

First portable lightweight link dipole

Following my first wire dipole which is too heavy for portable and I am using it at home, I am making a multi band link dipole for portable use for SOTA activations on the hills and mountains.
Instead of traps it will have links where we can make or disconnect sections of wire in to be resonant on different bands. It will be cut for 20m, 30m, and 40m. The 30m dipole should work as 5 half waves on 6m, and the 40m dipole should work as 3 half waves on 15m.

Via the SOTA reflector I found this very useful link dipole designer:
http://www.sotamaps.org/extras.php
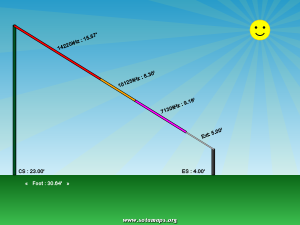
and used it to design the dipole like so:

3 band link dipole
The 4 foot support at the ends will be my trekking poles, which enable me to keep the end elevated with a lesser ground footprint, which needs 61feet as it is.

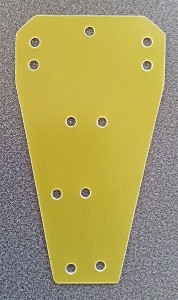
I decided to adopt a very similar design as my first dipole (here) with a flat plate centre and cable ties. The plastic I used before I found to be a little brittle so I don’t expect it to last repeated portable batterings on hills. So I found some bare FR4 board and used that.

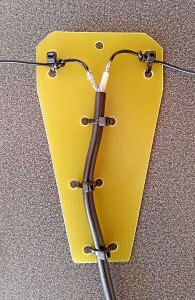
Dipole centre
Coax stripped back and wires attached. I decided to not go for the loop of coax at the top many go for to stop water ingress, but go for a simpler style and will waterproof it with some liquid electrical tape. I have gone for RG58 as it’s less lossy and mechanically good and not that heavy really. It can always be lightened up if really necessary later.

Dipole centre wired up
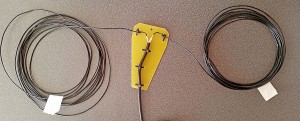
Showing the soon to be 20m antenna wire.

20m wire dipole
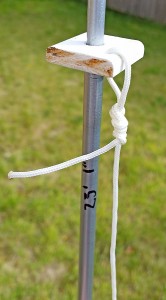
To mount the dipole on the fishing pole mast I have made this piece of uPVC which is very light and pretty strong which slips down over the thinner section and sits on top of the thicker section below like so:

Dipole mast mount
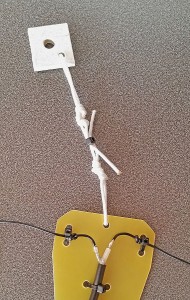
And attached to the dipole itself:

Dipole centre ready to mount
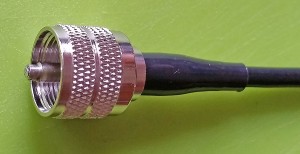
I have to put a word in for the Barenco crimp PL-259 connectors I got for RG58.
I prefer crimp to any other style due to the reliable retention on the braid (if you have good braid-the Barenco supplied RG58 has a good braid).
This connector also has a reduced diameter tip which lets you use the iron on the outside to transfer heat and keep the main contact section clean of solder.
It also comes with a stiff plastic strain relief that is such a good fit I didn’t think it would fit, but can be fitted and looks like it will give some support.
Product link

Barenco PL-259

Next job is tuning it up and adding sections.

Off to a local hilltop common to set up the mast and antenna and tune the dipole sections.

I’m using an 8m fishing pole and will mostly use it guyed. I decided the middle size guy ring from SOTAbeams was the best option as it sits nicely on a joint and is a nice height but also not too steep an angle to collapse the pole, hopefully. I have a ground stake to strap the pole to for assisting in erecting it and holding the base steady. I tied four guys, but may use just 3 depending on location.

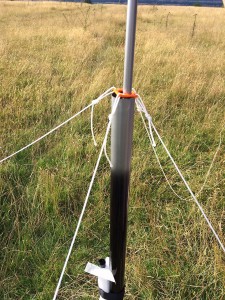
Mid pole guy ring
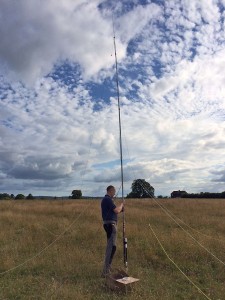
Antenna attached, will be at 23 feet above ground.

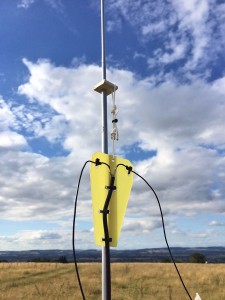
Antenna mounted to mast
As I prefer to take the weight hit and reduce coax losses, I am using RG58. To save it bending the thinner top of the pole with the weight hanging away from the pole, I am using velcro cable ties to keep the coax against the pole to below the guy ring.

Fixing coax to pole
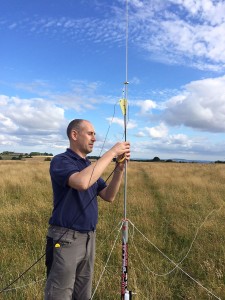
Raising the mast. This is SO much easier than hoisting a 20 foot aluminium scaffold pole on your own!

Raising the mast
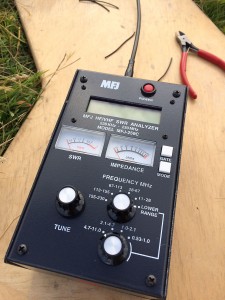
I used the MFJ269C for tuning the 20m section of the dipole. What an amazingly useful bit of kit!

MFJ269C antenna analyser
Once the wire was trimmed to nearly be resonant in band I tied on the string I am using to make the link supports. This shortened the dipole making it closer to resonance, then a final trim to tune. It actually read and SWR of 1.2:1 at both band edges, with 1:1 to 1.1:1 in the SSB portion, where I will be operating. Then trim off the ends the same amount as the length of the 2mm bullet connectors I am using for the links. I used the sockets on the ‘uphill’ side of the links.
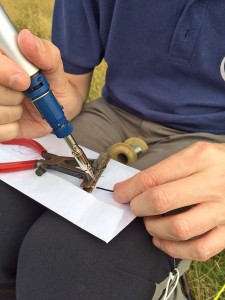
Soldering the link on, literally ‘in the field’.

Soldering 'in the field'
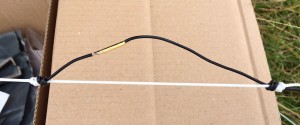
I’d pre-cut the next sections and already fitted the plug of the bullet connectors, so the link was soon made. I don’t think you’ll get much lighter link supports than these!

Dipole link
We soon had the 30m dipole tuned up nicely, and ends prepared for soldering. Except the brand new gas iron G1YFC had bought failed to work again. Managed literally two solder joints! That’s going back. So I will need yet another dipole building session tonight, as I plan to be using this tomorrow for SOTA activations.

We took the opportunity to work some stations on 20m and test the battery supply. We started on 50W, then 75W, and in the end went for 100W. Why not…
We used about 1.1Ah in about just over an hour. We’d use more contesting or calling CQ more often, but we were scanning the band and calling into other stations.

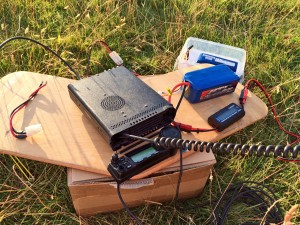
Portable setup
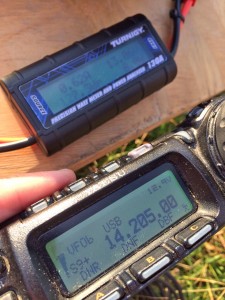
Rig and DC power meter
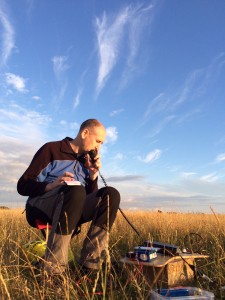
G1YBB operating
Final round of antenna making.

Bullet connectors now soldered on at home I headed back out to add the 40m sections of the dipole. First I checked the match of the 30m dipole to check it wasn’t different from the previous install as this time I set the pole and antenna up on some grass near my home and wanted to see if there was much difference. All seemed fine. At least the dog walkers and cars driving by were amused. Or was it bemused…

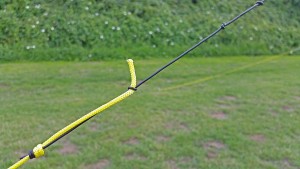
Anyway, tip of the day if you are using string for your links is to make sure you tie the knots with enough slack. I made one link string a little too short so it was same length as the link, which meant with stretch the connector may pull out.

One problem of a double fisherman’s knot tied in wire and thin nylon cord is it’s pretty much impossible to untie them. I couldn’t cut either as I’d have to start over, so I had to tie a couple of knots in the link string to make it shorter.

Once done I could trim the 40m wires to resonance. I thought I was near so I tied the final knot to join in the bottom guy string, leaving (I thought) plenty of trailing wire to trim.
Wrong. I trimmed as much of the wire as I dared but was resonant pretty much at 7.000MHz, and I will be using SSB. My only option now (as I was getting tired of it now anyway) was to shorten the wire by adding knots. That did do the trick.

40m dipole end
Next stop, some summits.

Super useful home brew tool

As I have recently been beavering away making wire dipoles (something new to me – much more used to making long yagis) I thought I would share this well known, but amazingly useful multi-tool.
Best of all it is usually free as long as the XYL doesn’t find out:

Clothes peg
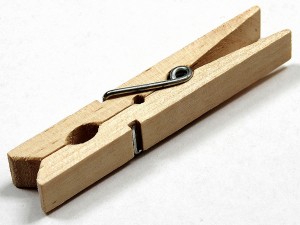
The humble wooden clothes peg (clothes pin).

The beauty of this marvel is it can hold contacts for you while you solder them without sinking the heat away or melting. Here I am using the weight of my wire strippers to keep it from moving around.

Soldering vice
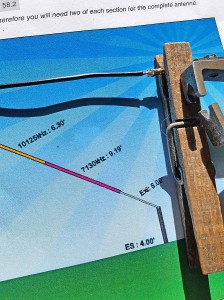
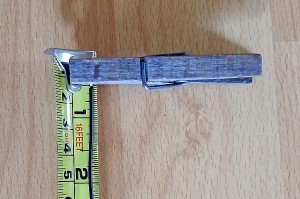
Not only that, if you are making a wire dipole as I am here, the humble peg helps out once more by holding one end for you to measure off the amount of wire needed.

2015-07-29 17.27.45
This is nothing new, but worth sharing for those who may not have seen this tool in action.
Another good reason to stick with traditional pegs not those plastic ones!