My current circumstances preclude my having a permanent mast up for antennas so I am having to stick up a portable style telescopic fishing pole with an inverted vee dipole when it gets dark, and take it down again before I go to bed. Quite tiresome but better than nothing.
I started by strapping my 8 metre fishing pole to the rotary washing line that is installed in the garden but it’s a bit of a faff in the dark and I get covered in cobwebs, and it’s a bit wobbly. Also its location means I don’t have room for a 40m inverted vee, and the locations I have for the ends of the dipoles are not in line with the pole so that means it is always stressed and bent over quite a lot. So I needed another solution.

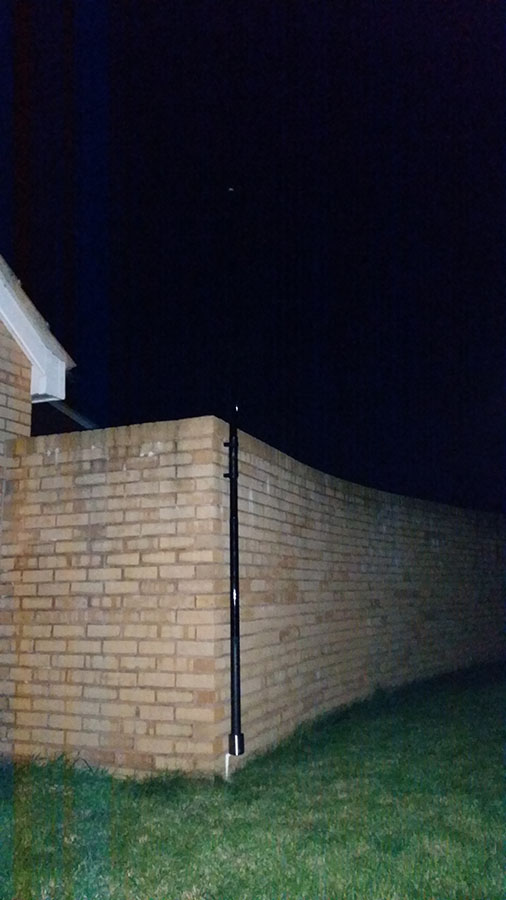
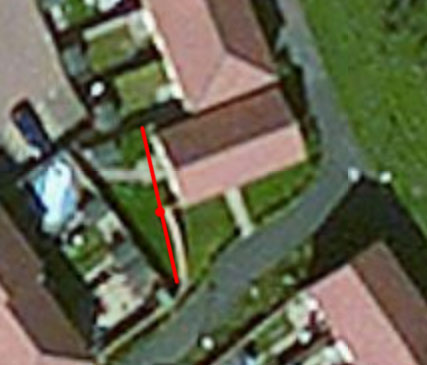
Using the very useful Link Dipole Calculator on the SOTA Mapping pages I was able to calculate that there is room for a 20/40m inverted vee if I use a 10m fishing pole and mount to to the corner of a 6 foot brick wall in the back garden and I can arrange the ends of the dipoles to be in a straight line with the mast to relieve stress on it. Both solutions have one end of the dipole coming close to building which is not ideal but the higher pole will help and at least it’s a bungalow so most if not all the actual radiating elements should be above the roofline.
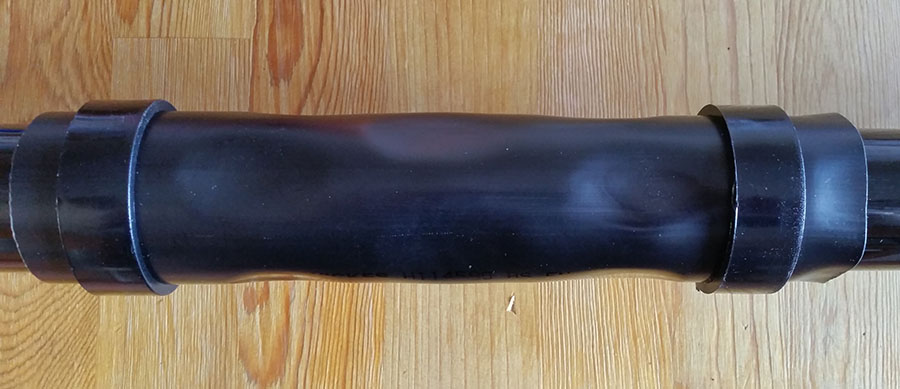
Next challenge is to come up with a quick and simple arrangement to erect it. After looking around and some thinking I decided I needed some sort of cup to sit the bottom of the mast in and a sleeve higher up to extend the mast into giving it secure support. Scouring the DIYs the closest I could find for the upper sleeve was some black 50mm downpipe. This also had suitable wall fixings that keep it fairly close to the wall. However it turned out to be a beautiful fit for the top of the bottom section (no use to me), but sloppy on the next section up.

I was trying to think of ways to line the pipe to get a better fit and how I might secure it in the pipe and in talking to a friend who is very good at engineering solutions he suggested heating the pipe and bending it inwards in several places. Perfect!
As there is quite a bit of play I used strips of cereal bar box and masking tape to build up the pole to a nice fit on the tube to keep it centred around the pole.

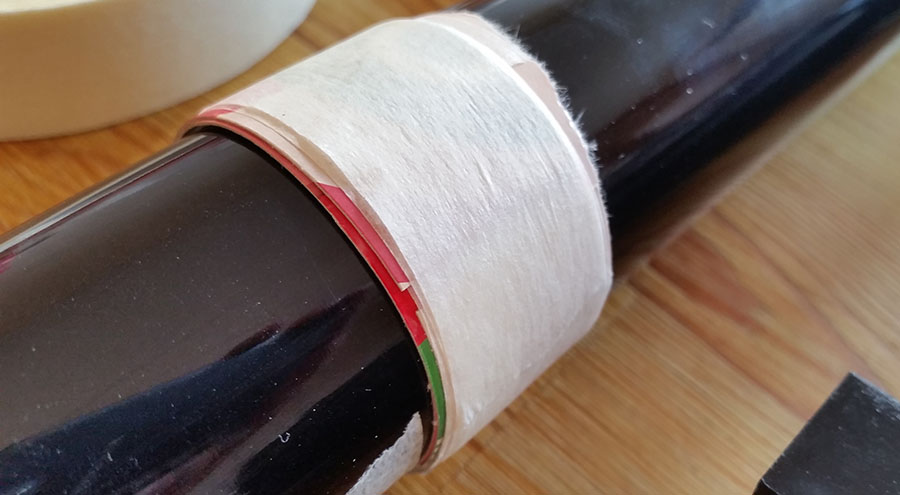
Then a bit of masking tape over the outside to keep it still.

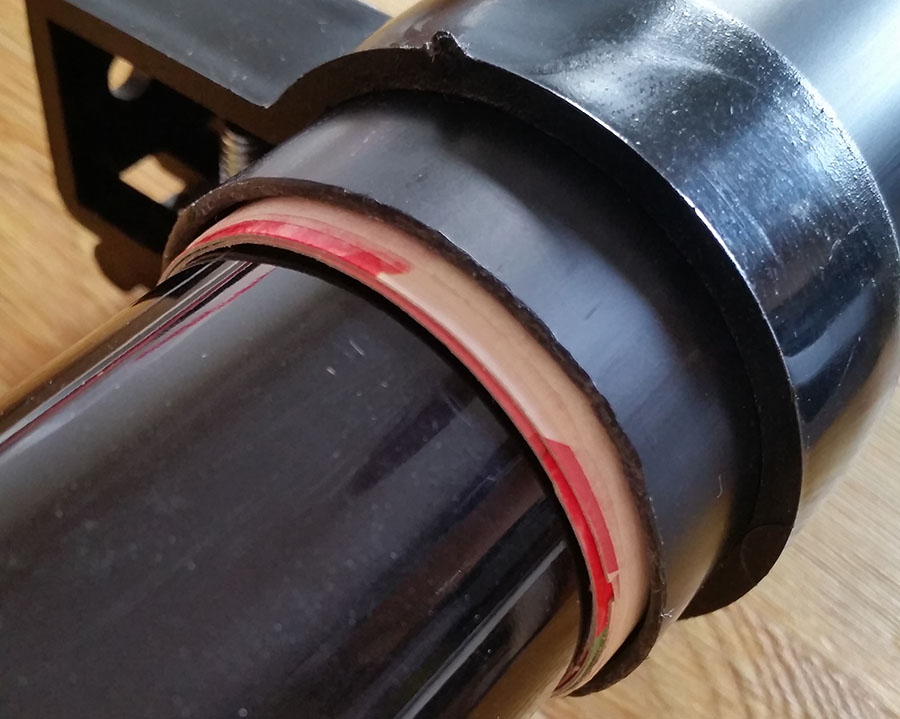
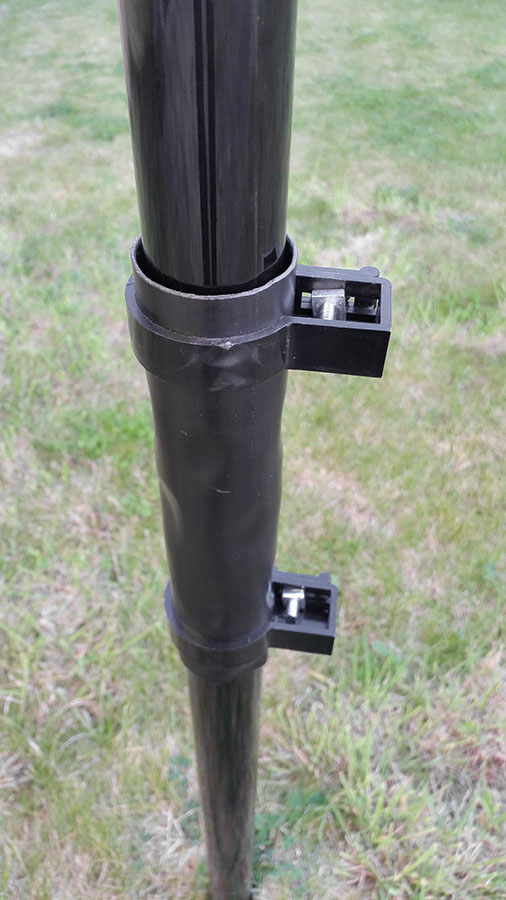
Once set up I used a heat shrink gun to heat up small areas of the pipe and used a teaspoon to press the soft pipe against the pole and hold it there until the plastic cooled a little. I kept the teaspoon in a cup of ice water between uses to keep it cool and cool the pipe quicker. I did three sets of four indentations. Set one at 0° 90° 180° and 270°, 2nd set at 45° 135° 225° and 315°, 3rd set as the first. Then I took off the top card and masking tape and pushed the top edge in as well for a bit more support. I left the bottom entry oversize for easy entry.
This worked better than I expected! The fit is very close. If I had known how good the pipe would keep the new shapes, I would have wrapped a sheet of printer paper around the pole to have a little freedom on the fit. However, it works and here is the pole standing upside down with the pipe fitted showing it gripping the pole.
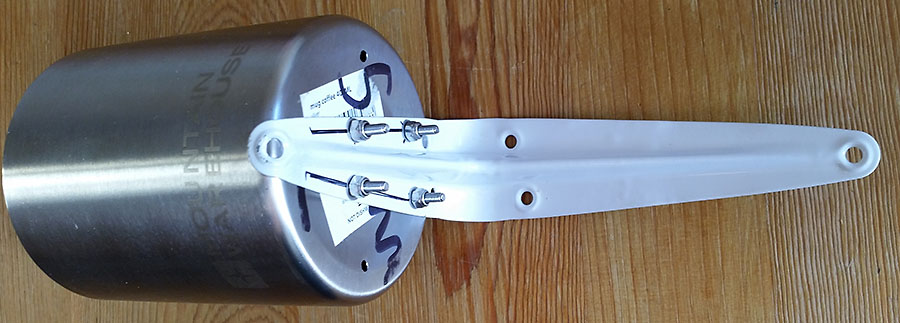
The cup for the base of the pole took a bit more searching for. Nothing was quite the right size, or if it was it was flimsy plastic. It doesn’t need to be industrial but will need to stand the leverage the top 8 metres or so of pole exerts when the wind blows. After much looking and considerably over budget at £10, I got a metal camping mug from Mountain Warehouse. Of all the metal cups I found it was the only one that was close to the right size and also was parallel sided, which would be useful.
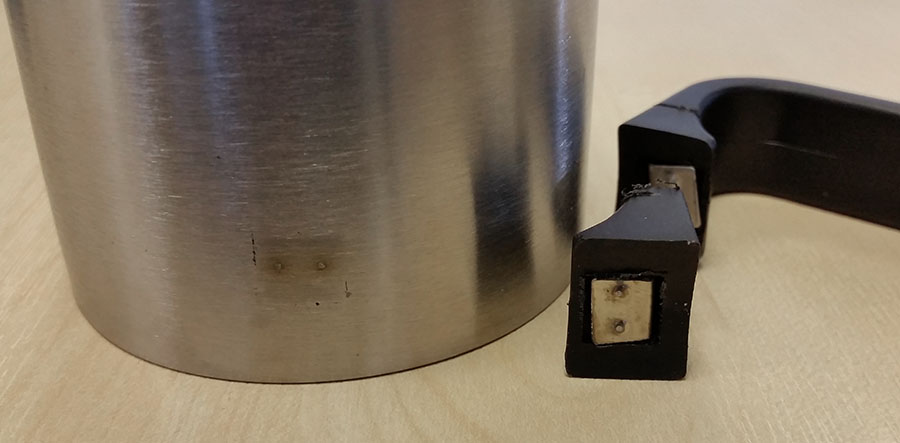
First the handle had to come off. I wasn’t sure how it fixed on so I started sawing it off. First cut through just plastic, then the 2nd hit metal as I cut closer. I decided to just try and break it off. Came off easily and I was able to see it was only a tab spot welded on. So the other was off in seconds.

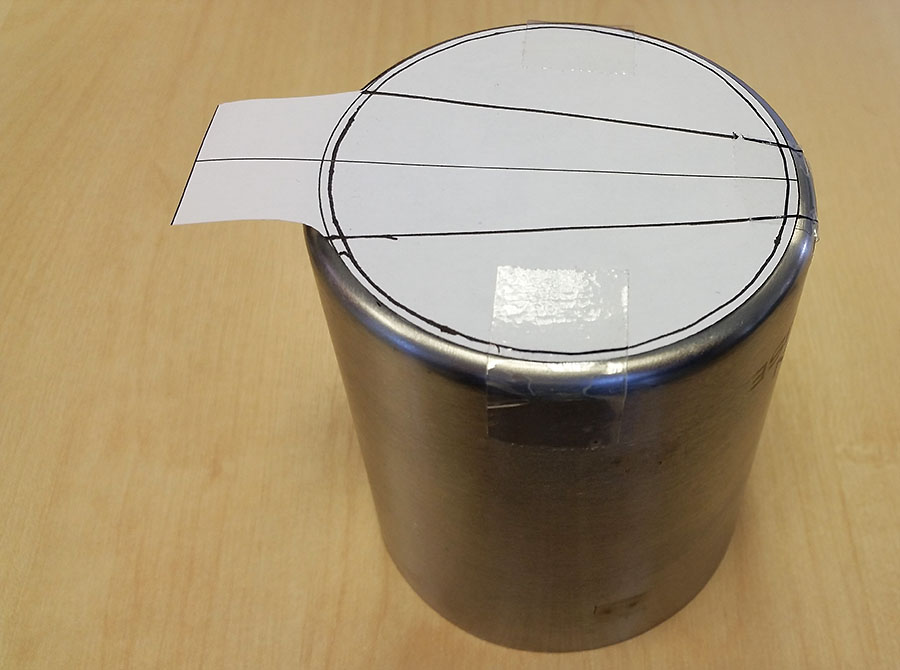
I had also though of how to attach it to the wall as screws through the side wouldn’t work as the heads would be in the way of the pole and the wall thickness of the double skinned cup are very thin anyway meaning it would deform. So it had to be fixed at the base. A simple metal shelf bracket was chosen, cheap and plenty strong enough. In order to line up correctly with the black pipe, the centre of the cup needed to be 55mm from the wall. To make it easy to do I drew a circle a little smaller than the cup base, and positioned the centre of it 55mm from a base line, printed and cut it out, and taped it to the base. It was then easy to line the shelf bracket up with my centreline and the upright part with the base line (left in the photo) so I could mark where the new holes in the shelf bracket needed to be (it goes without saying the ones already in it were no use).
I was then able to drill the bracket and the cup with new holes for fixing the cup to bracket, and a couple extra for rain drainage. As the metal is very thin I also cut a disk of 1.5mm aluminium sheet to spread the load of the screws. I just printed a circle the right size, cut it out, taped it to the aluminium and cut round it with tin snips. A quick file of the corners and it was sorted.

Now just needs bolting up together. I used nyloc nuts so I can do it up tight enough to be sure but not need to crush the cup getting the nuts to stay tight. The disk and bracket spread the load well anyway, but I know they should never come undone. All the fittings are A2 stainless steel so should last a while outside.
So the pole can sit in the cup but not rest on the heads of the screws I cut a sheet of rubber matting to raise the pole base off the heads. May help absorb some (tiny fraction of) shock if the mast happens to collapse down one day. Ready to go on the wall now.

All set and just need to screw these to the wall. And a rubbish picture taken in the dark with my phone with the mast in situ.