The GM3SEK mains filter

I’ve looked at the GM3SEK mains filter several times but nevertaken it any further. My worst noise at home varies with beam heading on HF so I suspect it is being received by the antenna itself and assume filtering the mains would have no effect. But recently I was testing an antenna on 80m and noticed quite a bit of noise from the Honda EU10i generator I have which wasn’t there (as I remember) some years ago on 80 using the EU20i. So I decided I would build a GM3SEK filter to try to stop the generator noise and as a side effect, could see what happens at home!

The starting point is on Ian’s site here:
https://gm3sek.com/2019/10/11/clean-up-your-shack-2019/

Ian details all the parts with links to vendor’s sites and manufacturers part numbers. I was able to source all the parts needed from CPC and Farnell, and not pay delivery charge (I bought 2 sets of parts because I run the amplifier from a second 240V outlet so would need a 2nd unit if I used them here.)

From Farnell I ordered the below. The 13A lead for the mains input.
Prices include VAT.

Order NumberManufacturer NumberPrice
1304848FN2030-16-06EACH£24.02
FN2030-16-06 FILTER, 16A CHASSIS MOUNT
4156104431177081EACH£16.19
0431177081 SPLIT CORE FERRITE, 375 OHM, 25.15MM
1124373X-150708AEACH£8.70
X-150708A LEAD, 13A, BLACK, 2M

From CPC (also including VAT).

Order NumberManufacturer NumberPrice
EN84544GR17012EACH£10.62
CE-TEK GR17012 IP65 ABS Enclosure – 170x170x75mm
CBBR7352PP01645EACH£0.26
PRO POWER PP01645 Nylon Cable Gland PG-11 Black, Single, IP68
PL15548WP21-01EACH£12.90
BG ELECTRICAL WP21-01 13A 1 Way Outdoor Mains Socket
CB22778PELB0767EACH£15.01
PRO ELEC PELB0767 3183TQ 3 Core Heat-Resistant Mains Cable, 2.50mm, 25A, White, 5m
CN19163CTSOS431/12EACH£1.36
CAMDENBOSS CTSOS431/12 Terminal Strips, 12 Way, 2.5mm, 24A

You’ll notice the 2 Fair-Rite oval cores 2643167851 are not there, that is because I have several in stock already. As I write this these are available from Mouser for £3·77 each here:
https://www.mouser.co.uk/ProductDetail/Fair-Rite/2643167851

CPC delivered next day, Farnell the day after. Which is interesting as Farnell is the parent company of CPC!

I started off fitting the main box. I used tha samebasic layout as Iam GM3SEK used, why change a winning formula. The chassis mount filter fitted with M3 screws and nylocs. I always use nylocs in general, but especially when plastic is involved as you can be sure of a safe fixing without excessive force.

Next I drilled the hole for the gland, which needed a 19mm hole. Drilling large holes with a twist drill, even going up in steps from a small pilot hole, never works well on plastic boxes. The drill wants to tear out as soon as it breaks through. Far better and faster is a step drill which even deburrs the hole for you with the radius leading to the next size up:
stepdrill for drilling large holes
However, do ensure you mark the hole in the right place, UNLIKE me! Doh!
poorly located hole for gland
The hole is too close to the corner for the nut securing it to sit flat. I need this to be watertight for portable use. I toyed with the idea of scrapping this and using the second box but in the end I bodged it in by removing plastic with the dremel:
poorly located hole bodged up
Managed to get the gland fitted better after the mod:
gland fitted after bodge
Next I stripped the outer from the 2.5mm 3 core. I made shallow slits with a knife both side and peeled back the outer sheath. I used adhesive lined heatshrink to keep the ends together before fully stripping the whole length. I started with 2.5m of cable. Ian says 1.6m but I knew I was needed longer tails than his build.
3 cores heatshrunk together
Once fully stripped I did exactly the same as the instructions, twisted it with the battery drill.

I wound the large split core first then prepared the two oval cores.
I didn’t want to superglue them so I used a strip of double sided tape:
oval cores about to be stuck together

I then used the desktop and a square to align them up nicely to stick them together. This method would work well with superglue too:
square used to align oval cores
Winding the 3 turns through these was a lot easier than the larger core.

Here are the two chokes wound and rulers showing the spare length. 30cm on the input side and 75cm on the output side. So 2m would probably have been plenty. But it’s easier to cut some off than add some on.
extra length left over
Soon I had wired the input cable and the choked cable to the chassis mount filter. I stuck down the 2 oval cores choke with mode double sided tape. The large choke touched the lid so not required:
main box completed
You’ll notice I only have one gland fitted to this box. As this is designed for my portable operating I want it to go between the generator and my extension lead so I am using a single waterproof outlet (the 3rd item from CPC above). This was fitted to the main lid with M4 countersunk and more nylocs and a centre hole for the output cables:
outlet box fitted to main lid
main lid inside view
Before fixing these together I applied a ring of silicon mastic around the 5 holes to keep water out:
outlet box sealing to main lid
Output cable threaded through and lid fixed in place:
output cable to outlet box
Once the outlet socket was wired and fitted it is ready to test:
finished filter with waterproof outlet
The input lead is kept short, just enough to leave the generator and sit the filter box on the ground.

I’ll add my findings to this page when I test it.

TMF-3 based DXcommander style vertical portable antenna

This is a build of a TMF-3 based DXcommander style vertical antenna for portable use because at home I just do not have any space for anything on the lower bands. Also, when I did put up an inverted V once for 40m (hell of a job) it induced so much RF into the house it was not a great plan.

The basics of the DXcommander style verticals are well know, I won’t be going into that. This is focused on making use of my TMF-3 50 foot (15 metres) heavy duty fibreglass push up mast that O bought during lockdown, used for a while to support my lightweight 20m moxon but has been doing nothing since.

This video shows the TMF-3 mast and the guying points I have already made for it (excuse wind noise):

The TMF-3 at 50 foot tall is a beast of a mast and I have not yet fully extended it vertically. The garden was too small to get a decent angle on the guys to push up any higher than about 30 feet. I have added guying points to the mast, one atop the first section to secure it to push the rest up and one just above half way up. But the issue for me using it portable was to be able to anchor the bottom securely to work with the 1st guying point and of course enable connection of radials and radiators. So this is what I came up with:
TMF-3 based DXcommander style vertical base

This video explains the features of the base in more detail (excuse wind noise):

And this video shows a test fitting (excuse wind noise):

This is a push fit top for the very top of the mast that I drew up and 3D printed. Even though the mast is 15m tall it’s still too short for 80m so my plan is to take the wire over the top through this and out to the side at an angle and pegged to the ground via a length of cord.


To be continued…..


Contesting information sign for passers by

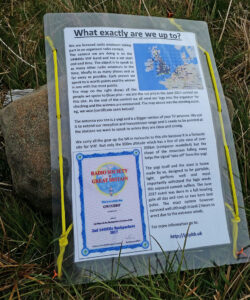
Most of us that operate portable in any way will no doubt have had interested people come to ask us what what we are up to. My portable operations these days are almost exclusively contesting and single op so I don’t really want to break off a pileup to answer questions so I decided I would make a contesting information sign for passers by answering most of the questions before they ask them! I have found it to be very effective especially when I am tent portable on a mountain summit where there is a fair amount of walker activity. Often when I am in the tent listening around the band before the contest kicks off I can hear one person of a group reading out the card to the rest of the group. It’s been a great help. You may have even seen it in one of the Practical Wireless magazines in the PW 144MHz QRP Contest results write ups.

I printed and laminated it then peg it out with tent pegs from the pound shop between the summit and my tent:
contesting information sign for passers byIt’s survived some pretty hairy and wet weather so far. I also have another one for car portable that I put in one of the windows (doubles as a sun shade in the summer evenings!)

A few people have asked about doing one themselves so I have add below a Word DOC file and DOCX file (both ZIPped up) for you you use as a start point for your own version, you can just change the images and wording a bit to suit. Just needs a few tweaks to make your own contesting information sign for passers by to suit your own situation.

What exactly are we up do.DOC

What exactly are we up do.DOCX

Have fun and spread the good word!

If you found this useful, I’m always up for a coffee…
https://g1ybb.uk/buy-me-a-coffee/

Easy building of a moxon antenna with 4NEC2

As we are still on lockdown and my 50MHz yagi is literally too huge to fit in the garden let alone erect on my lockdown lash-up system I decided I needed to make something smaller to use at home. I didn’t have any aluminium tubing at home long enough to make a small yagi so I decided to make a moxon antenna on the recommendation of a friend. These are very compact and easy to make so it seemed like a plan. I decided on a wire based version as although I have some 12mm tube I could cobble together I didn’t have anything I could get today for the corners. Wire it is. I decided easy building of a moxon antenna with 4NEC2 simulations to find the correct starting point would be a cool project.

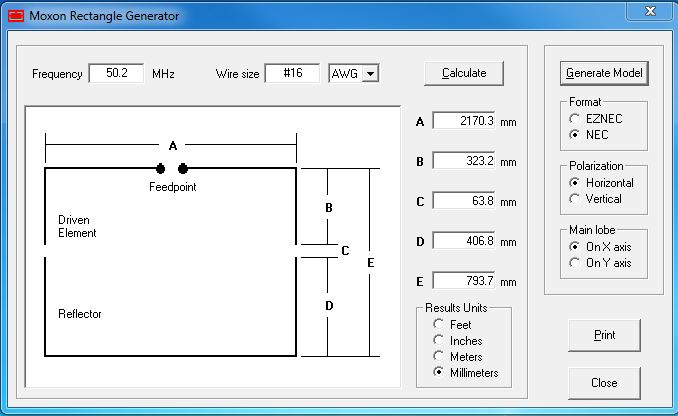
I’d already looked around the web and compared the various online moxon calculators and the AC6LA Moxgen program (link) and the Moxgen program seemed to be the best fit for the suggested spreader angles. (Even though I’m not using spreaders as such.) It’s dead easy, just put your desired frequency in and the wire size and click calculate:
Moxgen calculated values for 16AWG wire
That’s it, job done. Almost…

I’m using normal insulated wire but the calculator doesn’t cater for the change in velocity factor from insulated wire. So I decided to run it through the free 4NEC2 simulation software (link) to make the required adjustments to the dimensions so it would work with minimal fiddling after. I love building, hate fiddling. Now, before you start backing away from the PC this is quite easy to use and just needs some really simple maths to do this. Stick with me. Look at the image above and see I have selected Format NEC on the right. You just do that and click the Generate Model button and save a file ready to open in 4NEC2. Run 4NEC2 and click Open and load the file you just made.
4nec2 main screen
Click that green calculator looking icon to bring up the next screen, choose frequency sweep and check the start and end frequencies are a useful range and that the step size is not too large, then click generate:

We then get a plot showing us the expected SWR curve of the antenna:
SWR of Moxgen design as supplied
Oddly minimum SWR at 50.1MHz rather than 50.2MHz but looking good. We can click the green calculator button again and this time plot the azimuth plot we are interested in:
generate 4NEC2 far field pattern
Which results in this plot:
Gain of Moxgen design as supplied
We can see the moxon should have about 6dBi gain and the amazing front to back ratio it is known for. Next to nothing off the back.

This is all very well but I’m not make it with bare wire so my antenna will not look like this without some tuning. First of all we need to add in the insulation so we can see what the effect will be. On the main screen, to the left of the green calculator is a red book, for editing the information that defines the wires making up the simulated moxon. Select the Source/Load tab, and tick Show loads. We then add two lines selecting as shown below from the offered selections. For Tag, First & Last we put 0 (zero) which will apply the setting to all parts of all wires. My tri-rated wire has insulation 3mm in diameter so I enter the radius, adding the mm to ensure correct scaling is used:
parameters for coated wire added
Once done we can click the green calculator on that screen, select frequency sweep again, but widen the scale. I’ve gone 5MHz either side of 50MHz. You can see the resonant frequency has moved 2.5MHz due to the effect of the insulation’s velocity factor:
frequency shift with insulated wire
So if we had built to the Moxgen dimensions using my insulated wire we’d be looking at an SWR of about 2.2:1. So we need to make some simple adjustments. The dimensions of the wires are on the Geometry tab below. Looks complicated but it’s just a few repeated co-ordinates. Some with a minus ( – ) sign to make the equal around the center of the axis to plot correctly:
original design geometry
What we are going to do is put those numbers into symbols, or what we would call variables in programming. When you look above there is only actually 4 different numbers used so it’s not complex. You can give them any name you like, even Harold but I have gone similar to the Moxgen image further up. Just click the Symbols tab and enter as shown below. You’ll see a 5th value called Vf. I’ve already tuned it by now but pretend I haven’t:
values changed to symbols
Now we need to flip back to the Geometry tab and put the letters (W, E, DirS, RefS) where the numbers used to be:
geometry changed to symbols
If you were to run the SWR plot again now, it should be exactly the same, best SWR on 47.5MHz. But finally we add in the velocity factor. To the end of each of the letter symbols add without spaces
*Vf    (star V f):
velocity factor applied to design
Now we can run the SWR plot and it will apply a Vf correction to every dimension. I found 0.945 by trial and error. They say Vf for wire is between 0.95 and 0.98. I knew mine would be the lower end as it is quite thick. Now if we run the SWR plot, changing back to the 49 to 51MHz range we get this plot:
velocity factor corrected SWR plot
Back in business. A point to note here. I’m aiming for the SSB section of the band, but if I wanted to cover more of the band I would still aim at the lower frequency with this design. You can see the SWR curves rises steeply on the LF side but gently on the HF side. Anyway, if we run the far field plot we now get this:
velocity factor corrected gain plot
As you can see this has changed. A bit less forward gain because we are chucking some out the back now. Now as I mostly do contesting this doesn’t bother me at all but it is interesting nonetheless.

So now we have redesigned the original dimensions to my real world application of actual wire, we should be shooting for success. We just need to apply the scaling factor of 0.945 to the original sizes with a calculator and a little rounding to sensible numbers:
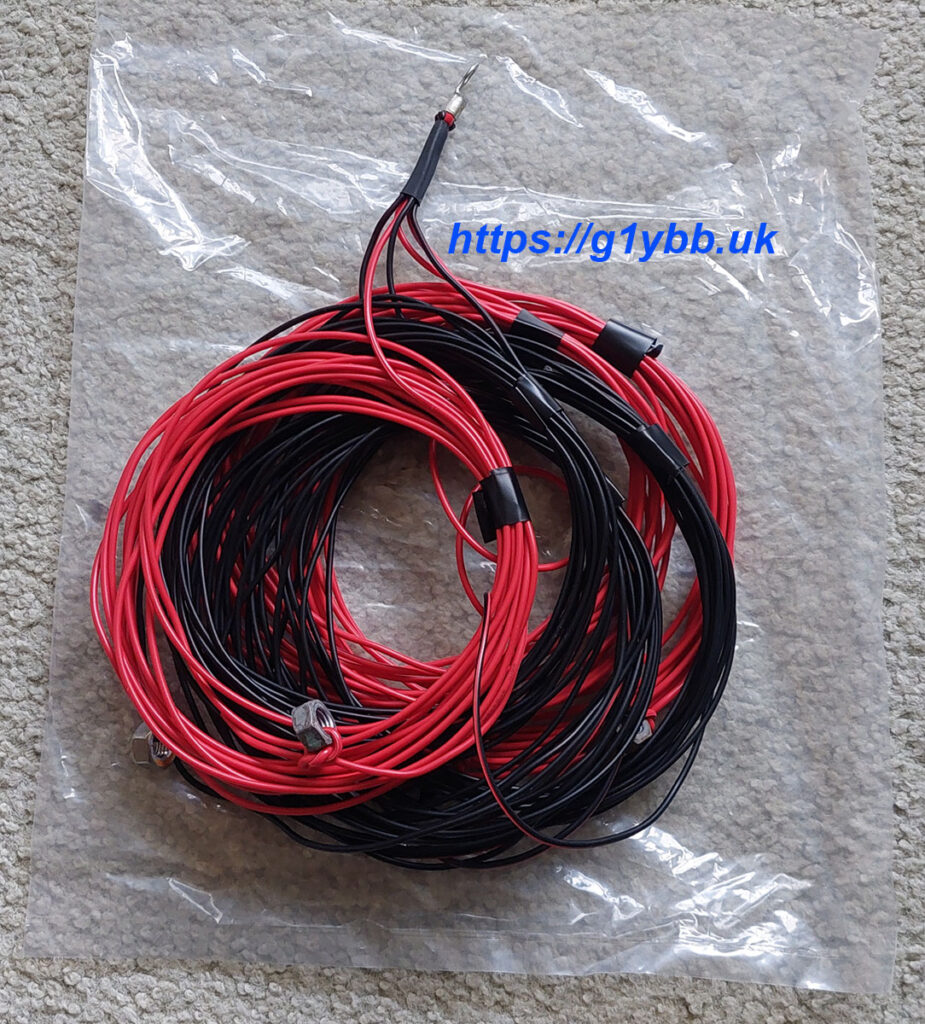
Moxgen adjusted values for 16AWG wire
So for the reflector we need a wire 2051+384.5+384.5 – 2820mm long and for the driven element 2 wires 1025.5+305.5 = 1330.5mm long.

Now we can build the antenna and have a good chance of it working!

I decided to make it from a small length of 20mm boom left over from VHF yagis and find some plastic pipes from the DIY shop to support the wires in the A dimension and just stretch them between the pipes for the E direction:
material costs receipt
I bought a terminal block strip with the intention of using the brass inserts with nylon rope to join the ends at the C direction but didn’t after so total cost of parts not lying around £3.87. I used my red yagi elemt plates to mount the pipe clips and snapped the pipes into them after cutting to size. They didn’t really grip the pipes so I just taped them on to stop them sliding sideways.
I fitted a short tail of RG223 to an N-type plug, split the other end into braid and core and soldered the two halves of the driven element on and threaded those into a hole drilled in the centre of one pipe. After testing I sealed this with liquid insulation tape:
driven element entry detail
I had a better idea for the ends of the elements at dimension C. I quickly modeled up a small plastic part like so and sent two to the 3D printer:
wire ends connecting strip 3DThe holes are a snug fit, tight enough to hole the wire until final testing. I marked lines on with a Sharpie 60mm apart and fitted the wires. Once tested I locked off with cable ties:
wire end connecting strip
So, the acid test. What does it measure like?
SWR as designed
SWR plot is very close but shifted down in frequency. This is because of the plastic pipes which I can’t (or don’t know how to) model in 4NEC2. Not a problem as I expected this and knew that now the wires would be ‘too long’. So I cut 10mm off the end of each element half (4 ends) and ended up with this:
SWR plot with 10mm trimmed off(just noticed my analyser clock is way out LOL)

Pretty much an exact match to the simulation with 30 seconds of trimming. Just how I like it!

The finished antenna looks like so. It actually looks better than this because this is before cutting the 10mm off each wire end.:
finished moxon up for testing

G1YBB Contest Results 2019

List of G1YBB Contest Results 2019 I have participated in. Where I have had chance to post a report there is a link to that post.

Individual Events
RSGB 144MHz UKAC January 2019
RSGB 432MHz UKAC January 2019
RSGB 50MHz UKAC January 2019
RSGB 1296MHz UKAC January 2019
RSGB 70MHz UKAC January 2019
RSGB 2.3GHz UKAC January 2019
RSGB 10GHz UKAC January 2019
RSGB 144MHz UKAC February 2019
RSGB 432MHz UKAC February 2019
RSGB 50MHz UKAC February 2019
RSGB 1296MHz UKAC February 2019
RSGB 70MHz UKAC February 2019
RSGB 10GHz UKAC February 2019
RSGB March 144/432 (144MHz) 2019
RSGB 144MHz UKAC March 2019
RSGB 432MHz UKAC March 2019
RSGB 50MHz UKAC March 2019
RSGB 1296MHz UKAC March 2019
RSGB 70MHz UKAC March 2019
RSGB 2.3GHz UKAC March 2019
RSGB 10GHz UKAC March 2019
RSGB 144MHz UKAC April 2019
RSGB 432MHz UKAC April 2019
RSGB 50MHz UKAC April 2019
RSGB 1296MHz UKAC April 2019
RSGB 144MHz UKAC May 2019
RSGB 50MHz UKAC May 2019
RSGB 432MHz UKAC May 2019
RSGB 70MHz UKAC May 2019
RSGB 2.3GHz UKAC May 2019
RSGB 144MHz 1st Backpackers
RSGB 144MHz UKAC June 2019
RSGB 144MHz 2nd Backpackers
Practical Wireless 144MHz QRP 2019
RSGB 432MHz UKAC June 2019
RSGB 50MHz UKAC June 2019
RSGB 1296MHz UKAC June 2019
RSGB 70MHz UKAC June 2019
RSGB 2.3GHz UKAC June 2019
RSGB 10GHz UKAC June 2019
RSGB 144MHz UKAC July 2019
RSGB 144MHz 3rd Backpackers
RSGB 432MHz UKAC July 2019
RSGB 50MHz UKAC July 2019
RSGB 1296MHz UKAC July 2019
RSGB 70MHz UKAC July 2019
RSGB 144MHz Low Power
RSGB 432MHz Low Power
RSGB 50MHz UKAC August 2019
RSGB 432MHz UKAC August 2019
RSGB 70MHz UKAC August 2019
RSGB 1296MHz UKAC August 2019
RSGB 144MHz UKAC September 2019
RSGB 50MHz UKAC September 2019
RSGB 1296MHz UKAC September 2019
RSGB 70MHz UKAC September 2019
Practical Wireless 70MHz 2019
RSGB 2.3GHz UKAC September 2019
RSGB 144MHz UKAC October 2019
RSGB 432MHz UKAC October 2019
RSGB 1296MHz UKAC October 2019
RSGB 70MHz UKAC October 2019
RSGB 2.3GHz UKAC October 2019
RSGB 10GHz UKAC October 2019
RRSGB 144MHz UKAC November 2019
RSGB 432MHz UKAC November 2019
RSGB 1296MHz UKAC November 2019
RSGB 144MHz UKAC December 2019
RSGB 432MHz UKAC December 2019
RSGB 50MHz UKAC December 2019
RSGB 1296MHz UKAC December 2019
—————————————-
sec
AL
AL
AL
AL
AL
AR
AR
AL
AL
AL
AL
AL
AR
6O
AL
AL
AL
AL
AL
AR
AR
AL
AL
AL
AL
AL
AL
AL
AL
AR
5B
AL
5B
NA
AL
AL
AL
AL
AR
AR
AL
5B
AL
AL
AL
AL
MO
MO
AL
AL
AL
AL
AL
AL
AL
AL
LP
AR
AL
AL
AL
AL
AR
AR
AL
AL
AL
AL
AL
AL
AL
res
1st
1st
1st
2nd
1st
9th
5th
1st
1st
1st
3rd
1st
6th
2nd
1st
1st
1st
2nd
1st
6th
4th
1st
1st
1st
3rd
1st
1st
1st
1st
11
1st
1st
1st
1st
1st
1st
1st
1st
3rd
5th
1st
1st
1st
1st
1st
1st
1st
1st
1st
1st
1st
2nd
1st
1st
2nd
1st
1st
21
1st
1st
1st
1st
9th
12
1st
1st
2nd
1st
TBC
1st
2nd
Series results
RSGB 144MHz Backpackers 2019
RSGB 144MHz UKAC 2019
RSGB 50MHz UKAC 2019
RSGB 432MHz UKAC 2019
RSGB 70MHz UKAC 2019
RSGB 1296MHz UKAC 2019
RSGB 2.3GHz UKAC 2019
RSGB 10GHz UKAC 2019
RSGB Overall UKAC 2019
sec
5B
AL
AL
AL
AL
AL
AR
AR
NA
res
1st
1st
1st
1st
1st
1st
20
12
3rd

G1YBB Contest Results 2018

List of results of contests I have participated in during 2018. Where I have had chance to post a report there is a link to that post.

Individual Events
RSGB 144MHz UKAC January 2018
RSGB 70MHz UKAC January 2018
RSGB 1296Hz UKAC January 2018
RSGB 144MHz UKAC February 2018
RSGB 50MHz UKAC February 2018
RSGB 432MHz UKAC February 2018
RSGB 70MHz UKAC February 2018
RSGB 1296Hz UKAC February 2018
RSGB 50MHz UKAC March 2018
RSGB 432MHz UKAC March 2018
RSGB 70MHz UKAC March 2018
RSGB 1296Hz UKAC March 2018
RSGB 144MHz UKAC April 2018
RSGB 50MHz UKAC April 2018
RSGB 432MHz UKAC April 2018
RSGB 70MHz UKAC April 2018
RSGB 1296Hz UKAC April 2018
RSGB 144MHz UKAC May 2018
RSGB 50MHz UKAC May 2018
RSGB 432MHz UKAC May 2018
RSGB 70MHz UKAC May 2018
RSGB 1296Hz UKAC May 2018
RSGB 144MHz 1st Backpackers 2018
RSGB 70MHz Cumulatives #3
RSGB 144MHz UKAC June 2018
RSGB 144MHz 2nd Backpackers 2018
Practical Wireless 144MHz QRP 2018
RSGB 432MHz UKAC June 2018
RSGB 50MHz UKAC June 2018
RSGB 1296MHz UKAC June 2018
RSGB 70MHz UKAC June 2018
RSGB 70MHz Cumulatives #4
RSGB 144MHz UKAC July 2018
RSGB 144MHz 3rd Backpackers 2018
RSGB 144MHz Backpackers 2018
RSGB 432MHz UKAC July 2018
RSGB 50MHz UKAC July 2018
RSGB 144MHz UKAC August 2018
RSGB 50MHz UKAC August 2018
RSGB 70MHz Cumulatives #5
RSGB 432MHz UKAC August 2018
RSGB 70MHz UKAC August 2018
RSGB 144MHz UKAC September 2018
RSGB 50MHz UKAC September 2018
RSGB 432MHz UKAC September 2018
RSGB 70MHz UKAC September 2018
Practical Wireless 70MHz 2018
RSGB 144MHz UKAC October 2018
RSGB 70MHz UKAC October 2018
RSGB 144MHz UKAC November 2018
RSGB 432MHz UKAC November 2018
RSGB 50MHz UKAC November 2018
RSGB 1296MHz UKAC November 2018
RSGB 70MHz UKAC November 2018
RSGB 144MHz December AFS 2018
RSGB 144MHz UKAC December 2018
RSGB 432MHz UKAC December 2018
RSGB 50MHz UKAC December 2018
RSGB 1296MHz UKAC December 2018
—————————————-
sec
AL
AL
AL
AL
AR
AL
AL
AL
AL
AL
AL
AL
AL
AL
AL
AL
AL
AL
AL
AL
AL
AL
5B
AL
AL
5B
NA
AL
AL
AL
AL
AL
AL
5B
5B
AL
AL
AL
AL
AL
AL
AL
AL
AL
AL
AL
LP
AL
AL
AL
AL
AL
AL
AL
O
AL
AL
AL
AL
res
1st
1st
3rd
47
2nd
3rd
3rd
4th
16
1st
1st
3rd
1st
1st
1st
2nd
3rd
1st
2nd
1st
1st
3rd
1st
1st
2nd
1st
1st
2nd
1st
2nd
1st
1st
3rd
1st
1st
1st
1st
1st
1st
1st
1st
1st
1st
1st
1st
1st
1st
2nd
1st
1st
1st
1st
2nd
1st
2nd
1st
1st
1st
1st
Series results
RSGB 144MHz Backpackers 2018
RSGB 70MHz Cumulatives 2018
RSGB 144MHz UKAC 2018
RSGB 50MHz UKAC 2018
RSGB 432MHz UKAC 2018
RSGB 70MHz UKAC 2018
RSGB 1296MHz UKAC 2018
RSGB Overall UKAC 2018
sec
5B
AL
AL
AL
AL
AL
AL
N/A
res
1st
1st
1st
1st
1st
1st
3rd
4th

G1YBB Contest round up 2017

2017 was was first full year back into VHF contesting (and some HF contesting too) since the 1990s. In 2016 I did the RSGB Backpackers series with Paul G1YFC and we achieved great success winning the series and I started doing the 144MHz UKAC series, initially as practice runs for the backpackers then it becomes kind of addictive.

Over December 2016 we tried to rally our local club Hereford Amateur Radio Society into joining us on the bands in the UKAC contests. Take up was encouraging and several members said they would come on the air for the club. Additionally the rules for the UKACs were changed to divide the ‘clubs’ into National and Local. So HARS would be in the section for ‘real’ radio clubs with members only eligible within a 35km radius of a designated central point. During our plans we thought it would be feasible and great if HARS could get into the top 10 of the local club category.

December was busy for me as I had decided to take part in the 50MHz UKAC series along with the 144MHz UKAC series. But to do so I needed a 50MHz beam! So I was busy buying aluminium and building. I finished the main build and tested it literally the evening before the January 50MHz UKAC contest!

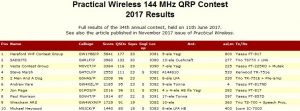
144MHz PW QRP.
This is the one I really hope to win and this year we were hoping to repeat our success of 2016. The weather on top of the Black Mountains was evil. Wet and VERY VERY windy all day. It took us 2 hours just to set up the mast and antenna, then we bent my tent poles in the wind so I had to prop up the corner of the tent with my head and shoulders for over 7 hours. However we did well and managed to take the win again.
144MHz PW QRP Top Ten stations 2017

144MHz UKAC.
On 144MHz I hit the ground running as I used to do a lot of contesting on 144MHz years ago and of course had been active in the UKAC and Backpackers in 2016. After initially entering some 2016 UKACs with the FT-817 I started using the old FT-225RD as it is still the best receiver of the radios I own.
I started 2017 the way I ended 2016, with a winning streak. Competition is fierce on 144MHz but working hard I managed to win all but one of the 12 session, which I am well pleased with.
144MHz UKAC AL Section final standings
144MHz Backpackers.
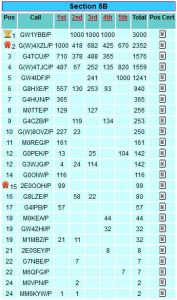
Myself and Paul G1YFC also took part in the 144MHz Backpackers series. We only managed 3 sessions of the possible 5 due to other commitments, but we managed to win those 3 sessions and retain the trophy we won in 2016.
144MHz Backpackers 5B Section final standings

144MHz Trophy.
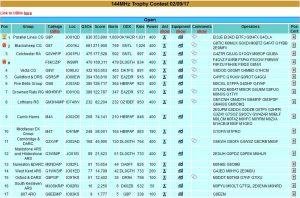
I was pleased to be invited to the Isle of Sheppey to join the Blacksheep Contest Group to help operate their open section station in one of the biggest 144MHz contests in the calendar. I have done this in the past with Kevin G1VDF but it’s hard work running a 24 hour station. Blacksheep run a multi mast multi op station which was good fun to see and operate. Despite our best efforts though we were beaten into 2nd place by Parallel Lines CG.
144MHz Trophy Open section results 2017
50MHz UKAC.
This was almost a new band for me as we only did a few 50MHz contests in the 90s. I had to build a yagi for the band and literally finished (to a point it was usable) the night before the first contest! I had two inches of snow in that first contest but managed to win, which is a decent achievement being up against G4CLA who is rather good and successful. I lead my section for a while but finally succumbed and was beaten to second place by 65 points only!
50MHz UKAC AL Section final standings
432MHz UKAC.
I hadn’t planned to do this band this year but as the club take up was very good I decided I should help out! So I borrowed a beam from Craig M0BUL and started in March. I was much more enthusiastic after winning my first one! I didn’t win the next few but got the hang of the band towards the end of the year. Just enough to scrape winning the section by just THREE points.
432MHz UKAC AL Section final standings
70MHz UKAC.
This was another band I hadn’t planned to do but I borrowed a transverter and beam from Matt G8XYJ and started on the band in February, the first time ever on the band for me. I then bought my own Ukranian transverter (which are brilliant for the price) and built my own long yagi twice the length of the borrowed one. This helped me get great results and although I was only able to do 9 of the 12 sessions I managed to win the last few sessions and gain enough points to take the AL section win.
70MHz UKAC AL Section final standings
1296MHz UKAC.
I had no intention at all of taking part on this band but as we went on through the year and were challenging Sheffield for 1st lace overall I decided to try and help us get more points on one of our weaker bands. I had no kit at all but first shared a station with Stuart G3WRA and later borrowed his kit when he wasn’t able to take part. Stuart’s transverter only generates 2W RF so taking part in the AL 10W section was quite hard work. I did manage a 4th place though in December!
I managed 37th place overall from 4 sessions.

Club results.
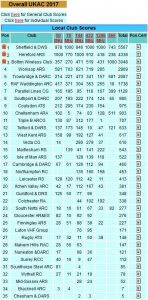
Hereford Amateur Radio Society had an amazing first year in the local club section of the UKACs. We came 2nd overall and also won the 144MHz and 50MHz bands outright.
Local Club Overall UKAC results 2017

G1YBB Contest Results 2017

List of results of contests I have participated in during 2017. Where I have had chance to post a report there is a link to that post.

2017
RSGB 144MHz UKAC January 2017
RSGB 50MHz UKAC January 2017
RSGB 144MHz UKAC February 2017
RSGB 50MHz UKAC February 2017
RSGB 70MHz UKAC February 2017
RSGB 144MHz UKAC March 2017
RSGB 50MHz UKAC March 2017
RSGB 432MHz UKAC March 2017
RSGB 70MHz UKAC March 2017
RSGB 80m CC SSB March 2017
RSGB 144MHz UKAC April 2017
RSGB 432MHz UKAC April 2017
RSGB 50MHz UKAC April 2017
RSGB 70MHz UKAC April 2017
RSGB 144MHz UKAC May 2017
RSGB 432MHz UKAC May 2017
RSGB 50MHz UKAC May 2017
RSGB 144MHz UKAC June 2017
RSGB 432MHz UKAC June 2017
RSGB 144MHz 2nd Backpackers 2017
Practical Wireless 144MHz QRP 2017
RSGB 50MHz UKAC June 2017
RSGB 70MHz UKAC June 2017
RSGB 80m CC SSB June 2017
RSGB 144MHz 3rd Backpackers 2017
RSGB 144MHz UKAC July 2017
RSGB 432MHz UKAC July 2017
RSGB 50MHz UKAC July 2017
RSGB 1296MHz UKAC July 2017
RSGB 70MHz UKAC July 2017
RSGB 80m CC Data July 2017
RSGB 144MHz UKAC August 2017
RSGB 144MHz 4th Backpackers 2017
RSGB Backpackers Championship 2017
144MHz Low Power Contest 2017
RSGB 432MHz UKAC August 2017
RSGB 50MHz UKAC August 2017
RSGB 70MHz UKAC August 2017
RSGB 144MHz Trophy 2017
RSGB 144MHz UKAC September 2017
RSGB 432MHz UKAC September 2017
RSGB 50MHz UKAC September 2017
RSGB 144MHz UKAC October 2017
RSGB 432MHz UKAC October 2017
RSGB 50MHz UKAC October 2017
RSGB 1296MHz UKAC October 2017
RSGB 70MHz UKAC October 2017
RSGB 144MHz UKAC November 2017
RSGB 50MHz UKAC November 2017
RSGB 432MHz UKAC November 2017
RSGB 70MHz UKAC November 2017
RSGB 1296MHz UKAC November 2017
RSGB 144MHz UKAC December 2017
RSGB 50MHz UKAC December 2017
RSGB 1296MHz UKAC December 2017
RSGB 70MHz UKAC December 2017
sec
AL
AR
AL
AR
AL
AL
AR
AL
AL
100
AL
AL
AR
AL
AL
AL
AR
AL
AL
5B
NA
AR
AL
AL
100
5B
AL
AL
AR
AL
100
AL
5B
5B
O
AL
AR
AL
O
AL
AL
AR
AL
AL
AR
AL
AL
AL
AR
AL
AL
AL
AL
AR
AL
AL
res
1st
1st
1st
3rd
4th
1st
2nd
1st
1st
107
1st
4th
2nd
1st
1st
3rd
3rd
1st
3rd
1st
1st
8th
3rd
13
1st
1st
2nd
6th
34
1st
21
2nd
1st
1st
4th
1st
1st
1st
2nd
1st
1st
2nd
1st
1st
2nd
10
1st
1st
2nd
1st
1st
8th
1st
3rd
4th
1st

G1YBB Contest Results 2016

List of results of contests I have participated in during 2016. Where I have had chance to post a report there is a link to that post.

sec
AL
AL
3B
AL
3B
NA
3B
AL
3B
3B
O
AL
AL
AL
res
3rd
1st
2nd
7th
1st
1st
1st
9th
1st
1st
4th
1st
1st
1st

RSGB 50MHz UKAC 10th August 2017

Not had much time for posts lately with all the contesting but thought I would do one for this one.

My 50MHz UKAC season started off well in 2017 with a win, and a win in the same section as Pete G4CLA at that. In March I was only beaten into 2nd by a couple of DX MGM modes, so I was quite buoyant about my chances. However as the year has progressed I seem to have dropped in the results. So much so (and in other bands too) I wondered if my feeder was shot so I made a new one but kept it for 144MHz and 70MHz as I had a chance in those bands at least.

However, August has been a good month for me. Apart from not winning my first 144MHz UKAC since October 2016 I have had great results. A 144MHz Backpackers win, 432MHz win, looking good in 70MHz and a very close 50MHz! Only 571 points covered the top 3 claimed scores!

Also Pete ‘CLA was operating as EI/G4CLA and didn’t put an entry in so for now I am artificially sitting top of the pile in 50MHz!

My QSO map:
50MHz UKAC 2017-08-10 map
Claimed scores (top 10):
Claimed scores 50MHz UKAC Aug 2017
Final scores (top 10):
Final scores 50MHz UKAC Aug 2017
Current standings overall (top 10):
50MHz UKAC AR Standing Aug 2017